How to Choose the Right Kitchen Cabinet Materials for Your Project

There are many elements that have to come together in a successful kitchen remodel to transform this room into the one envisioned by the homeowner. One of these is certainly the cabinetry. They take up a large portion of the space in a kitchen and typically a hefty chunk of the budget as well.

At Walker Woodworking, our custom cabinetry craftsmen know that one of the most basic decisions about your kitchen cabinets is the material from which they are constructed. You certainly have a number of popular choices when it comes to this decision.

Your Cabinet Material

As appealing as solid wood may sound for some applications, it’s not a favorite when it comes to kitchen cabinets. There can be quite a bit of moisture in this room over time with steam rising from cooking pots and from hot water at the sink, and everyone knows that solid wood can contract and expand in reaction to moisture and temperature. The most popular choices in material for this part of your kitchen are medium density fiberboard (MDF), plywood, particleboard with melamine and possibly stainless steel.

  • Medium Density Fiberboard MDF is appreciated by homeowners because of how well it stands up to cracking and peeling. It’s also smoother than plywood and is easy to cover with a coat of any color paint you’d like for your cabinets to make them match the rest of your kitchen décor.
  • Plywood This is a popular material for manufacturers of cabinetry given its relatively low cost as well as its stability and resistance to moisture. When used in cabinets, the outer layer of particleboard will typically be covered in wood veneer or plastic laminate to provide superior durability and protection.
  • Particleboard This material will not generally be used in high-end kitchen remodeling projects. It basically consists of wood chips that have been glued together and fused into flat panels. It has the least structural strength of all the options.
  • Stainless Steel While appliances made of this material are frequently all the rage, using it for cabinetry is definitely an area of personal taste. Many people consider that there’s nothing quite like wood or at least wood-derived products like some mentioned above when it comes to a warm, natural-looking kitchen.

Choosing the Right Material for Your Kitchen

Several factors may go into your final choice of material for your kitchen cabinets. You want them to blend in well with other design elements you already have and budget will certainly be a concern for some. You might even end up with a different material for the doors as compared to the cabinet box. The doors are, after all, the most visible and style-setting part. If you’re looking for a natural wood look, you may not want to choose MDF since it can’t be stained. Solid wood might work well for doors that need to have a natural look to match the rest of your kitchen. See what Bob Vila has to say about kitchen cabinet materials.

Custom Cabinetry in the Foothills of North Carolina

If you’re looking for kitchen cabinetry that stands out from the crowd, our artisans at Walker Woodworking have been crafting custom creations since 1999. We can help guide you with regard to design, materials, and layout of the cabinetry in your kitchen remodel. If you need a custom fit for unique spaces or a one-of-a-kind look for refined interiors, we’ve got you covered. Whatever your custom cabinetry needs, please view the before and after gallery on our website to show you what we can accomplish for you, and then give us a call to see how we can help you realize your kitchen cabinetry goals with the material and design of your choice.

Cabinet Refacing: Should I or Shouldn’t I?

If your cabinets are looking worn or faded, they can bring down the appearance of your entire kitchen. It’s possible that there may be problems with other parts of your kitchen as well such as worn flooring, insufficient counter space or damaged light fixtures. In this case, a kitchen remodel might be a good idea. Our team at Walker Woodworking wants you to know that if it’s just your cabinetry that’s holding back the rest of the room, then refacing them might be a better option.

How Refacing Works

In the event you’ve never had cabinets refaced before, you may want to know what’s involved. Basically, the box and frame of your existing cabinetry are kept and the cabinet doors and the fronts of any drawers are replaced. In other words, it’s just like it sounds. You’re changing the outer appearance or “face” of your cabinetry but without physically removing the existing cabinets.

Enhancing the Cabinet Box

Just because you’re keeping the box of your cabinets doesn’t mean they can’t be spruced up as well. You can opt for painting them, or when a wood finish appearance is desired, you can apply a veneer.

When you decide to handle a cabinetry refacing project yourself, you want to be careful when applying the veneer. You can use either factory-finished or unfinished veneers. While unfinished veneers can be touched up later with staining, factory-finished veneers are difficult to touch up later.

Replacing Cabinet Doors and Drawer Fronts

In the event you’re refacing standard, off-the-shelf cabinets, you should be able to find replacement doors and drawer fronts that will fit without a problem.

If you are replacing custom cabinets or you want a unique look to your new doors or drawer fronts, you may want to have custom ones manufactured that have the size, design, material or finish that you desire. At Walker Woodworking, we’ve been designing custom cabinetry near Charlotte NC since 1999 for our neighbors in North Carolina and would love to take a look at your replacement project to see if we can help create what you’re looking for.

kitchen,island,double oven,paneled hood,decorative details,display cabinets,ideas

Hardware and Measurements

Don’t forget the necessary hardware you’ll need to go with your new cabinet doors and drawer fronts. You’ll want knobs and pulls that blend with the hinges, or if you find particularly nice new hardware, you may just want to get new hinges that match them.

Ensuring correct measurements for everything is critical when refacing your cabinets. No matter how nice a cabinet door looks in a showroom, it’s not going to matter if you get it home and it doesn’t fit.

Going It Alone or Hiring a Contractor

Even if you’re fairly adept at DIY projects, you will at least need to find someplace to buy ready-made cabinets doors and drawer fronts or a place to create custom doors and fronts. Located west of Charlotte in Cleveland County, our team at Walker Woodworking has been creating custom cabinetry and other fine furnishings for residents in the North Carolina foothills for a couple of decades. If you are doing a kitchen remodel and need custom cabinetry, please contact us and we’ll see how we can help your project turn out just as you’d like at a budget that you can appreciate. Read what HGTV has to say about cabinet refacing.

Disclaimer – while cabinet refacing is an option, Walker Woodworking can only provide you with doors and drawers or all new cabinetry. We do not offer complete cabinet refacing. A contractor should be able to provide this service for you.

Located 45 miles west of Charlotte, and only an hour from Asheville, we are your one-stop-shop for all of your custom cabinet needs. We can provide beautiful, custom storage solutions for any room in your home. If you’re looking for distinctive cabinets for your kitchen, then most of what’s available off-the-shelf at retail stores will not do. Contact us and we’ll find out how we can make your kitchen stick out from the ordinary at a price you can afford.

The Benefits of Custom Cabinetry

When doing a kitchen or bath remodel, one major decision you’ll have to make will be whether you plan to go with off-the-shelf cabinetry or custom cabinets or perhaps a combination of the two. While pre-made cabinets will cost less, they also offer less flexibility in terms of matching exactly what you want to achieve from your remodel. The following are a few benefits of custom-built cabinets and reasons why you may want to go this route for your remodeling project.

1) Superior Appearance

One major reason that you would remodel a room in the first place is to get it looking a certain way. This is much harder to accomplish with off-the-shelf cabinets from a store. Your kitchen and bath are unique in certain ways, and you want the cabinetry in these rooms to match and reflect this uniqueness. If you have a special trim or a certain type of countertops, custom-built cabinets can be made to visually complement the color and shape you want.

2) Fitting Unusual Spaces

You may find it hard to locate pre-made cabinets that perfectly fill the row of available space for cabinets in your kitchen. This is probably even more likely if your home is older than most. You may end up having to put awkward spacers between cabinets to have them fill the horizontal space over counters and appliances that’s made for fitting your cabinetry. Custom-built cabinets solve this problem perfectly since they can be made to whatever width that will assure a smooth, uninterrupted row of cabinets across the entire available space, which should have the effect of maximizing your kitchen’s storage area.

3) Adding Personal Flair to Your Kitchen or Bath

Chances are, you’re not going to the trouble and expense of replacing cabinetry or doing an extensive remodeling of your kitchen or bath in order to make it look like everyone else’s. Off-the-shelf cabinets, make it more difficult to truly add a personal touch to your home. Perhaps you’re a wine connoisseur and want a cabinet that incorporates a wine rack. The aspiring or accomplished chef in you may want one that incorporates a spice rack and perhaps a couple of others with glass doors that show off some particularly nice china you own. With custom cabinets, your options truly are limitless.

4) The Importance of Professional Craftsmanship

When you have custom cabinetry made, you want it to last as long as possible. Most people will only do a major remodel once or maybe twice in their life. You want the job done right, so you’re enjoying your custom cabinets every time you enter the room they’re in.

If you’re anywhere in the vicinity of Charlotte, North Carolina, you should become acquainted with the fine furniture and quality custom cabinetry of Walker Woodworking. Located in Shelby, North Carolina, west of Charlotte, they’ve been locally manufacturing their cabinetry since 1999. They employ 28 people from Cleveland County and the surrounding area, and their craftsmen, artisans and designer will help you realize your dreams when it comes to incorporating the ideal cabinetry in your kitchen, bath or other room.

Twin Chimney’s Farmhouse Renovation

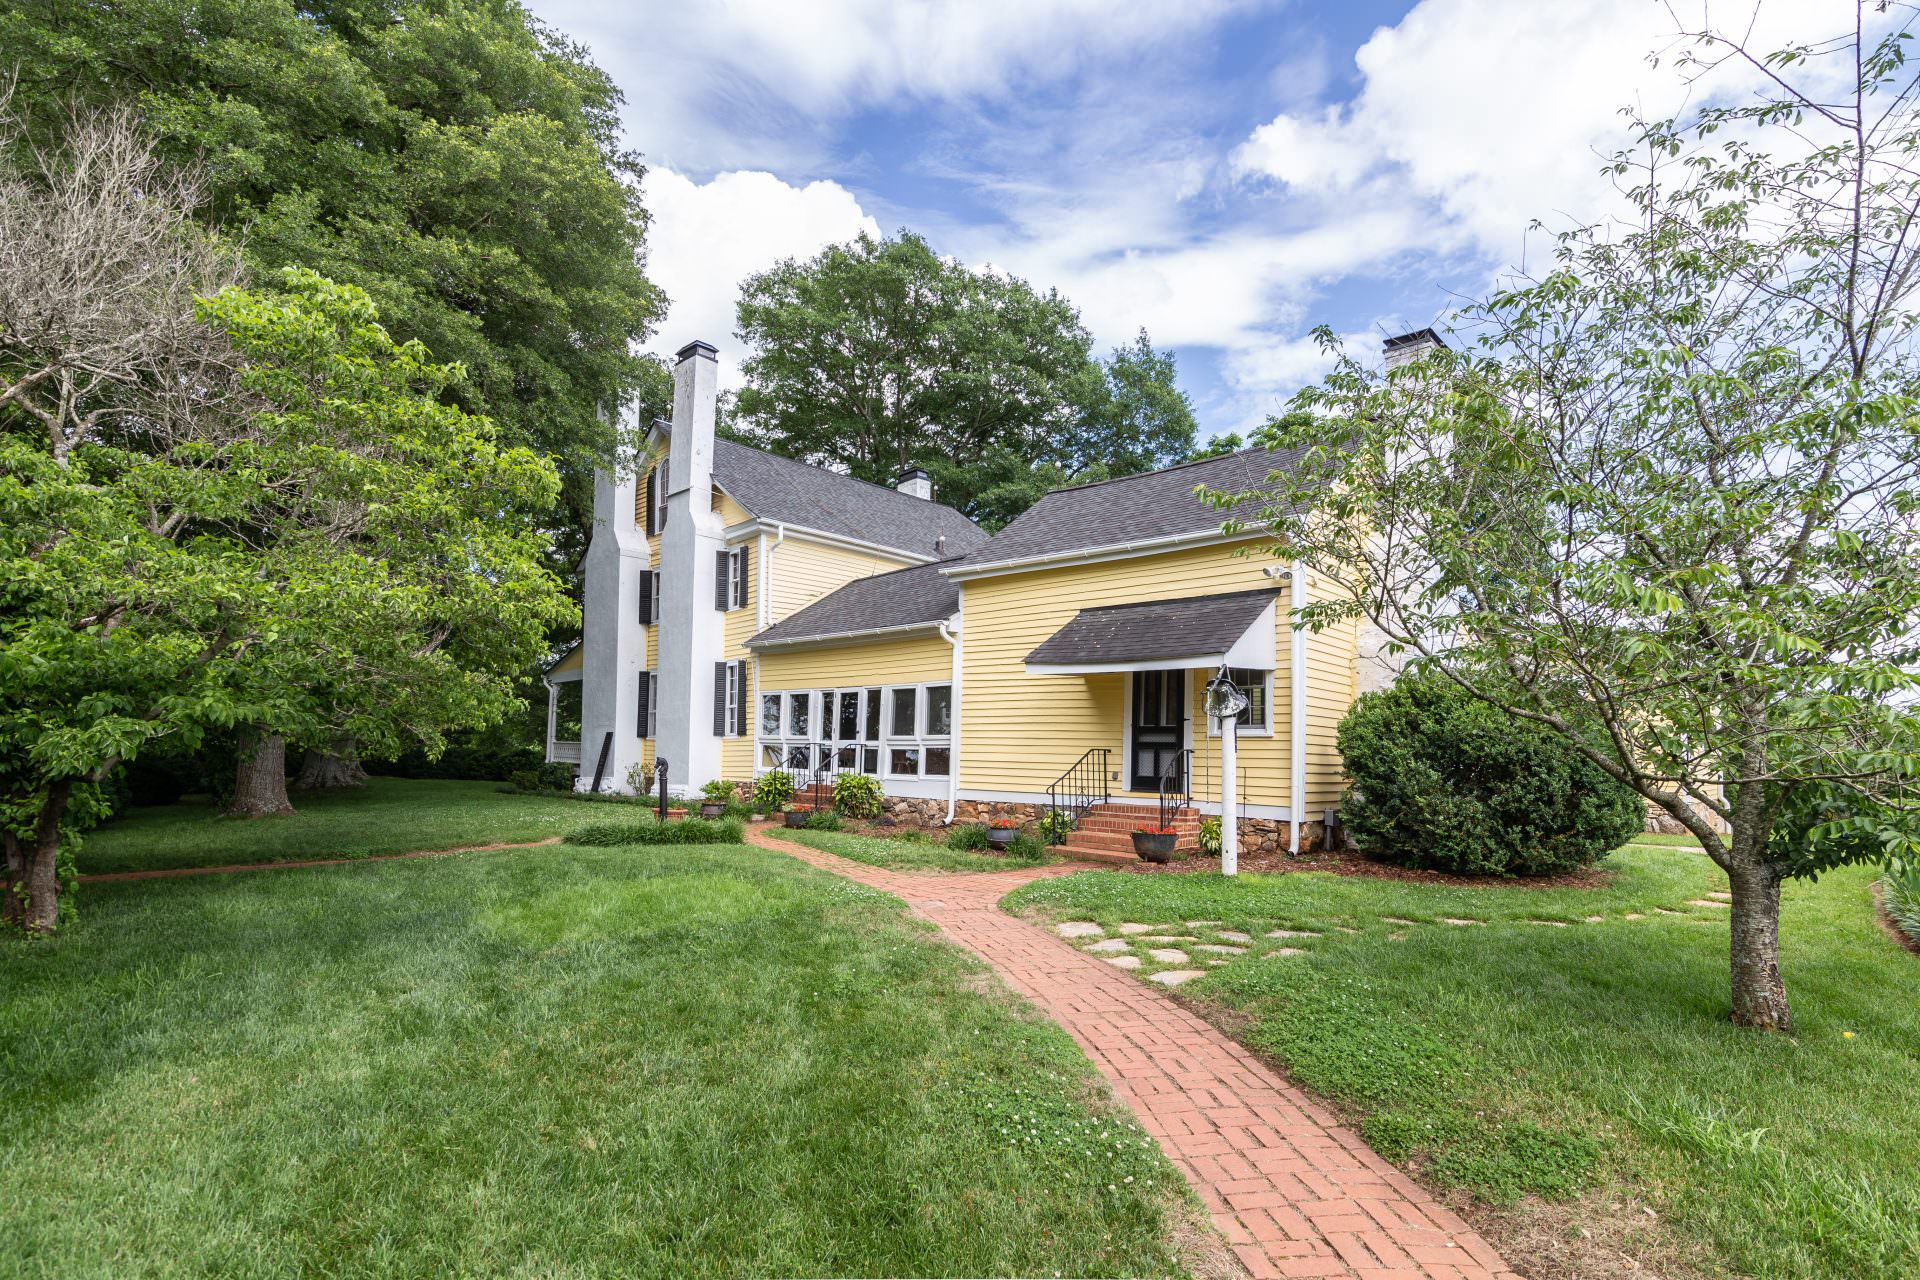
Twin Chimney’s Farmhouse Renovation Project


If you love old homes as much as I do, you will surely love the story of the Twin Chimney Farms renovation project. Travis and I were honored that the homeowners, Jack and Carole Arey trusted us and Walker Woodworking to be a part of this 18-month long project. These final results of his circa 1817 farmhouse rehabilitation project are truly amazing!

farmhouse remodel - after

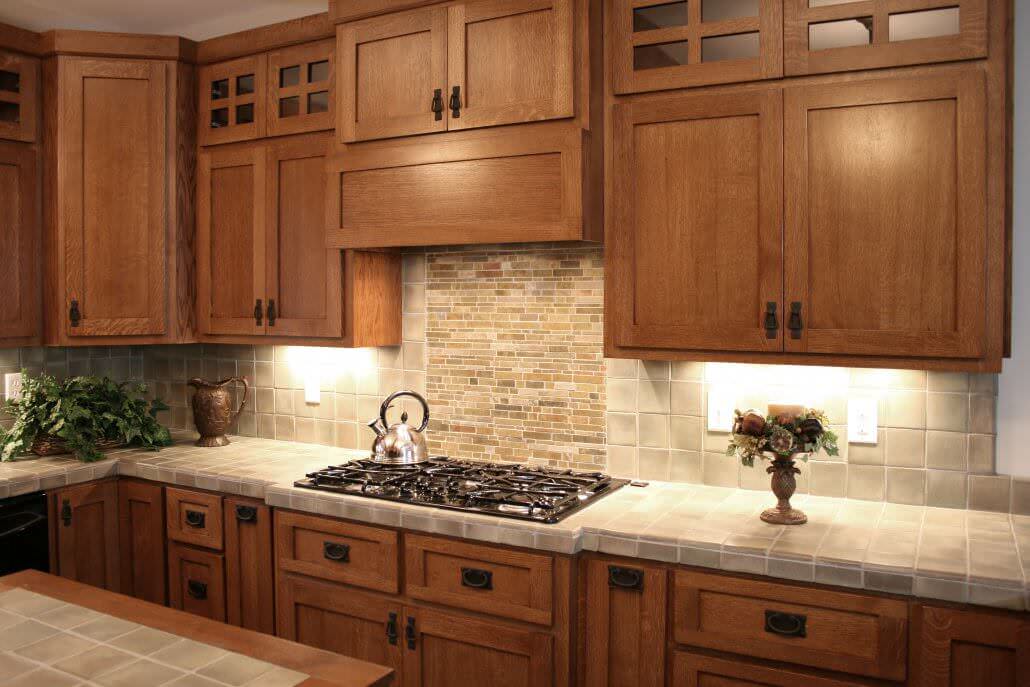
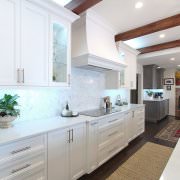
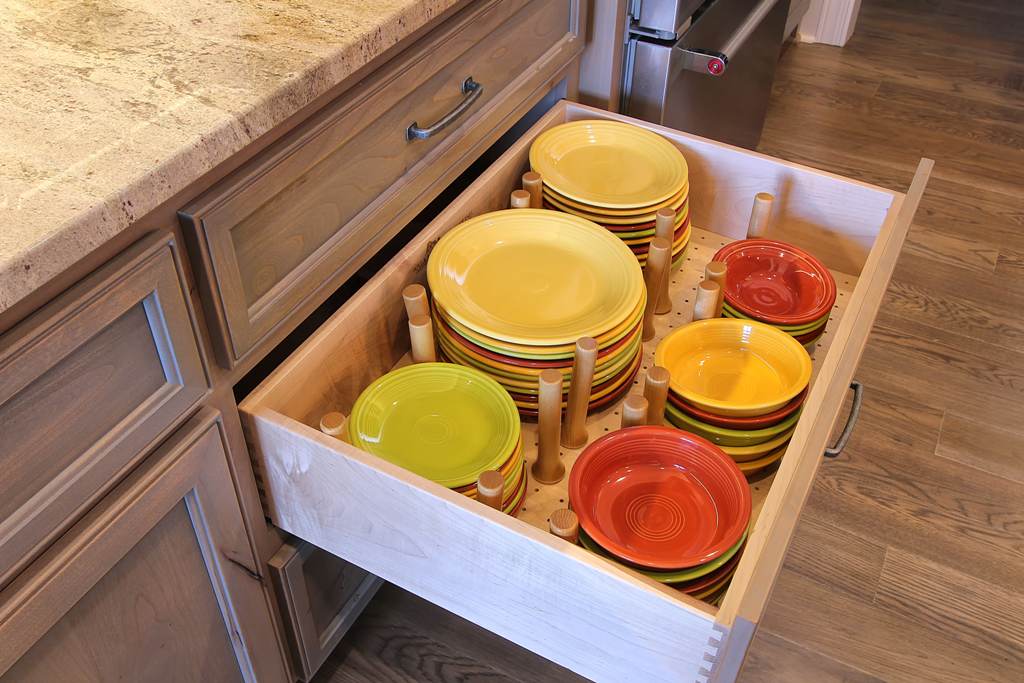
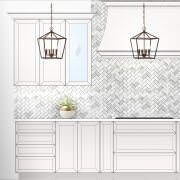
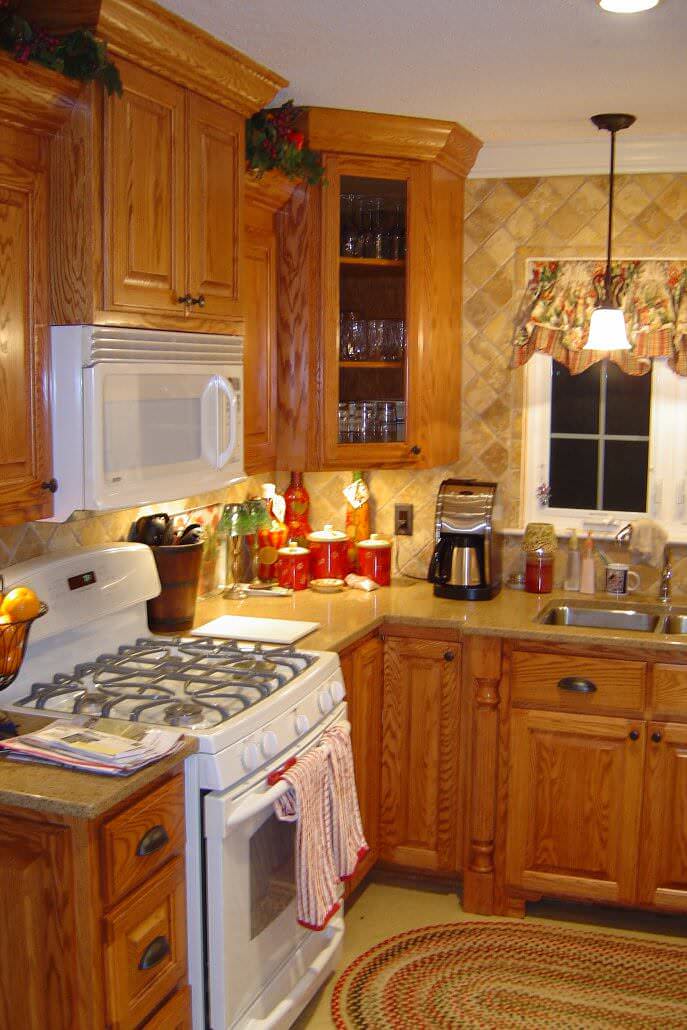
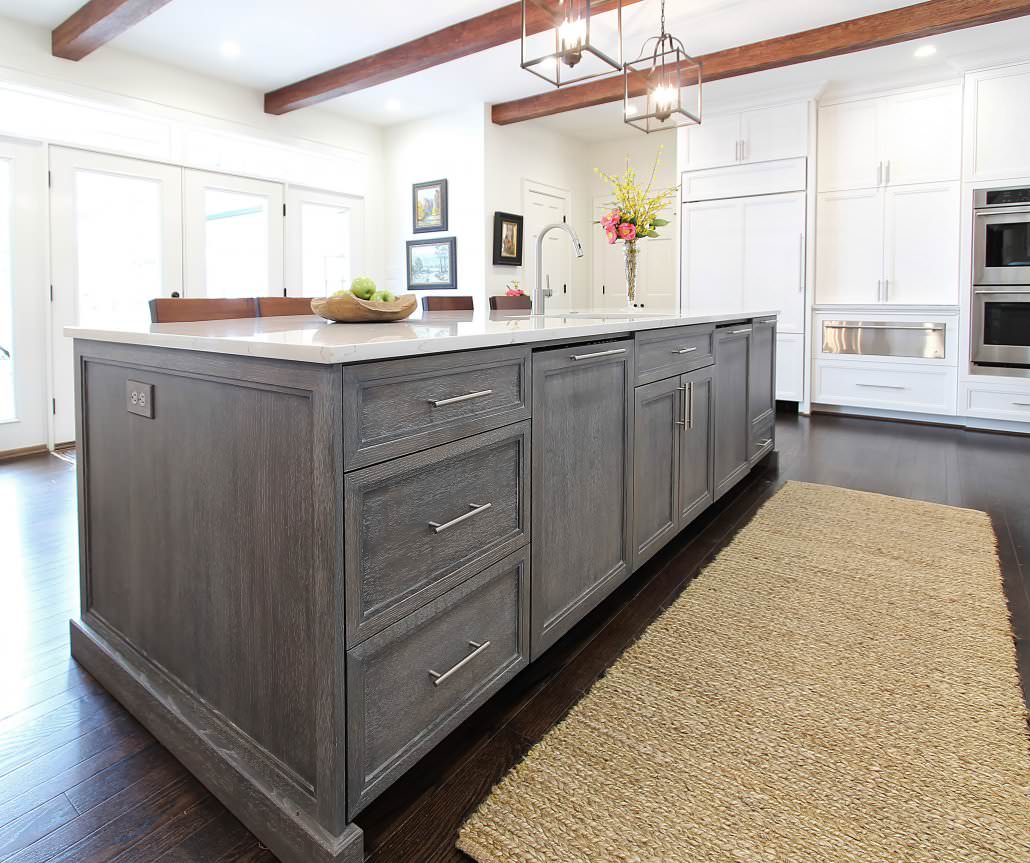
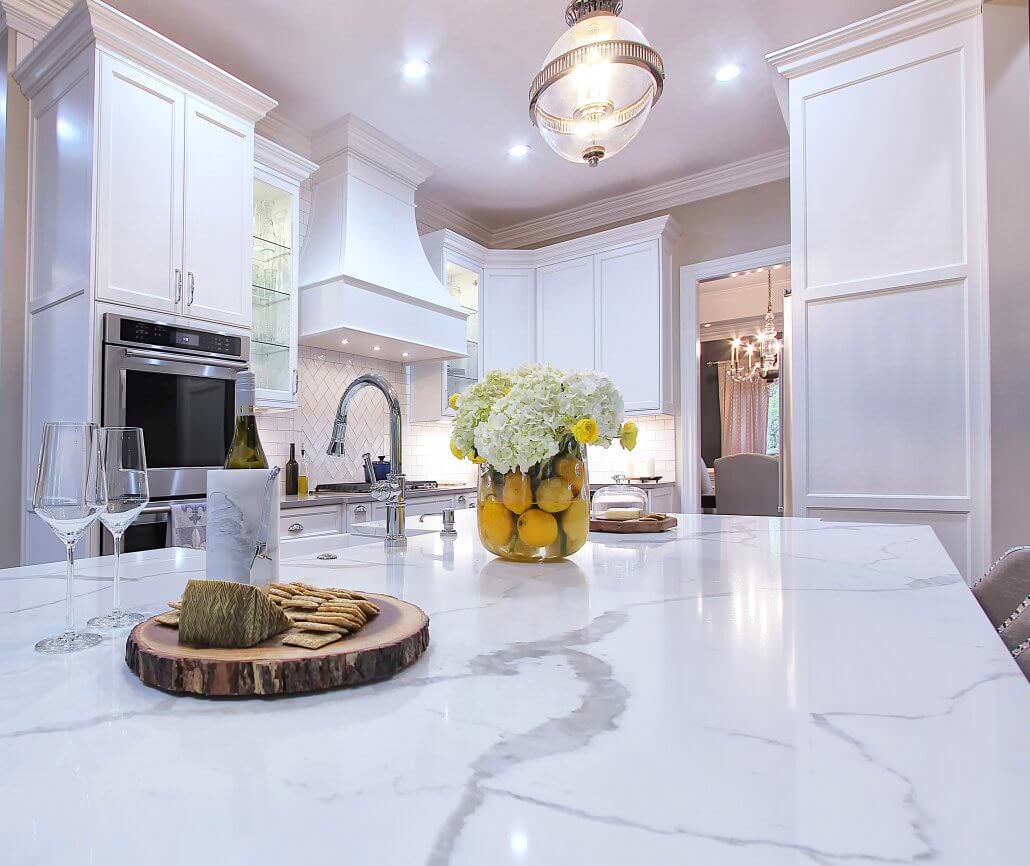
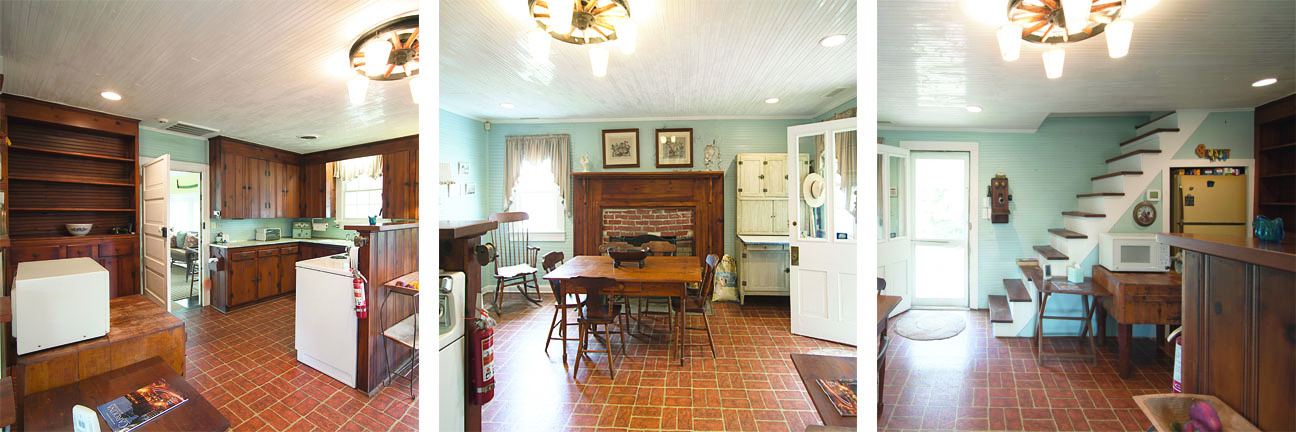
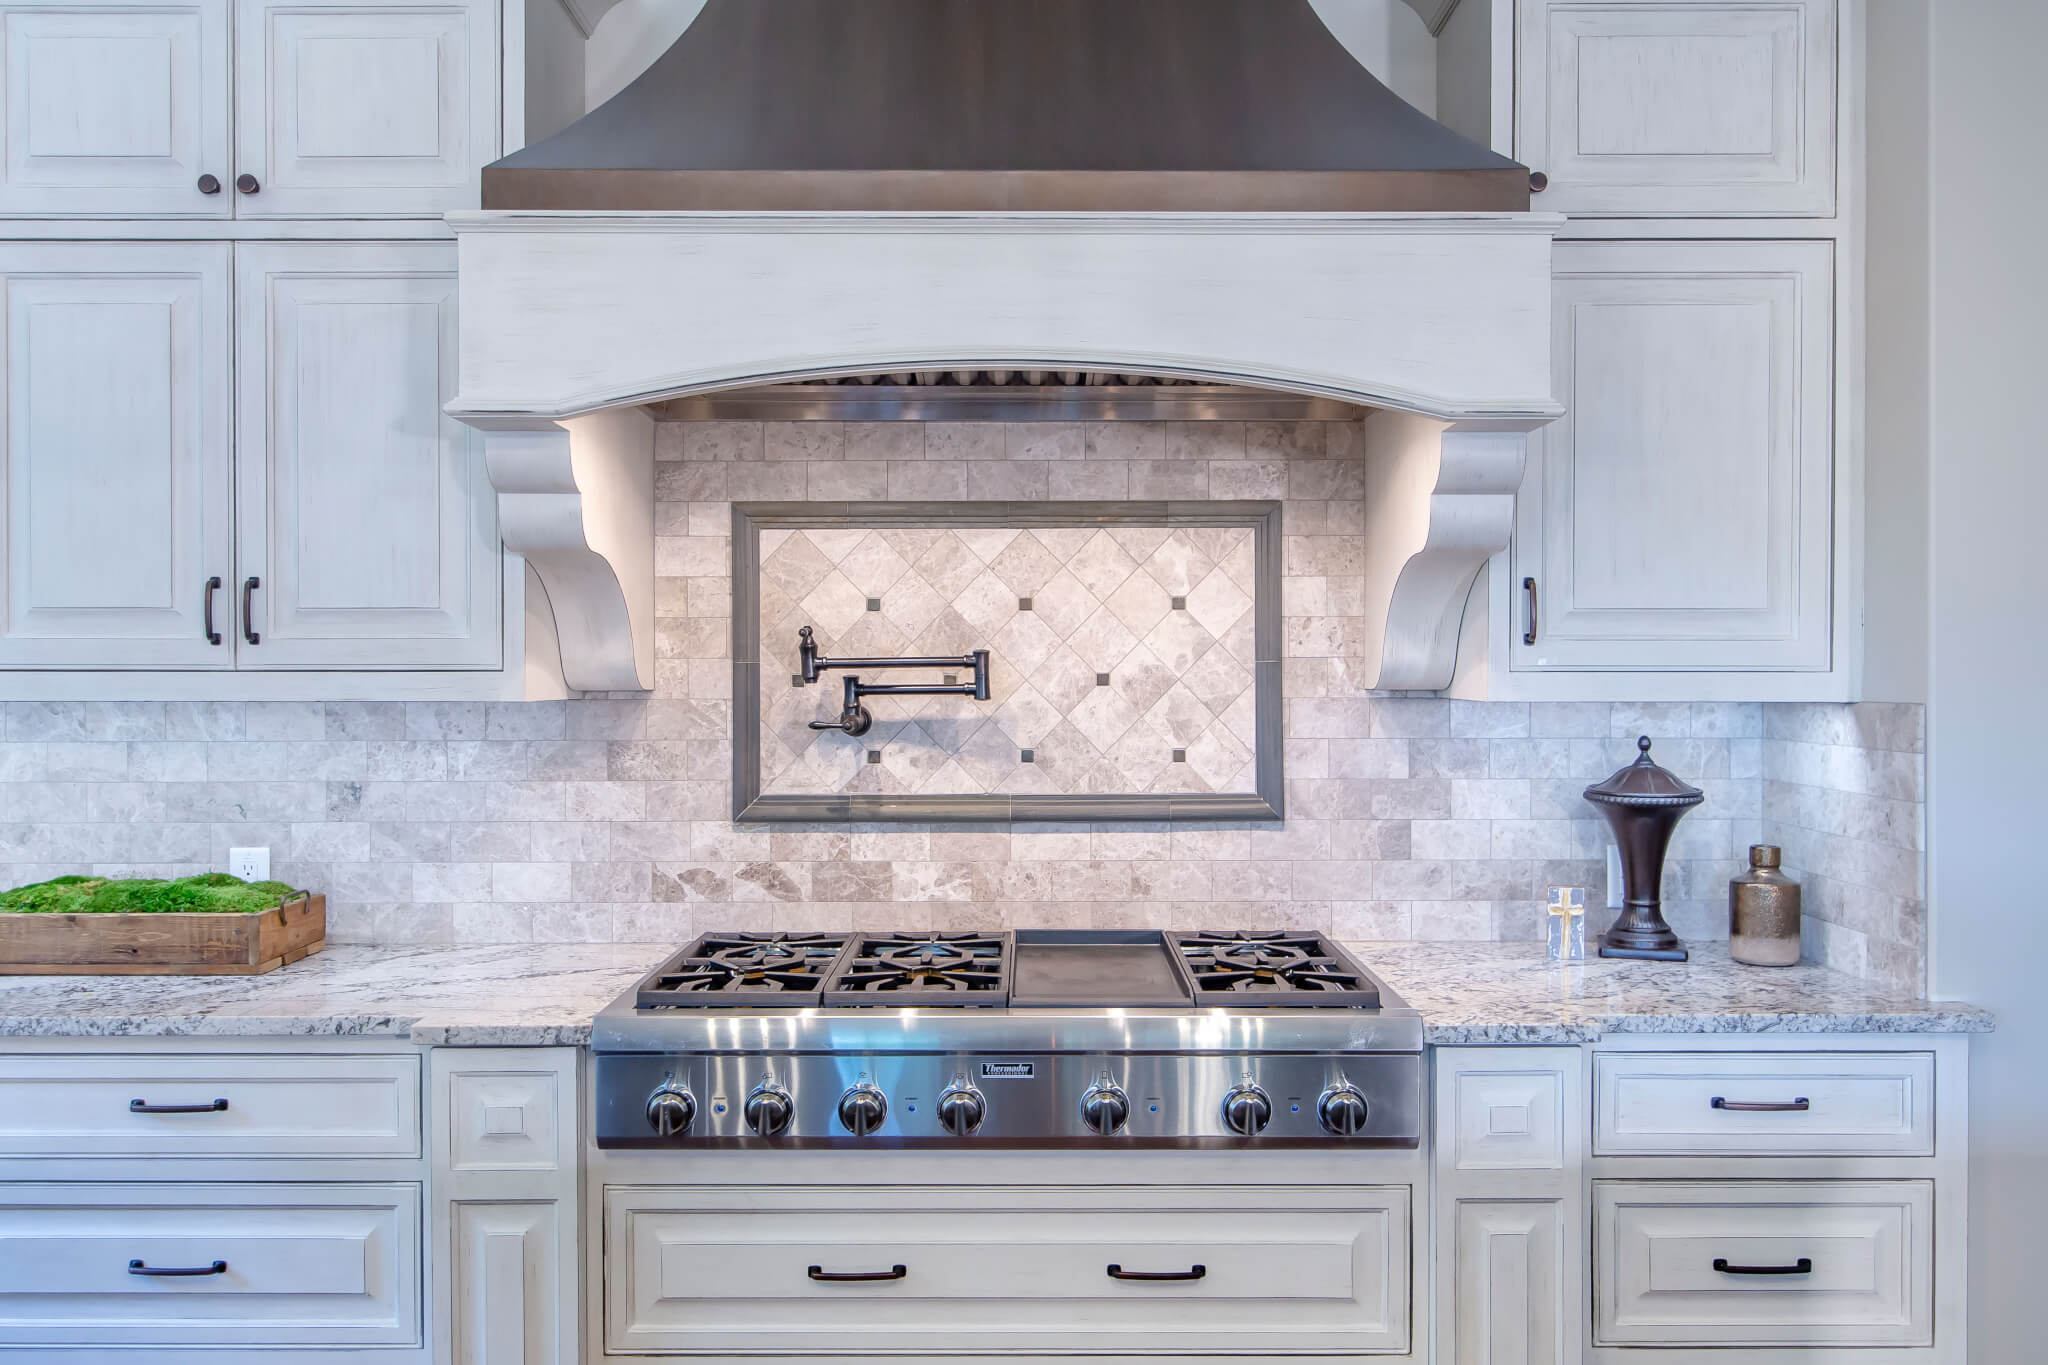
After Photo of Kitchen

Planning and Preparation

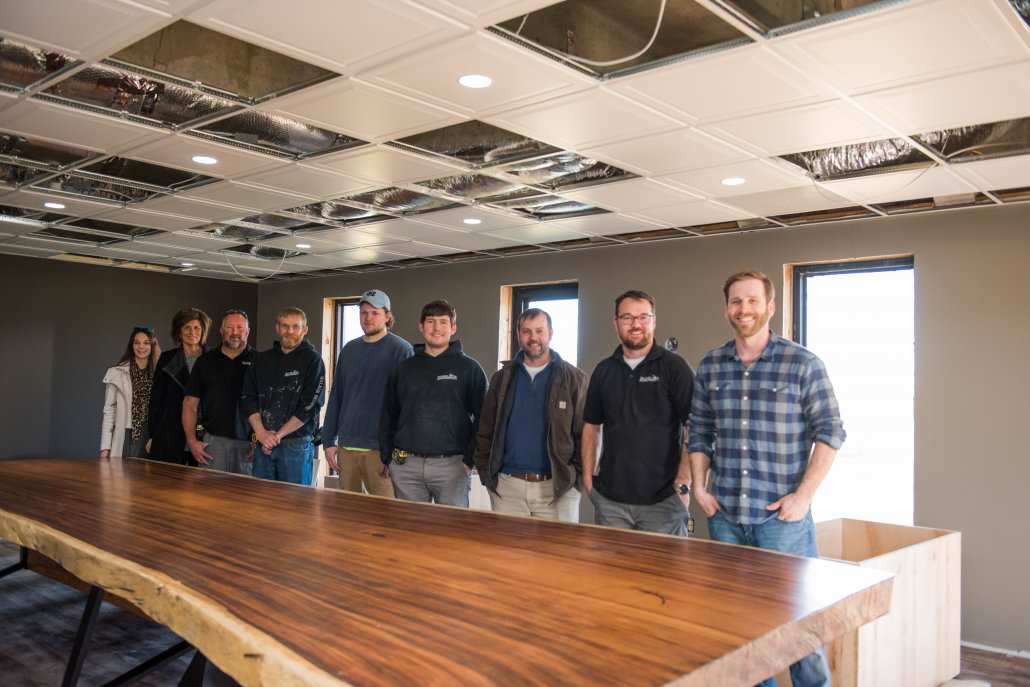
Projects like this one can be very challenging due to the time it takes to properly plan and execute the complicated details for a renovation of this magnitude. Like most homeowners, we want to wrap up projects as quickly as we can. However, we knew this assignment would take a lot of time because the details were complex and the rules were extremely strict for a historic home rehabilitation. Travis Walker, President of Walker Woodworking,  and Brandon Fitzmorris, lead designer for Greenbrook Design, teamed up with Tony Brooks, the general contractor with Beam Edwards and Brooks as well as the interior designer, Wendi Gragg to see this project through to the end. We hope you enjoy this story and appreciate the craftsmanship involved to preserve the home. To skip the story and view the gallery click this link.  

before - kitchen

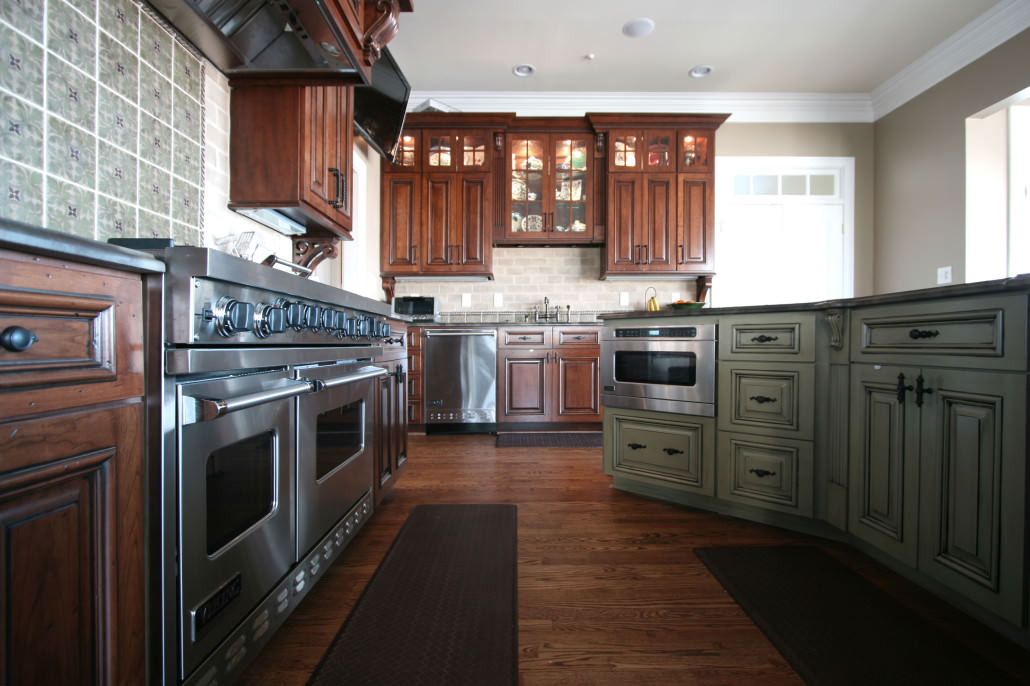
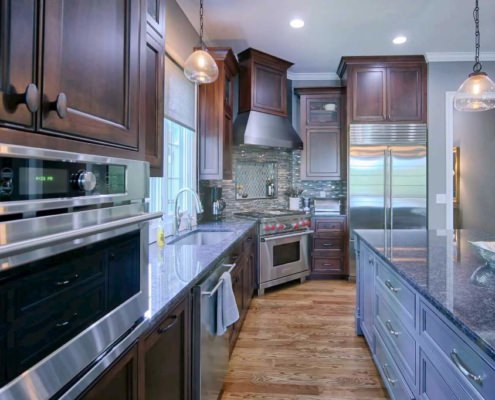
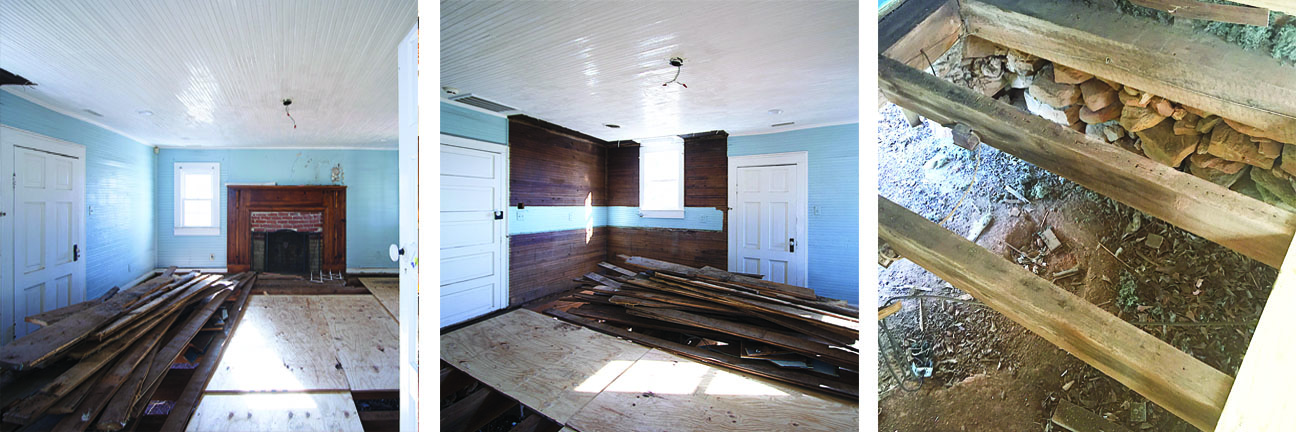
Before photos of the kitchen.

If these walls could talk, what a deep history they would speak!

If the walls of this home could talk I believe they would tell you how grateful they have been for the care and maintenance of the family that has owned this home for many years. Let me introduce you to the current homeowner, she is the great-great-granddaughter of Joesph Suttle; Meet Mrs. Carole Arey and her family history related to this home. Here’s her story:

History of Twin Chimneys

Twin Chimney's, Joe Suttle House

Twin Chimney’s farm, named for the Twins Chimney’s on this side of the home. There are actually four Chimney’s total in the home.

“The Joseph Suttle house, locally known as Twin Chimneys was built around 1817 for Minor W. Smith. Smith was born in England in 1784. He immigrated to Wilmington, North Carolina and then to Shelby. Joseph Suttle and his wife bought the property in 1854. Joseph Suttle died in 1861 at the age of 34. His widow and heirs sold the property in 1883. The house saw a long series of owners both in and out of the family until purchased in 1943 by J. L. Suttle Jr., a great-grandson of Joseph Suttle, and his wife Sara McFarland Suttle. It was listed on the register of ‘Historical Places” in 1980. The house is one of the best known antebellum residences surviving in Cleveland County.  Included on this property is a cemetery which includes the graves of Minor Smith and his wife Jane, and of Joesph Suttle and also other decedents.

Today Twin Chimneys is owned by my husband and I William Jackson Arey and Carole Suttle Arey. Our Architect Jerry McGinnis, who we have worked with on previous projects, was invaluable throughout this farmhouse renovation & rehabilitation. “

“We appreciate every single person who worked with us on this project, we couldn’t be more pleased with the end result. Everyone that had a part in this venture was extremely patient with us and we thank you! Really, there is nothing we would change if we had to do it all over again.” ~ Jack & Carole Arey

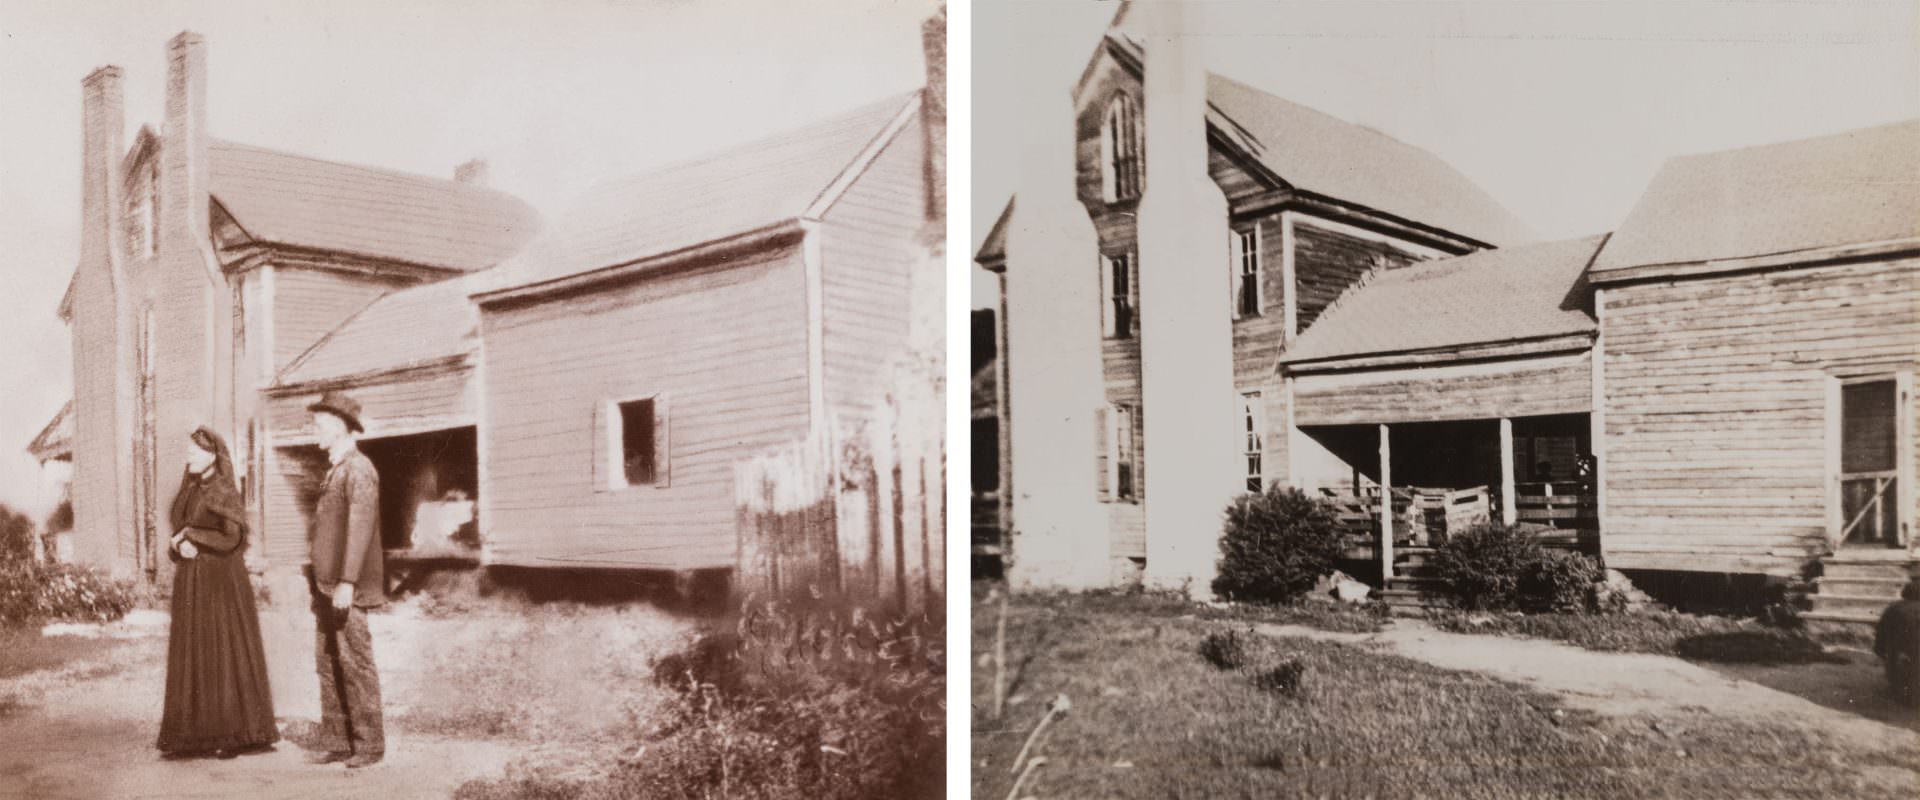
Early Photos from the Suttle Home

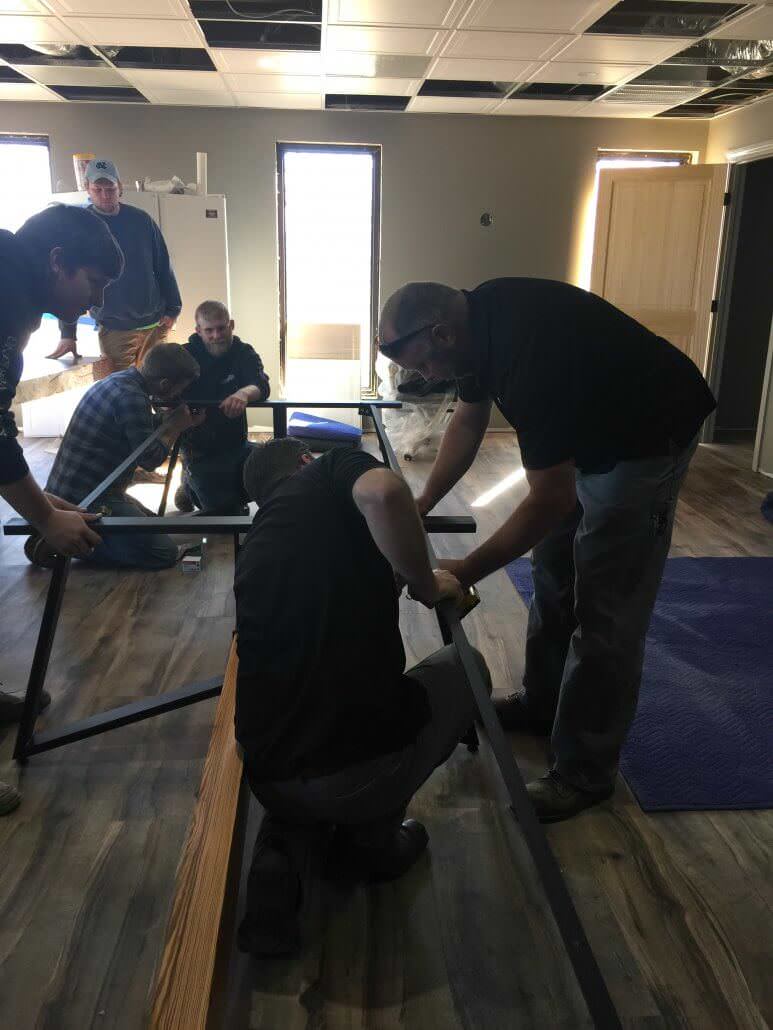
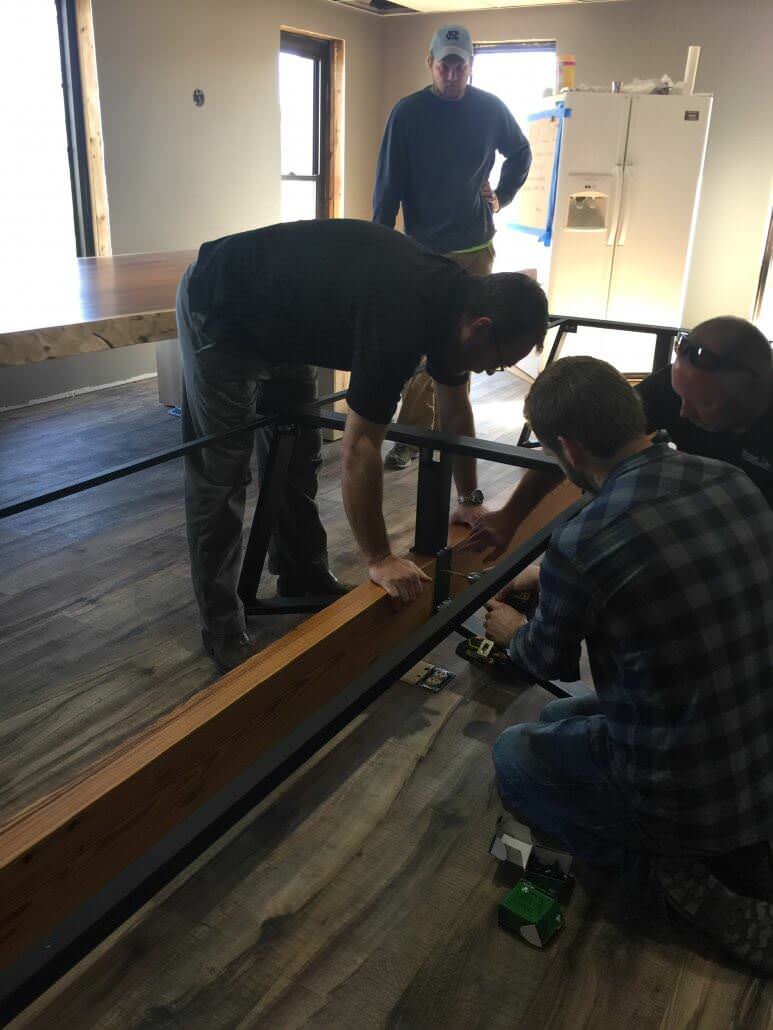
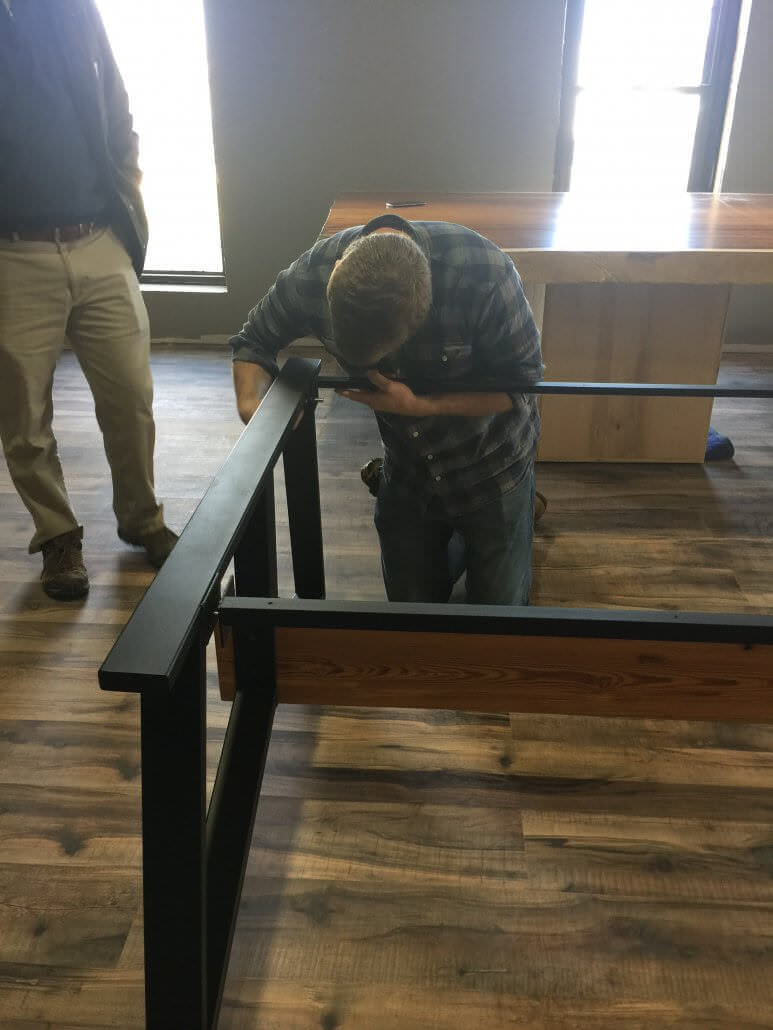
Building a foundation

The two-story framed house blends Federal and Greek Revival characteristics with a Victorian influence. It is very interesting to see construction methods from the early 1800’s. As seen from the pictures below, most likely this was a timber-framed construction method with mortise and tenon joints in the floor joist. During our preparation to saw the reclaimed wood floor for the cabinetry, we found hand cutnails. These cutnails had been used in the flooring to fasten the flooring to the joist. You can also see the early foundations were made using field rocks.

“The kitchen floor was our biggest challenge. We leveled and added extra supports blending today’s materials with those that were 200 years old. Matching materials was also a challenge. I had a strategy planned out to match the rock for the foundation and had made various visits to rock yards across western NC. Nothing seemed to click until the Owner took me to the edge of the pastures where we found rocks that had been cleared from fields long ago. We even found some with live moss that made it into the foundation.”~ Tony Brooks, GC Beam, Edwards, and Brooks

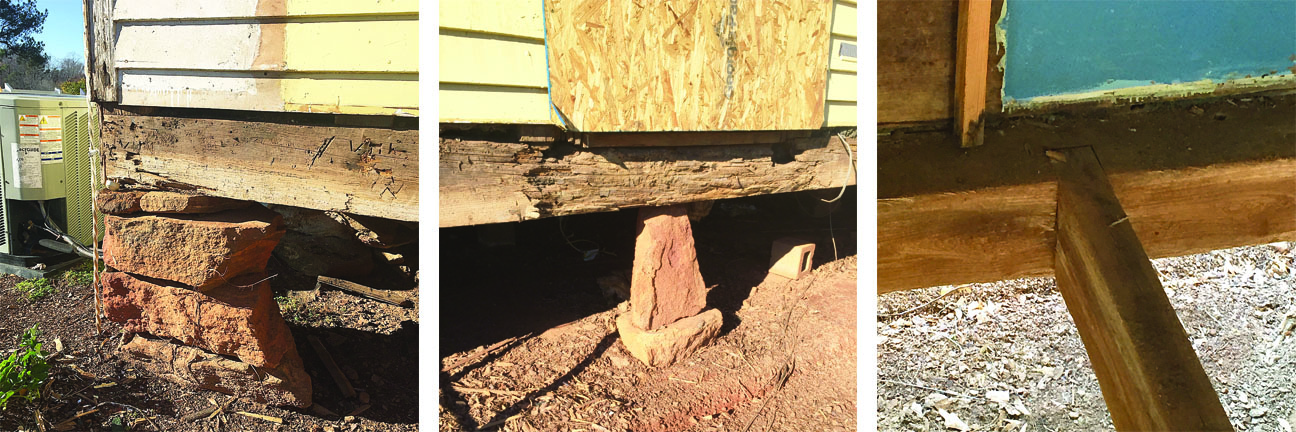
During tear out photos. The original foundation was reinforced during construction.

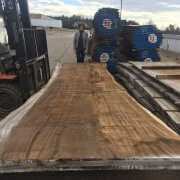
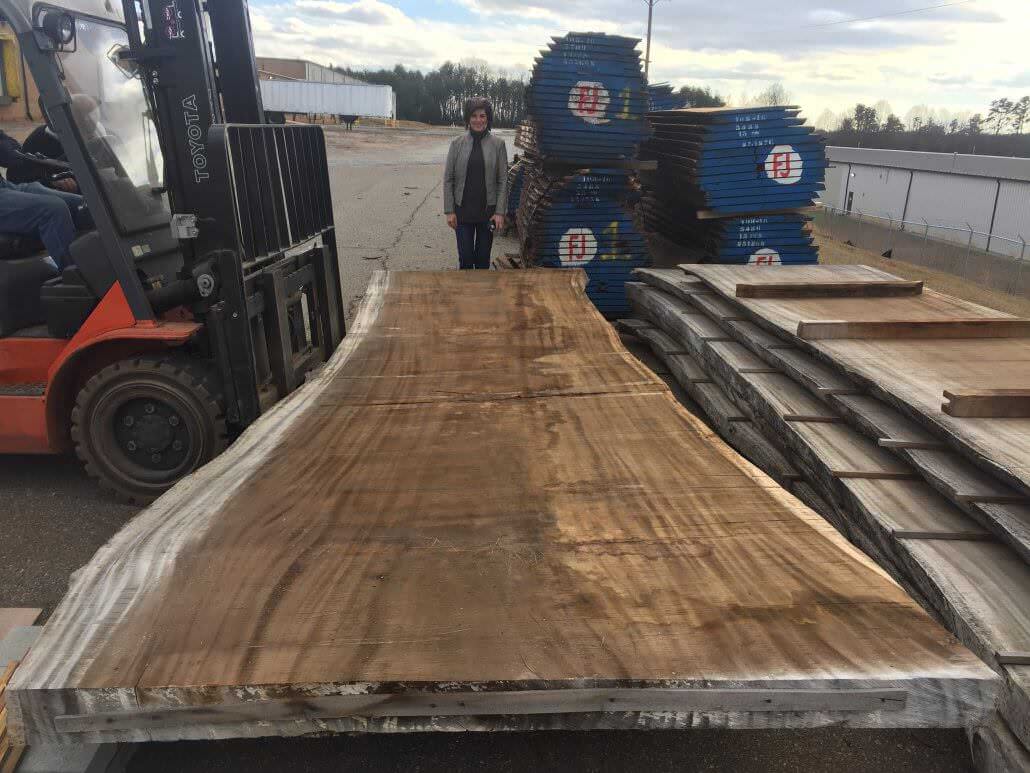
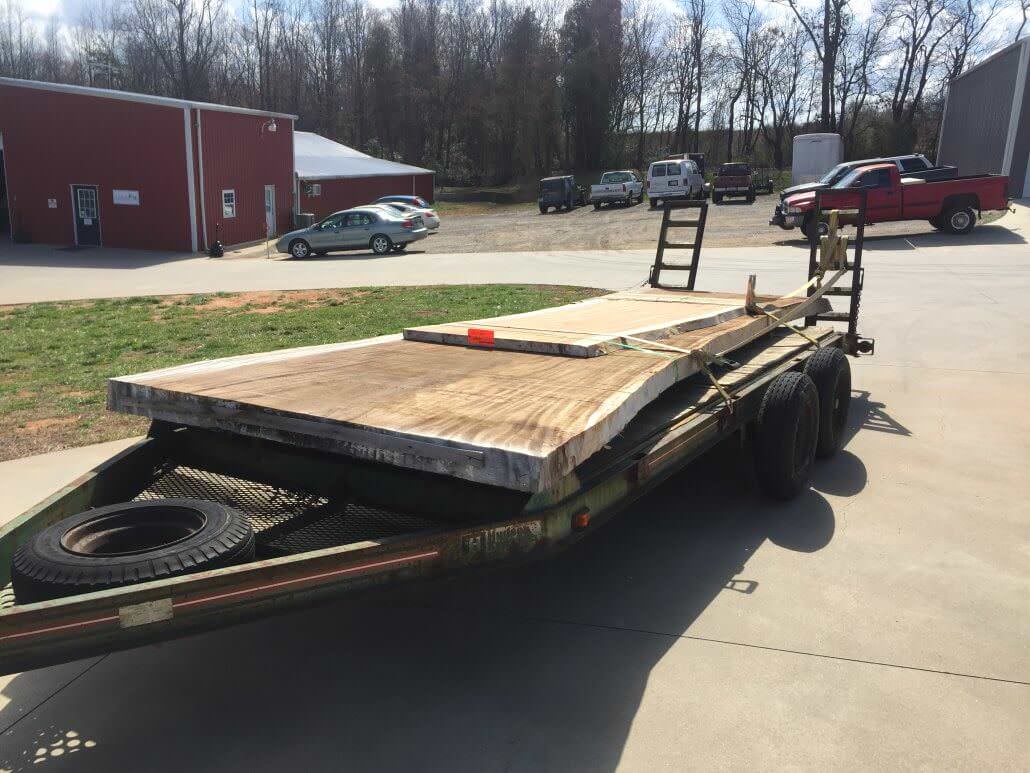
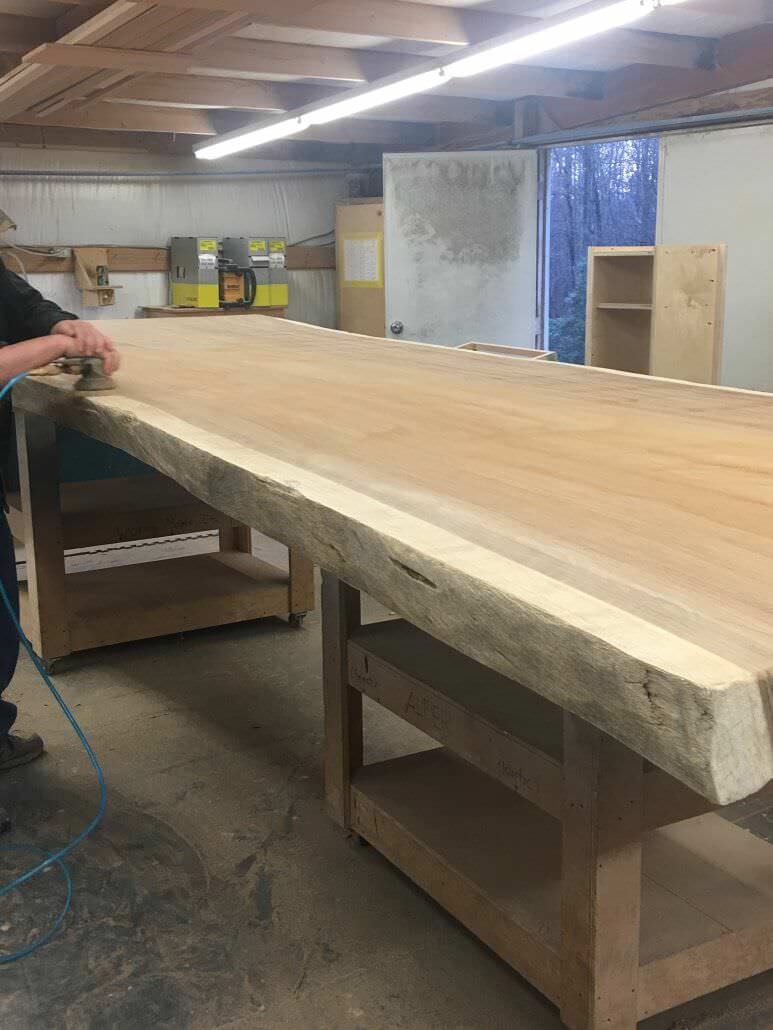
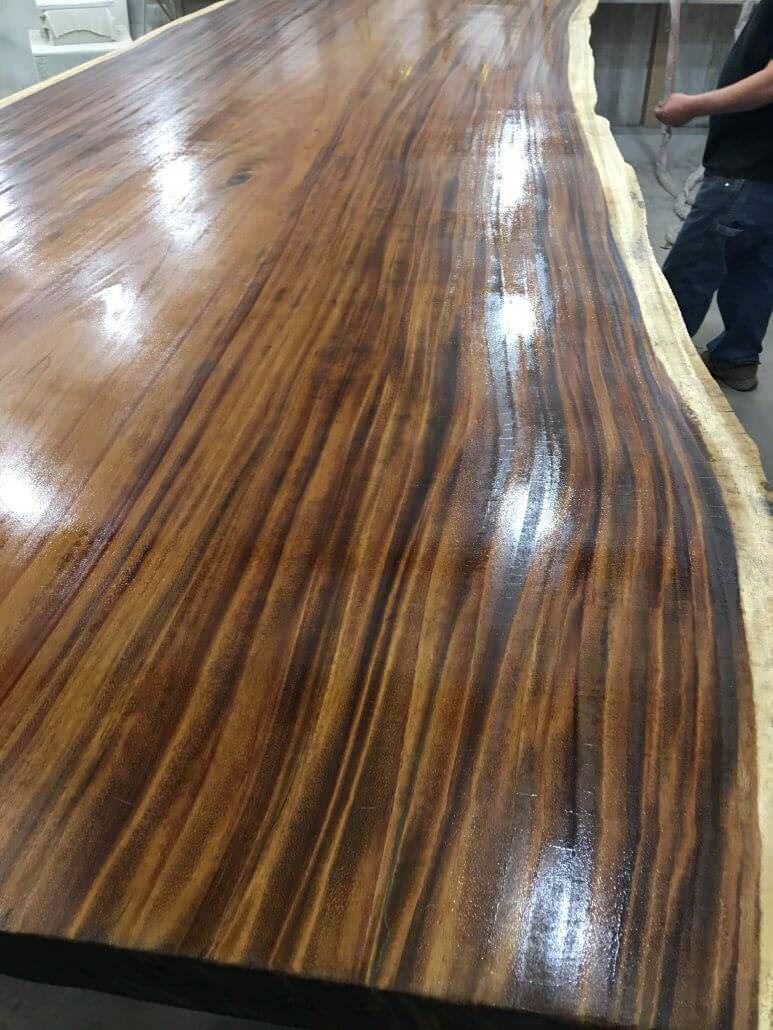
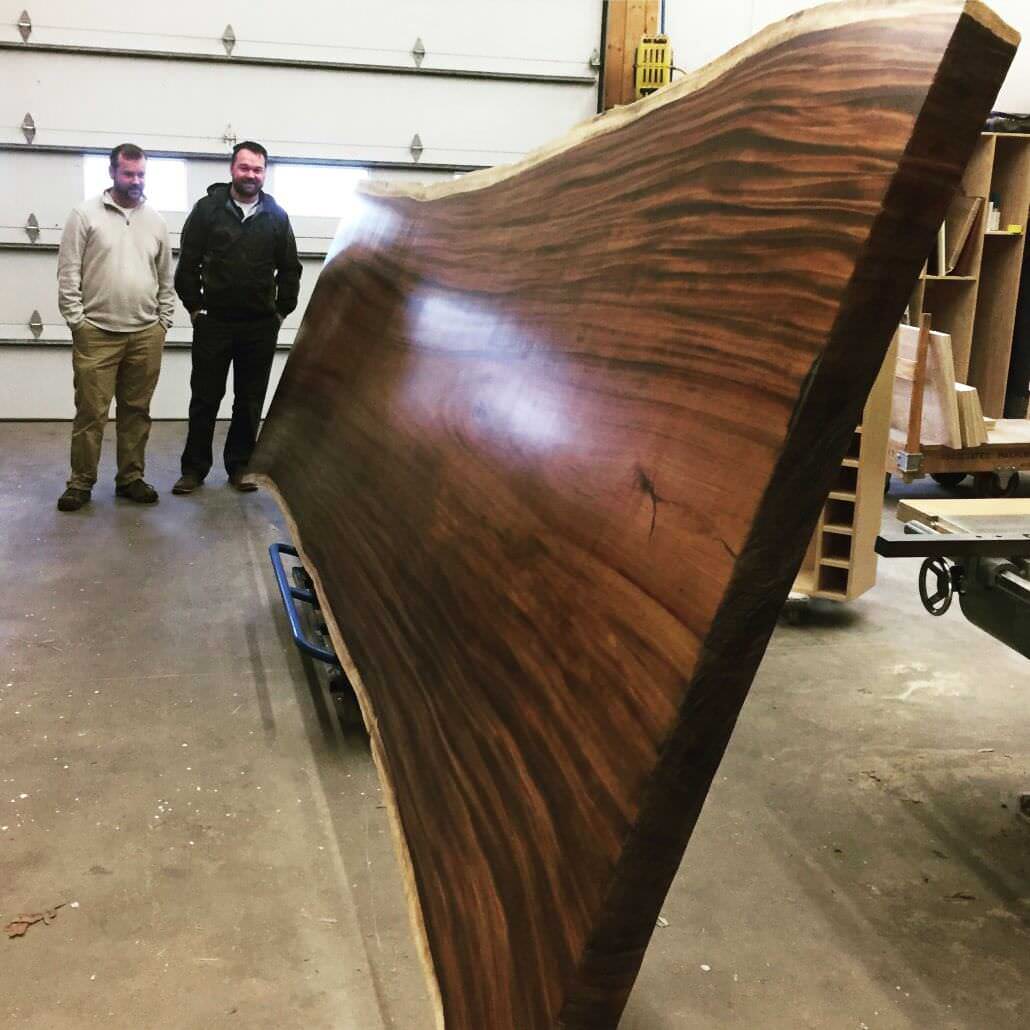
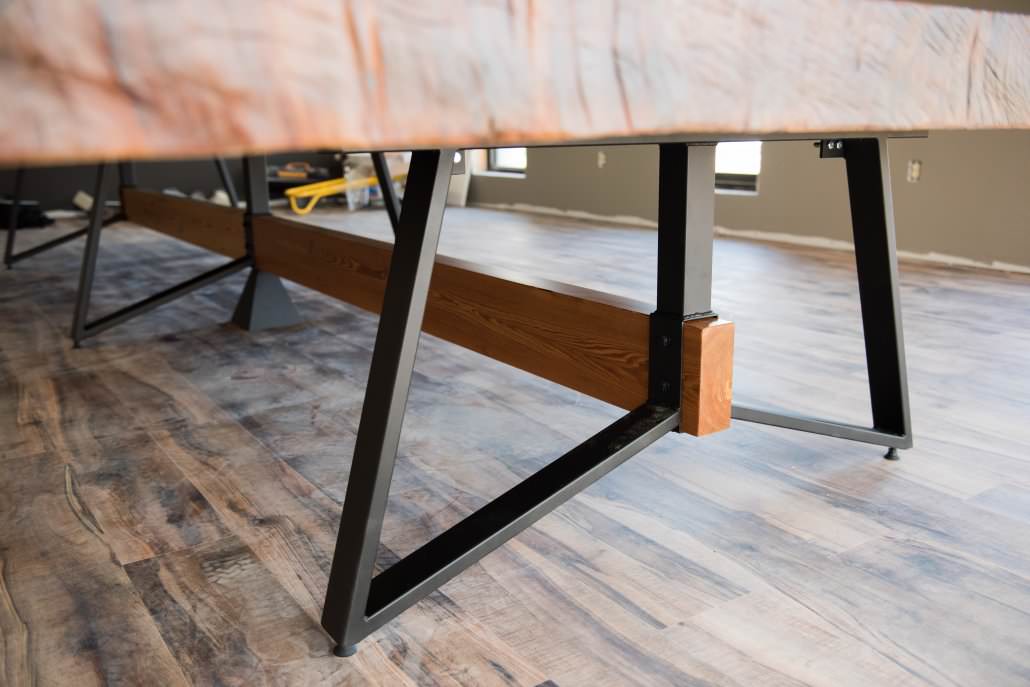
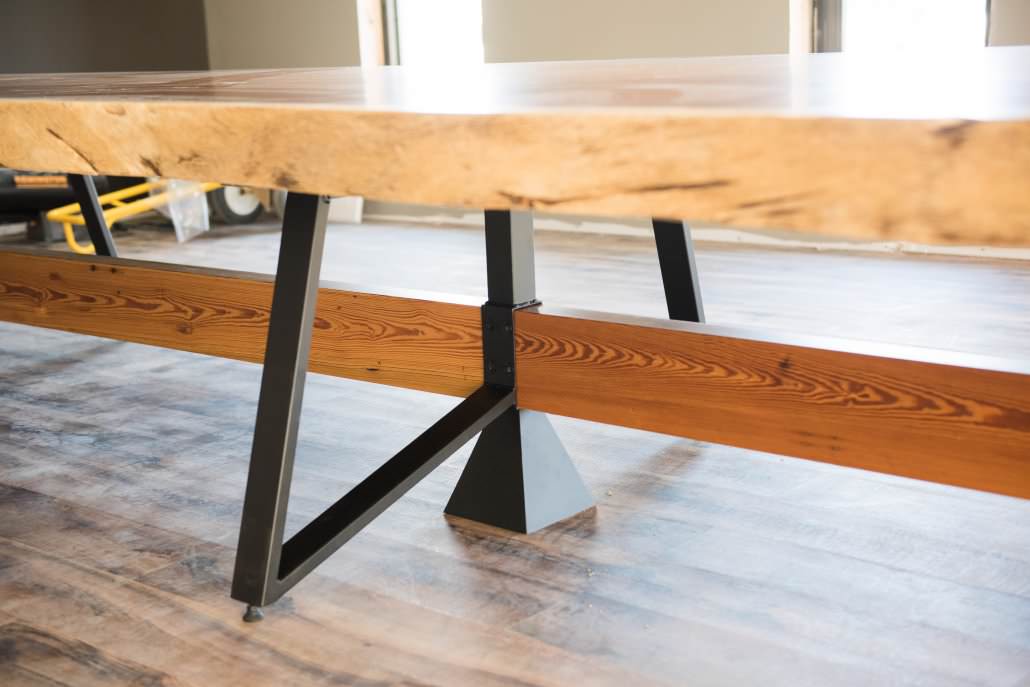
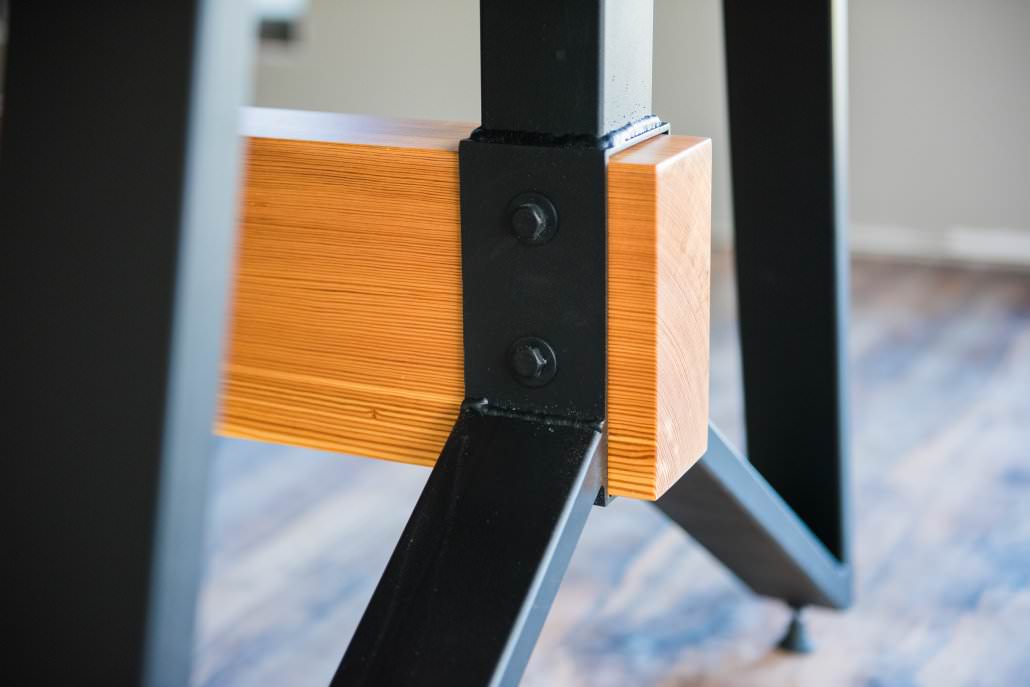
Using reclaimed heart pine

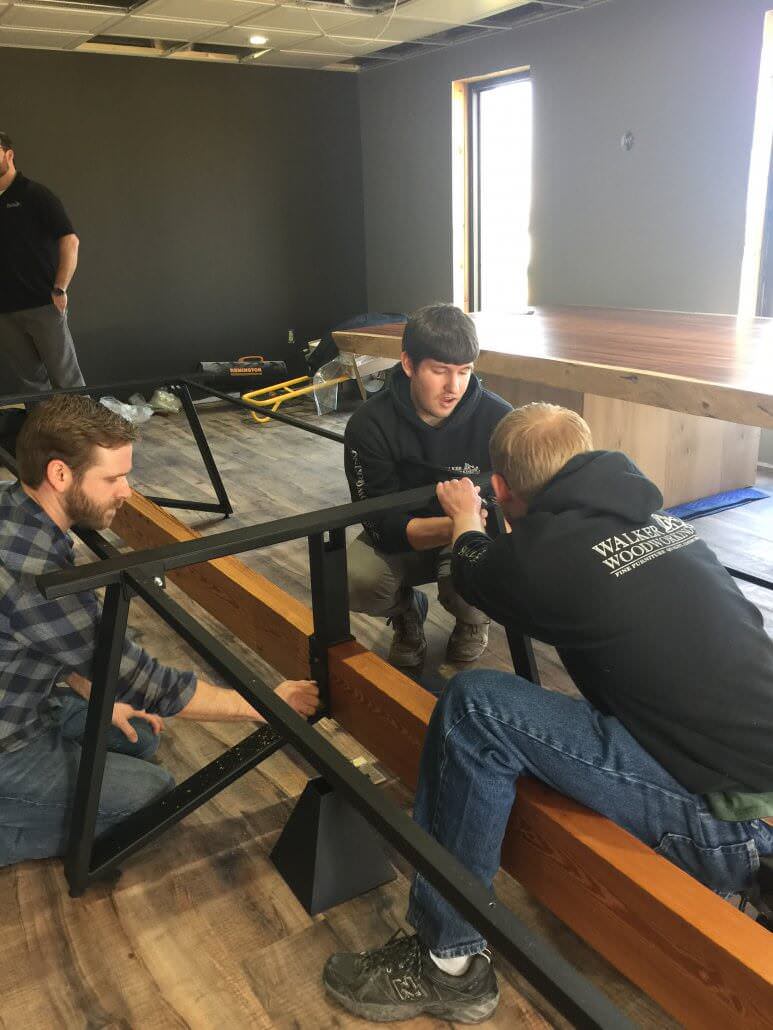
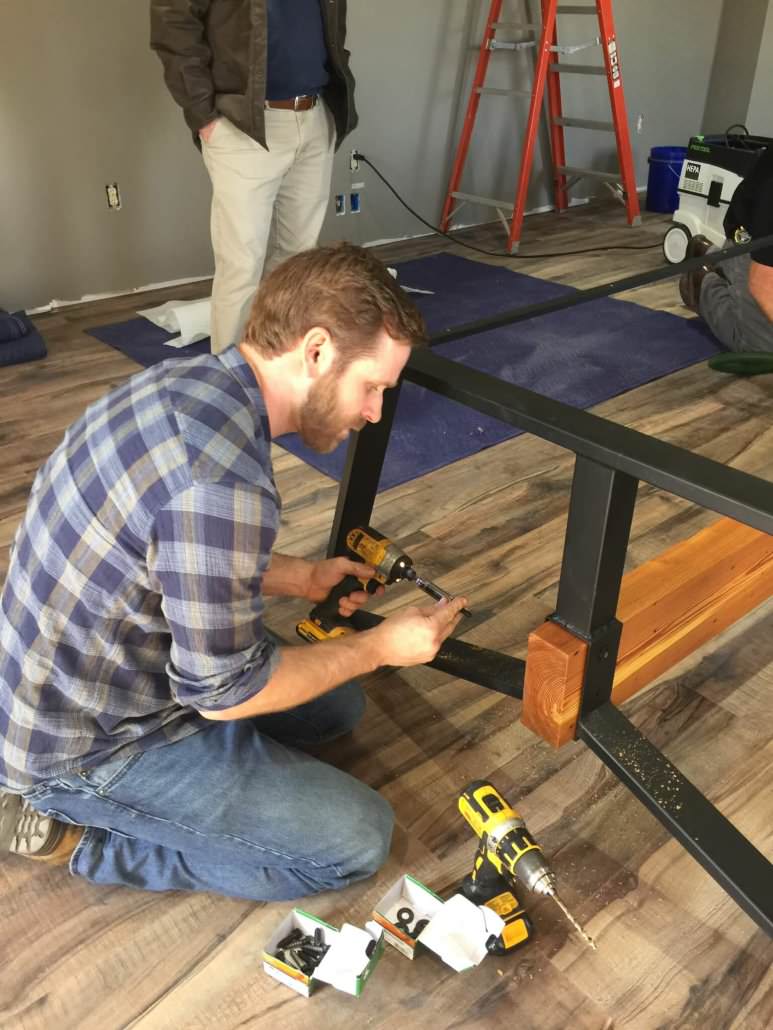
Working with reclaimed wood presents its own unique challenges. Questions arise such as, “Do we have enough material to complete the project? Will we be able to find a suitable match if we do not?” These are just a few issues we faced from a production perspective”. The Arey’s were former clients of Walker Woodworking, we have collaborated on several projects and we knew this would be a ‘labor of love” to accomplish. Nevertheless, Travis Walker, owner of Walker Woodworking, was eager to take on the project.

“We mostly work with brand new lumber that comes in clean and ready to use. The majority of my employees had never worked with old growth pine and had only heard of it. I had the pleasure of educating them on exactly what old growth was and what the term meant. Some were fascinated by it and just knowing the deep history of the home made it that much better. The easy part was the nails and bolts we had to remove. We scanned the wood with a metal detector. The hard part was the amount of pitch and resin in the wood. This was tough on the knives, blades, and sandpaper, and very hard on my machinery. The end results show what can be accomplished by a talented and dedicated team. ” ~ Travis Walker, Owner Walker Woodworking

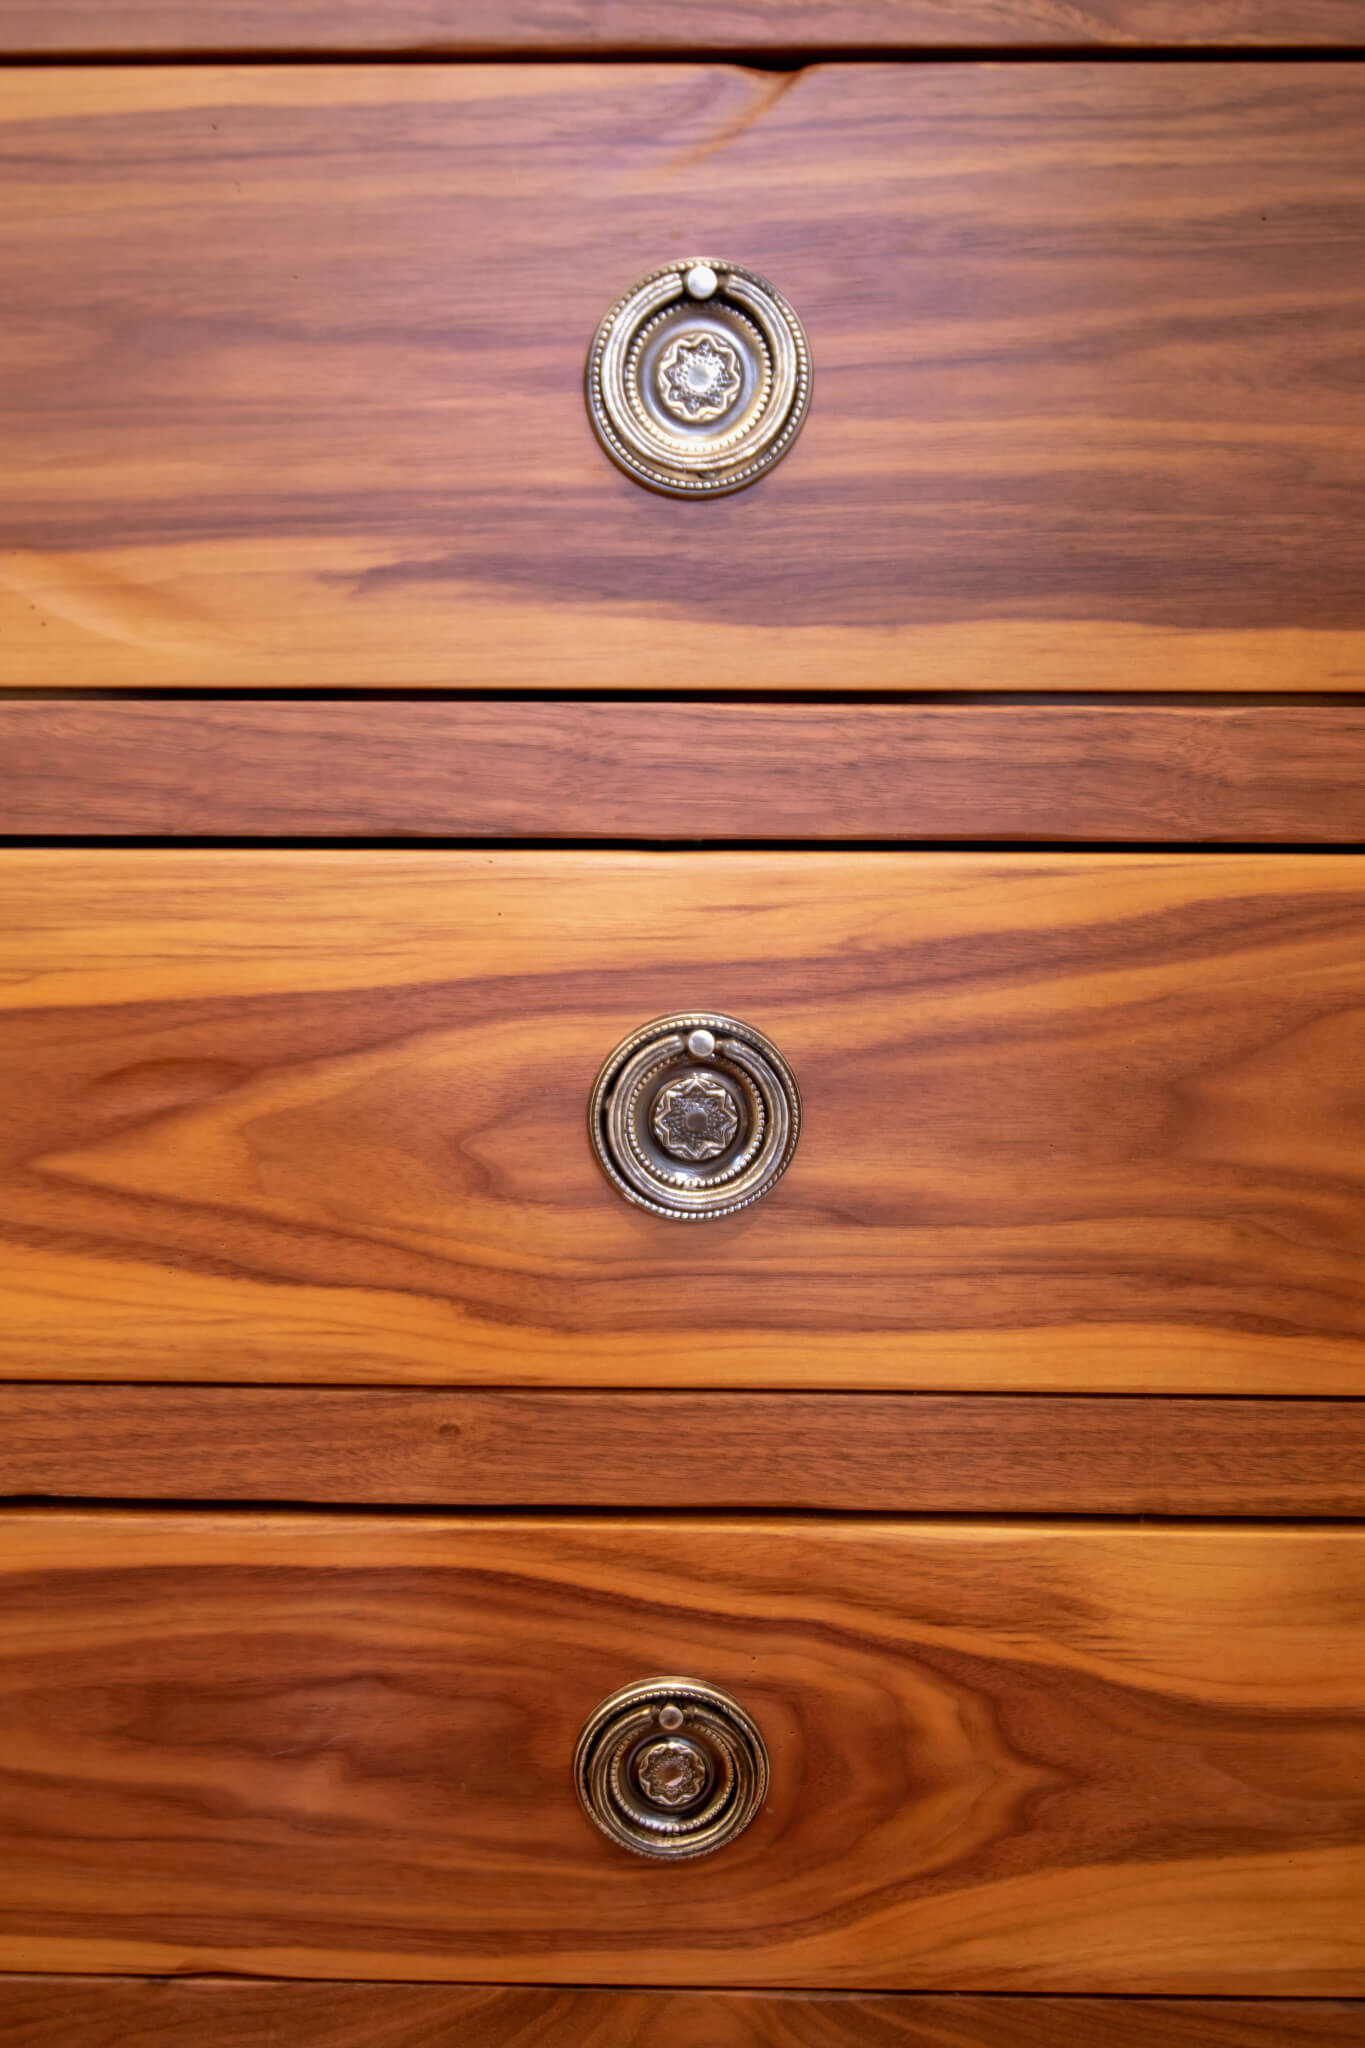
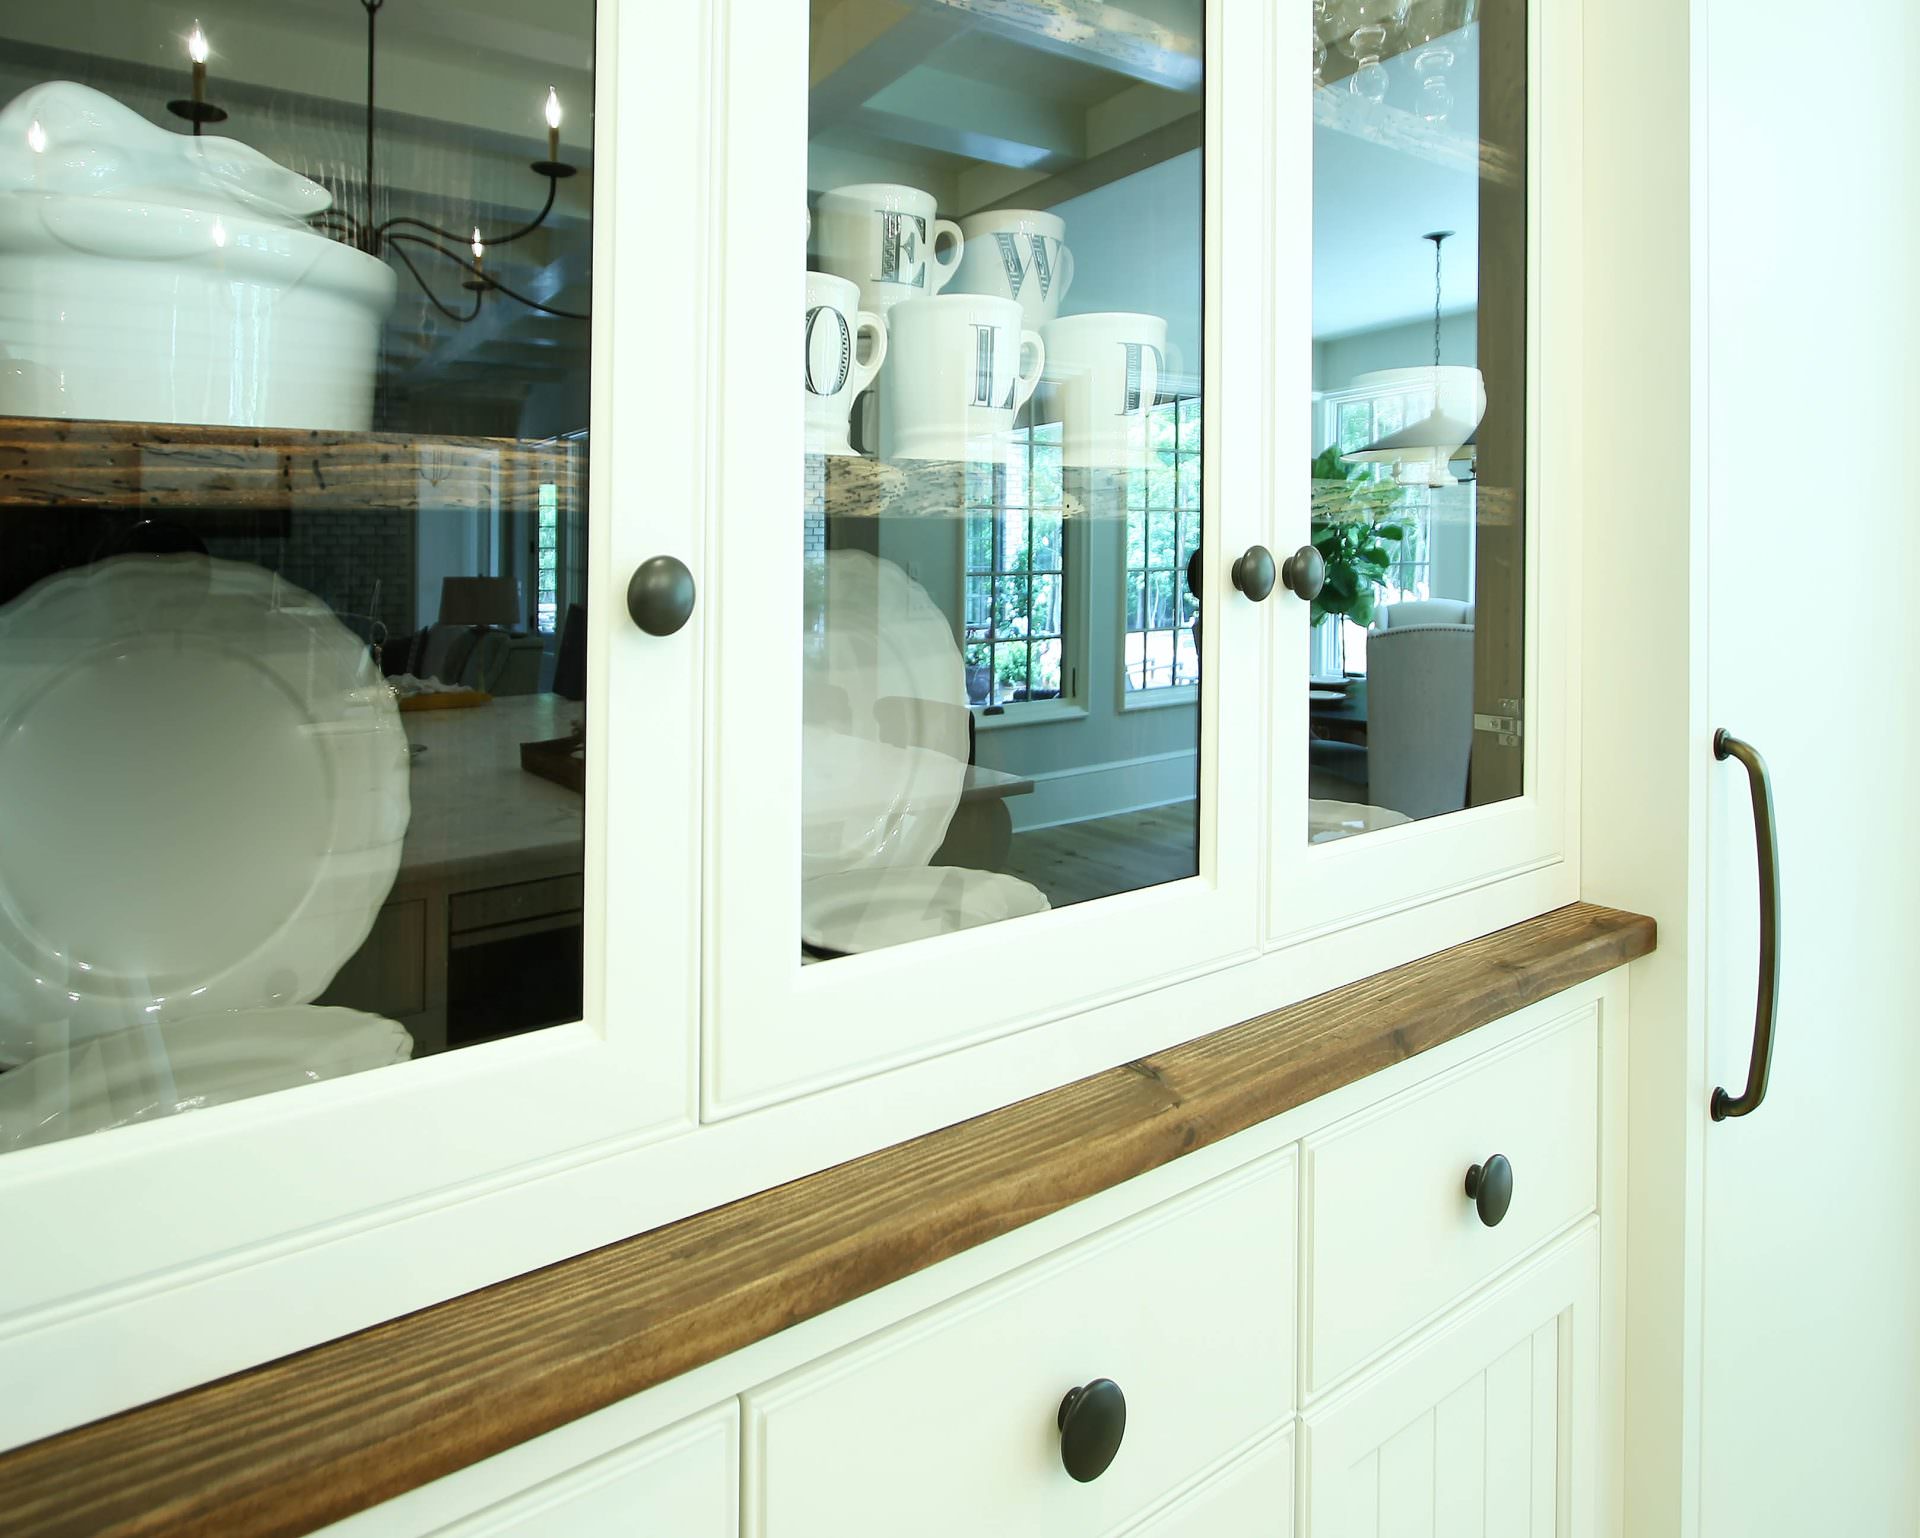
Old flooring was used for the construction of the cabinetry, and hardwoods in the kitchen and bedroom addition.

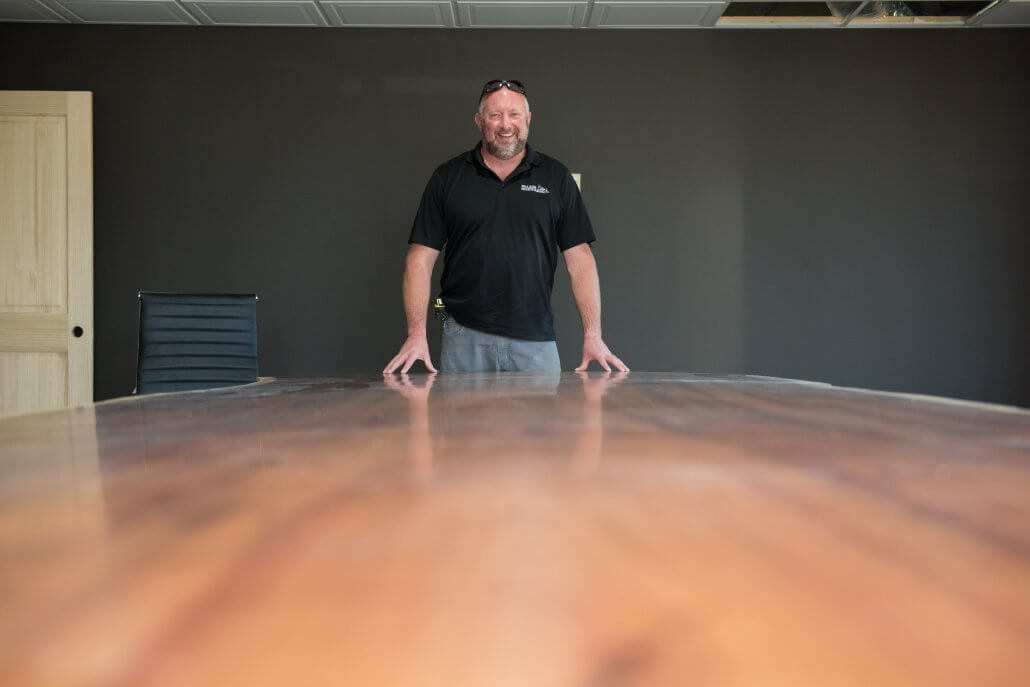
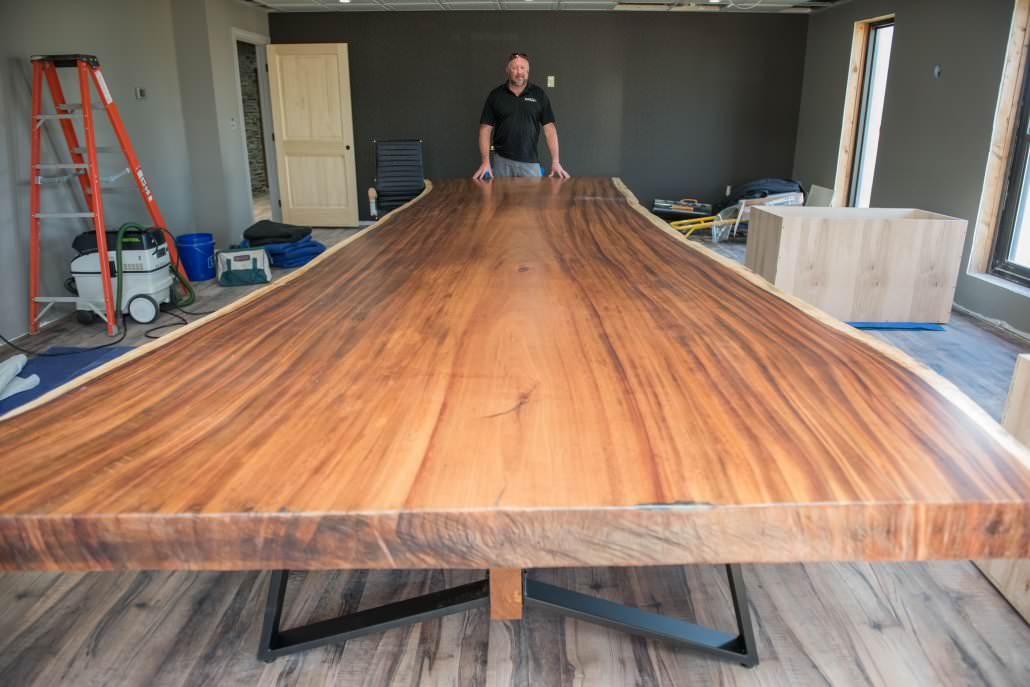
“I had the pleasure of picking up some of the extra reclaimed pine we needed to complete the project.  Some of it was resawn beams that came out of the old Double Shoals Mill near Lawndale, NC. Some of those beams were over 20 inches wide and 20 feet long, which means that the trees had to be 200-300 years old at the time of harvest.  If the mill was built in the latter part of the 19th century, that means those trees were growing in the early 1600’s or perhaps even the late 1500’s, the same time period that the famous Lost Colony was founded in NC!  I would certainly guess that English settlers had not made it as far west into North Carolina as Cleveland County when many of these trees started growing.”  ~ Justin Webb, General Manager, Walker Woodworking

Kitchen and Bath Design Challenges

Working with a historic home created a few design challenges for our design team at Greenbrook Design (LINK). The fundamental part of the floor plan had to remain close to that of the original home. Although the home had been updated several times throughout the years, we felt that we were able to keep the design as close to the original floor plan as possible also allowing the homeowners to expand cabinetry storage and function for a full working kitchen for the 21st century.

“The opportunity to work in a historic home was a unique endeavor that gave us the opportunity to be creative in establishing a new functional space. The challenge was for us to stay true to the character of the home. A great deal of family history and emotion was embedded in the project that remained as the foundation of collaboration between the contractors, designers, and homeowner. This allowed a narrow and specific route to achieve an outstanding design and allowed my team to diversify our skills in cabinet design.”  ~ Brandon Fitzmorris, Lead Design at Greenbrook Design

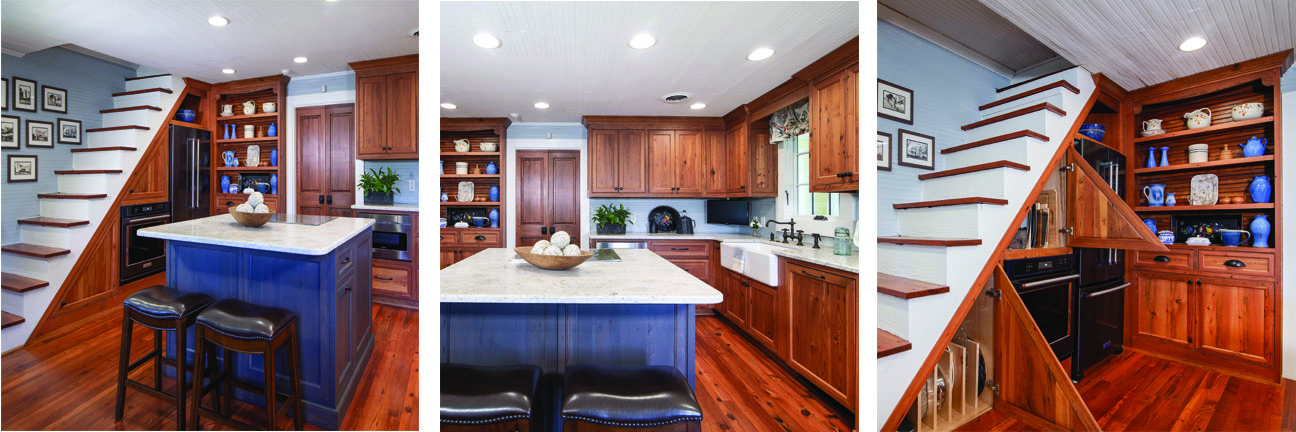
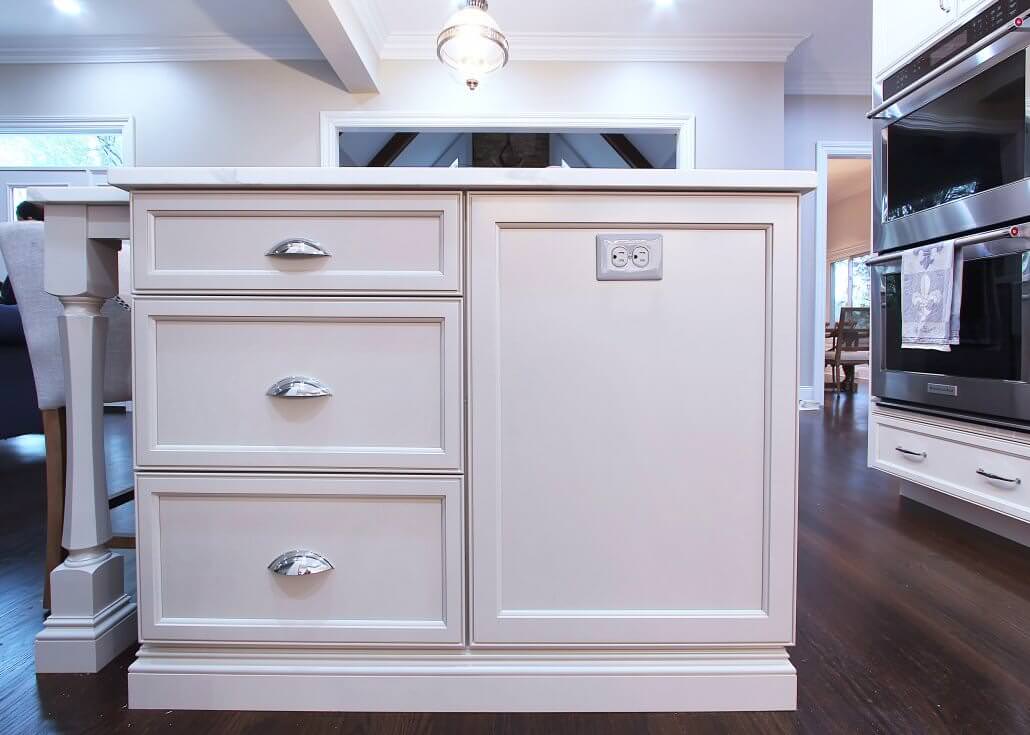
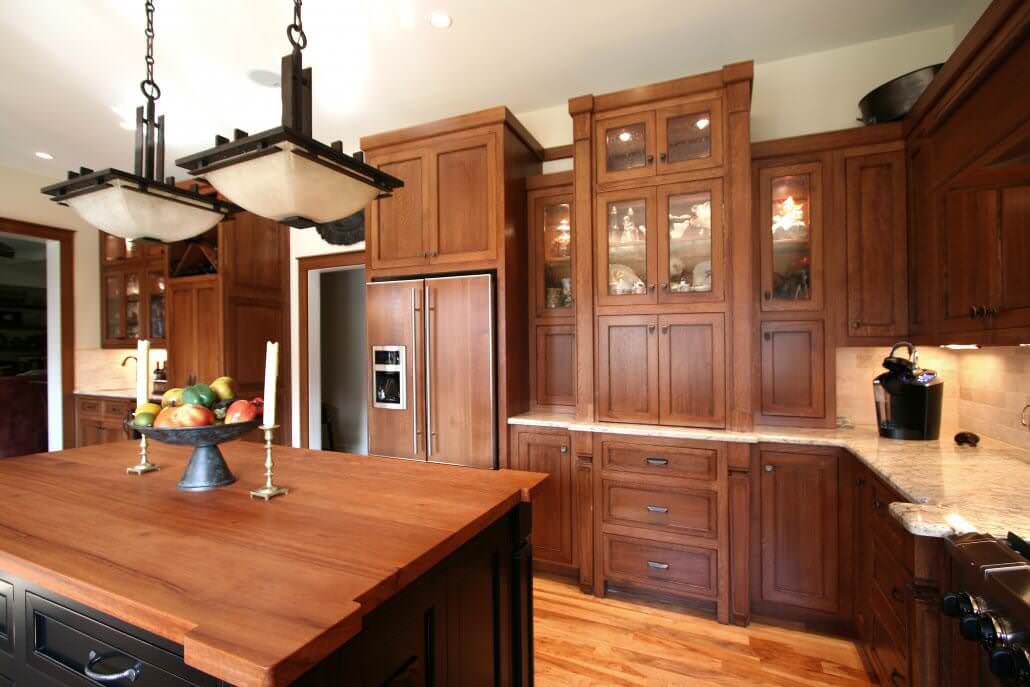
Completed Kitchen Remodel (renovation photo credits: Electric Films)

Interior Design Challenges

Wendi Gragg was involved in many components of this project collaborating with our the team meeting the requirements of the historical rehabilitation. The home remains listed with the registry of Historical Homes in North Carolina.

“The original architecture of the home was a mix of Federal, Greek and Victorian styles with several renovations throughout the years. I wanted to make sure the interiors remained rooted in a serene country spirit and that it retains the provincial charm that was indicative of the time. It was great to work with a team that you trust and depend on to meet the highest level of craftsmanship.”  ~ Wendi Gragg, Interior Design

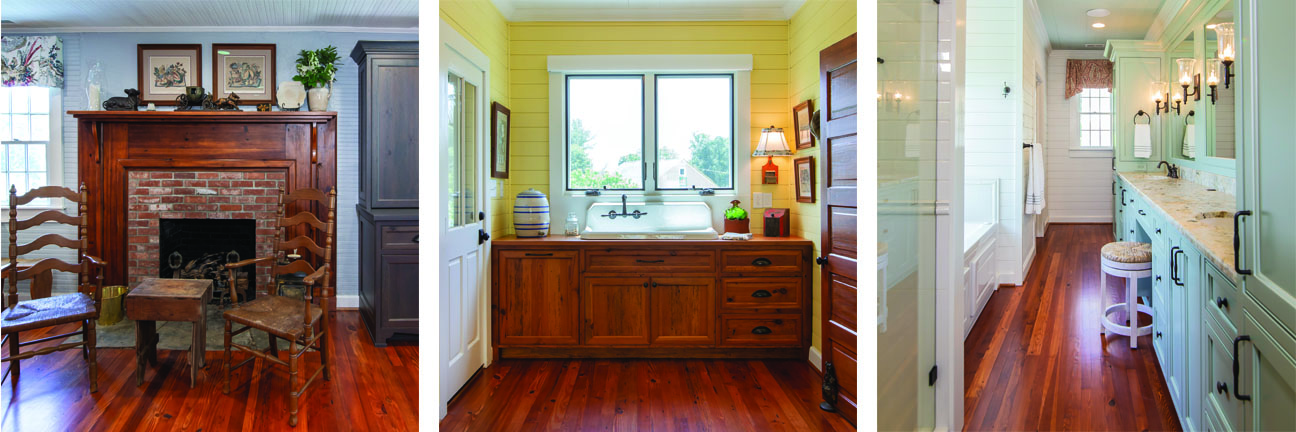
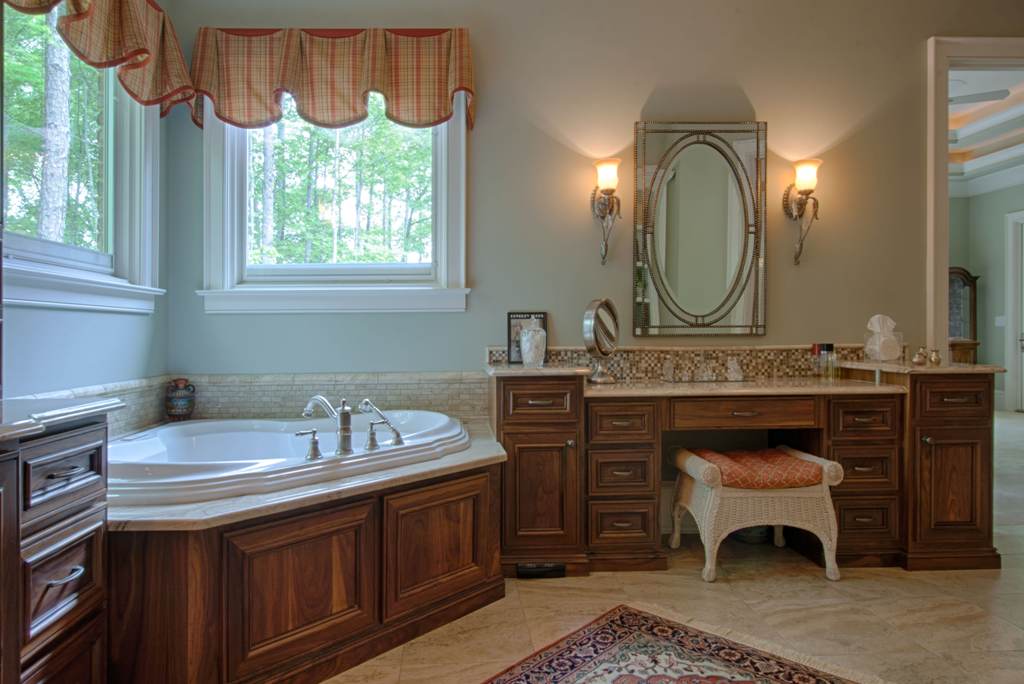
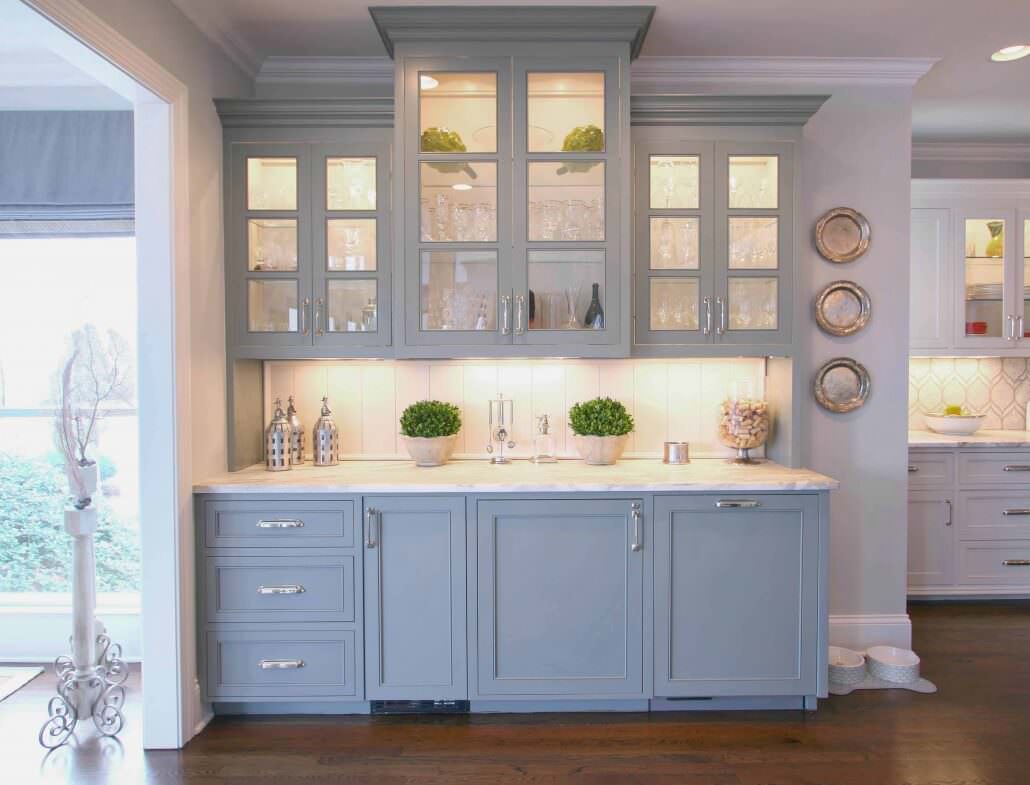
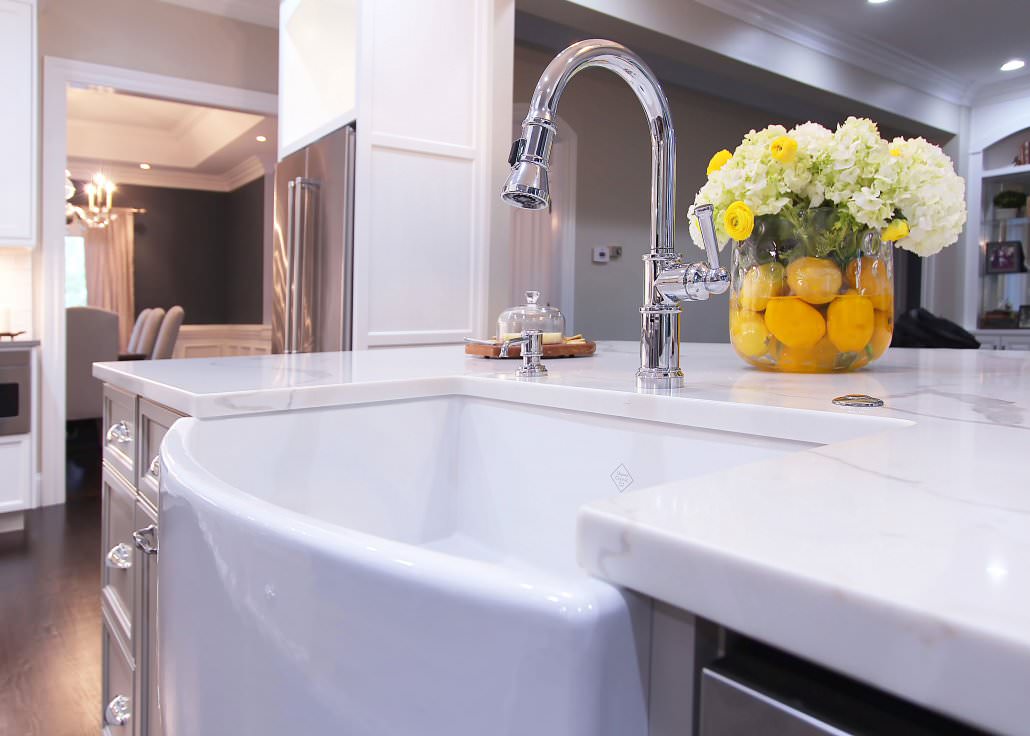
Original Fireplace, Farmhouse Sink, New addition Master Bathroom.

We have many more photos that we would love to share with you, follow this link to view the full gallery.

For more design details about this project, you will find more detailed information in this link.

For more information about the home, here are available resources:  National Registry Listing

Are you ready to start your remodel project? Give us a call today and we will get the process started. Our process incorporates the time each project takes, a full design package, attention to detail and a partnership with you to ensure every job is even better than what you expected.  Contact Us

National Register of Historic Places, Joseph Suttle House

Wash, Sort, and Stack Our Best Laundry Rooms

Wash, sort, and stack: The inner workings of our best laundry rooms

Who loves to do laundry? Most people’s response to that question would be…..not me! However, the task of washing and drying is a never-ending, necessary chore to keep a home running smoothly. I can attest to this as a mother of two small children; it never ends. Since it does have to be completed so often, why not make your laundry room as cheerful and welcoming as possible? We chose a few of our favorite laundry areas to showcase and give you some ideas on how to make the task of laundry more enjoyable.

The key to maximizing functionality

Organization is key to making any room function well. This is exceptionally true in an efficient and productive space, and most certainly if you plan to perform more than one task there. We have designed many laundry rooms that double as mudrooms, closets, and wrapping stations (to name a few). If you’ll be performing different tasks, then varying work zones will need to be planned accordingly. Such is so in this quaint laundry room where we utilized even the smallest space making it a functional and beautiful wrapping zone. The stained, warm cabinets blend elegantly with the lighter wood floor and other painted cabinets. Behind the short swinging door sits the mudroom bench, which serves as a place to remove shoes and coats. Everything has its place here, which means it will all function well for the homeowner and family.

laundry-room-gift-station

Laundry room with gift wrap station.


Color is the new black

Maybe you wish to be daring and use a fun paint color? What better place to try it than in the laundry room. Gleeful colors can bring whimsy into the most mundane rooms. The cheerful shade used here is Spruce tint and it will make you feel anything but blue.

blue laundry cabinets

Spruce tint – blue

Yellow isn’t your normal cabinet tone, however, these Elk Tan painted cabinets with a chocolate glaze brings a trace of character to this laundry room, which also features a standout sink.

Elk Tan with Chocolate Glaze

Another unique color is Rialto, which we show here in this classic lake house. This darker shade of blue with a thin chocolate glaze brings a soothing sophistication to the laundry area of this lake home. With so many appliance options to choose from, it is also easy to add a pop of color with your laundry apparatus.

Rialto blue cabinets with thin Chocolate Glaze.

 What works best for you?

Everyone has a different way of completing their household tasks. When planning your laundry room you need to consider what works best for you, and of course, the kiddos helping out. For example, my mother irons everything she needs to on one certain day of the week, whereas I do not even own an iron. If you do iron, we can build a custom door for your wall inserted ironing board, as you will see in some of our photos.

Ironing-Board-built-in

Hidden ironing board built into wall.


In addition, many of our clients utilize multiple hampers for sorting out colors, whites, and delicates. Some people like to hang items straight out of the dryer, so we usually put hanging rods in their upper cabinets. The most functional laundry room we’ve ever designed was this grand master closet, which was featured in the Wall Street Journal. Putting this laundry pair inside their closet is the ultimate in functionality. The island features multiple sorting hampers and the large countertop space is ideal for folding and sorting.

Laundry Room Featured in Wall Street Journal


Especially relevant, ease of use is another key consideration to think about when designing the laundry area. Keeping the most important things in arms reach is crucial, especially for those of us who are vertically challenged. Aging in place goes hand in hand with functionality. You do not want to strain your back every time you do a load of laundry. Many of our clients request that we build laundry pedestals under their washer and dryer pair. Elevating the appliances is a simple solution that will help you be comfortable in your home longer.

laundry room

Elevated washer & dryer.


Do you dread the task of laundry? Sprucing up your laundry area is a small project that can make loads of difference in your home. If you’re ready to get started, we’d love to hear from you. Call us at 704.434.0823 to set up your design consultation.


Cabinet Basics

Cabinet Basics 101: Our Building Options

When clients first come to us at Walker Woodworking they are often overwhelmed by the different cabinet options offered from different sources. We always strive to educate our clientele on all the options they have during their custom cabinetry selection process. There are many options to choose from within the categories of build method, paints/stains, drawer/door fronts, moldings, and hardware. This article will focus on detailing our two building method options and highlighting the differences between them while describing common styles that they each lend to. Regardless of which building style or look you prefer for your cabinetry all of Walker Woodworking custom cabinetry will be built to the highest level of quality. You can see more about our quality here: Product Education. Keep in mind, this article will only discuss our build methods, so let’s get to it!

Frameless

Frameless Cabinetry Example

The only overlay build method that Walker Woodworking offers is a frameless cabinet style. When this build method is chosen the stiles and rail around the cabinet openings are minimized so that none of the face frame is visible. All you see when you look at the cabinetry is the front of the doors and drawer fronts. In addition to creating a streamlined clean look, this style also maximizes the storage capacity of the cabinets, especially the drawers. This style is can be paired with either an ornate or simplistic door style, depending on if you are wanting a more transitional style or a clean lined look. Popular design styles for this build method include; Modern, Contemporary, Industrial, European, and Transitional. As you can see in the above picture, the overlay build method showcases the door and drawer style as the cabinet detail, while helping the client get maximum utility out of the cabinets.

Inset

Inset Cabinetry Example

Walker Wood also offers the alternative of an inset building method as an option for our cabinetry. The term inset describes the placement of the doors and drawer fronts since in this style of building they actually sit back into the face frames. This beautiful style has long been a staple in traditional high-end homes and is often used with a detailed door/ drawer design. When clients choose to use an outer bead on their door edges they can achieve the look of having a beaded inset look, at a fraction of the cost. We also have the ability to add the bead onto the face frames of the cabinets, but it is rarely needed since it is an upgrade in cost and the same look can be achieved with beaded doors and drawers. This building method is often selected for the following design styles: Traditional, Victorian, Arts and Crafts, and Transitional. As seen below in these images, you can see the entire face frame when using the inset build method.

Some people view the inset method as too busy visually, while others see it as having a timeless elegance and showcasing superior craftsmanship. There is no wrong or right direction to go, but we do want to make sure that all of our clients understand the differences and “pros vs. cons” of each style. You should also note that there is a small price difference to build an inset job over a frameless job. Each job is custom priced, but usually, the difference is about 8% – 10%, since inset jobs will be priced by the square foot of the face frames.

What’s your style?

Perhaps, you are still undecided about your style preference.  We suggest an in-home measurement consultation, followed by a design session and estimate. We are here to help you, and would love to speak with you to set up an appointment time. Please call us today. 704.434.0823~

The Comeback Of Oak

The Comeback Of Oak

When you think of oak cabinetry what do you envision? Probably a kitchen in an older home with lighter toned cabinets and all of the “typical oak” graining showing on every door and drawer.  We have indeed torn out many of these older style oak kitchens to complete updated remodels in our client’s homes.  However, due to recent techniques we’ve developed for treating this durable wood, oak is making a comeback.  We will be featuring it in a variety of styles in our new showroom in uptown Shelby.  Oak has long been a widely used resource for cabinet building due to its hardness and strength.  It contains a high level of the chemical tannin, which makes it invulnerable to insect or fungal attack.  The grain of the wood makes it widely recognizable as well as desirable, especially when quartersawn.   As you’ll see here, the species can be used to encompass many different styles.


Victorian  

Victorian Style Oak Door – Stock Photo

Organic shapes and spiral flowing details are hallmarks of the Victorian furniture style.  While most of the cabinetry we build and the accents we use are rectangular, we can incorporate carvings, corbels, onlays, and decorative posts to achieve the Victorian look.  Glass and mirrored doors are often used in this style. We can now design and cut any shape of doors on our CNC machine, creating endless design combinations.  We used to be limited to rectangular shapes, but using the latest technology we can now create softer curves and gliding lines that fit into the Victorian designs.


Traditional 

Traditional Oak Cabinetry by Walker Woodworking

This has been the most popular style in the Walker Woodworking customer service area for many years.  Neutral stain colors are most used in this style, but neutral paints have become more popular to incorporate in recent years.  Thicker moldings, a few touches of ornamental details, and raised paneled doors and drawers are staples of this design style.  Although we don’t do very many projects like this these days, it is still a timeless classic style. 


Industrial 

Industrial Style Oak Cabinets by Wellborn Cabinetry

As the name implies, this style is characterized by its practical look and use.  These cabinets are designed with ultimate functionality in mind, not necessarily decorative appeal.  For our cerused oak industrial cabinets, we let the grain and finish speak for itself, not using elaborate moldings and ornamentation.  Often times slab doors and drawer fronts will be utilized, not unlike you see often on utilitarian lockers or workbenches.


Transitional

Cerused, Quater-Sawn Oak Cabinetry by Walker Woodworking

This is a recently evolving style that has developed through the years as a blending of traditional elements and cleaner more modern designs.  Cerused oak fits well into this style since many consumers already associate oak cabinetry as being a traditional design element.  We’ll use simple door and drawer styles mostly when building this style, but can dress it up with ornate hardware, or pair it down with sleek handles. See more of this project here.


Contemporary 

Cerused Oak, Quarter-Sawn Oak by Walker Woodworking

Everything about this design style says simple, simple, simple.  Slab doors and drawers are a hallmark of this look but not required.  When using cerused oak in this way the grain and coloring used really speak for themselves.  White is a popular color choice, as well as the other end of the spectrum, going extremely dark with the color selections.  There are no curves to be seen in this style, hard edges reign supreme, letting the colors and textures speak for themselves. When we use cerused oak in this style the graining brings an added level of detail and makes this widely seen style appear fresh again.  

Read more about Cerused Oak here.


Arts & Crafts

Arts & Craft style, Quater-Sawn Oak Cabinetry by Walker Woodworking

Simplicity is a common theme here as well, however, small intricacies can be added to make a large impact.  This style is hardly ever seen painted, and mostly lends to mid range stains, many times with a reddish undertone.  Furniture legs are often incorporated into this design style and moldings used can make it distinctly different from other styles. See more of this project here.


We love the many uses of oak – trending right now are Industrial and Contemporary styles. Cerused oak has become one of our favorite types of material to use. There are so many unique stain options to choose from. To find out more about the uses of cerused oak, and to see if it is right for your project please call us today and set up a design consultation and a time to visit our showroom.

~704.434.0823~

Questions about your Kitchen Remodel: What you didn’t know you needed to know!

Questions about your Kitchen Remodel: What you didn’t know you needed to know!

When remodeling your kitchen there are certain decisions that are fairly obvious to the average consumer. For example: Do I want stained or painted cabinetry? What scope of construction will my project entail (full gut/renovation, sprucing up existing cabinets, new paint, new countertops, etc.)? What is the overall style I want to achieve? These large scale opinions are fairly easy for clients to determine early on in their project planning. However, as any distinguished designer can tell you, the small details are just as important to achieving your dream kitchen. Here I will address some issues for you to consider while planning your kitchen remodel details, things you did not know you needed to consider.

Selecting the finishes of your fixtures:

The rules of everything needing to have “an exact match” have been thrown out during recent years. Designers and clients are now mixing and matching finishes in and amongst their hardware, plumbing fixtures, and lighting. The choices are limitless and there are practical usage considerations to be made that go above and beyond the basics of being aesthetically pleasing. Brushed finishes hide smudges and droplets far better than their polished counterparts.

Polished fixtures look clean and shiny but will show fingerprints and smudges!


Hardware:

What will look and function best? The sheer number of styles and finishes available for decorative hardware can be overwhelming. It is best to have your designer guide you through the selection process, as there are many things to consider. Size is a major consideration, and it is not uncommon for us to use 3-5 varying lengths within a single kitchen. You want to make sure that the handle to drawer/door proportion looks and feels correct. No tiny handles on huge drawers. This is another area in which mixing and matching is allowed.

Brass is making a comeback! One main difference you will notice is that the brass is brushed or toned down.

Codes, laws, and permits……oh my:

It is important to find out what codes in your area pertain to construction; preferably before it is time for an inspection. Some cities have codes that dictate the way hood fans must be ventilated or disposals in the sink may need to drain. The city in which you live probably has their own electrical codes as well. These are definitely things to consider beforehand, as they can affect your design layout. These issues can also cause headaches on the back end, if not planned for properly.

Type of sink and mounting style:

The farm sink of today is not your grandmother’s farm sink. Deciding the type of sink you’d like is the first step: under-mount, drop in (self-rimming), triple/chef styles, and farm sinks are among the most popular choices. Think about how much you use your sink and what it is used for primarily. If you are a heavy duty scrubber and are very rough on your sink, then the ceramic ones may not be for you. The other consideration about the sink is how to mount it. If you are planning to have laminate countertops the sink will need to be dropped in and cannot be under-mounted, due to contact of water and the wooden sublayer of the top. Mounting a farm sink can be tricky too and can pose a water damage threat to the front of the cabinet if not protected. This is why we, at Walker Woodworking, recommend sitting any farm sink with an exposed front on a piece of your selected stone countertop. We also always request your specific sink at our shop during construction to ensure a proper fit.

Cabinets usually have to be cut for Farm Sinks to fit in place. Sinks must be on site for cabinet install.


Finishes and edges of your stone surfaces:

The basic materials of the countertops and tile you select are important, however, the texture that you choose to finish them in can change the entire look. Polished stone or tile will give more of a modern or transitional look to your kitchen. Whereas, tumbled, textured, or honed stone surfaces can lend to a traditional old-world feeling. Along that same line, you will need to consider the edge profile for your countertops. The straight line of an eased, squared, or pencil edge lends to a clean and modern style. While either a bullnose edge or an ogee offers a touch of softness blending more with the classical elements of a classic look.

As you can see there are many things to consider when beginning to plan the details of your kitchen. You can rest assured knowing that our design staff will assist you with any and all of these decisions that you wish.

If you would like to schedule a consultation please call Jan 704.434.0823 or contact us through our website.

Article by guest blogger: Jeneane Beaver, Former Designer at Walker Woodworking

“Having worked with Walker Woodworking for 7 years, I have the opportunity to share my experiences as a designer as well as a client, I remodeled my own kitchen in 2012.”  ~ Jeneane Beaver

If you are only in the dreaming stage of beginning to plan for a new kitchen? We would love to talk to you and work with you to fine-tune your very own remodel plan.  If you’re ready to be further from dreaming and closer to construction, call Walker Woodworking today 704.434.0823.

Please feel free to add a comment about your own personal experience with keeping your new kitchen clean.

Taking Care Of Your New Kitchen

Now that the kitchen of your dreams is actually in your home, you may not want to use it. It looks so clean and pristine, untouched by gunk, splatters, and spills. It is true that a deep cleaning of your new kitchen may be due every few months. However, the most beneficial cleaning tasks can be done every few days to help your kitchen remain beautiful and functional for years to come.

Fight Countertop Clutter in your New Kitchen

One thing you can do daily is fight countertop clutter. It is so easy to bring home things and set them all over the countertop, unfortunately, things can pile up quickly and often find a lingering home there, making the workspace feel cluttered and claustrophobic. It isn’t inviting to attempt to cook in an area covered with clutter. To fight the likelihood of unwanted items landing on your counters there should be designated places provided for bags, keys, mail, etc. along the path from the main entry to the kitchen. Most unnecessary items should be dropped off before they reach your kitchen work zone.

Another simple tip that I found to keep my new kitchen running smoothly is to begin by having a clean sink and an empty dishwasher. If you make a habit of unloading your dishwasher at night and cleaning your sink, then when you begin cooking the next big meal, the cleanup will be much easier. On the flipside of this, if the dishwasher and sink are already full you’ll only be compounding the problem by dirtying pots and pans on top of a sink full of dirty dishes. Once you make a habit of doing this it will be very rewarding, and ultimately save you time, while keeping your kitchen clean.

Cleaning & Maintenance

Having adequate trash and recycling containers located in the kitchen will also keep messiness to a minimum. Before we completed our kitchen renovation we barely had a large enough trash can, and no place for recycling. I planned that into my kitchen when we renovated and I love having a space allocated for “overflow” trash.

If you want to keep your new surfaces looking their best, I would recommend not using harsh chemicals to clean your new cabinets or countertops. Cleaners that work well on appliances in many cases are abrasive to painted or stained finishes and can quickly deteriorate the sealants used on granite and tile. The best thing to use on your countertops is a mild dish detergent and water mixture on a cloth. For the cabinetry, the same type of damp cloth can be used to spot clean a sticky mess, but we clean the cabinets in the Walker Woodworking offices with pledge every week to keep them looking new.

Maintenance on your cooking supplies is another helpful habit that can add to your kitchen’s longevity. Go through your pots and pans monthly and examine their wear and tear, toss out what is damaged and add whatever is needed to your shopping list. Such tasks as sharpening of knives and oiling of cutting boards will also help keep your kitchen functioning smoothly. This only needs to be done every few months but will be rewarding each day as you use these items.
The bottom line is: the more time you invest into cleaning and maintaining your kitchen, the more enjoyable it will be to cook in. Enjoy your new kitchen and put in the work so that you can keep enjoying it for years to come.

Article by guest blogger: Jeneane Beaver, Designer at Walker Woodworking

“Having worked with Walker Woodworking for 7 years, I have the opportunity to share my experiences as a designer as well as a client, I remodeled my own kitchen in 2012.”  ~ Jeneane Beaver

If you are only in the dreaming stage of beginning to plan for a new kitchen? We would love to talk to you and work with you to fine-tune your very own remodel plan.  If you’re ready to be further from dreaming and closer to construction, call Walker Woodworking today 704.434.0823.

Please feel free to add a comment about your own personal experience with keeping your new kitchen clean.

Conference Table Project

Conference Table Project

Concept & Design

A few weeks ago, Wendi Gragg asked our Designer Brandon Fitzmorris to find her a table for twenty-four, specifically a conference for seating up to twenty-four people for one of her clients. She also wanted a smaller eight-foot table for a smaller conference room. Once Brandon found a table source, Travis Walker, our company owner made a special trip with Wendi to select the perfect slab for her client.

wood-slab-table-top

In search of the perfect top.

Pictured above: This large slab had to spend 1 month in Dry Chem. Pictured below: see the difference of sizes. The 8-foot table is sitting on top of the 17-foot table.

Slabs- trailer

Travis makes special trip to pick-up slabs.

Time to sand, finish and find some table legs. Through social media connections, we found a source close to home to design and build the table legs for this project. A collaboration with Chronicle Millworks is born. Pictured below is the design concept for the metal legs.

Sanding

In order to sand the top on the 17 foot table – we had to bring in a floor sander. In this video watch as Jonathon Champion, from Champion hardwoods unveils the top layer of the slab.


Once the top layer was sanded – much work had to be done by a hand sander and to the edges of the top.

Final sanding before finish.

Now off to the finish room.


Table had 3 layers of finish applied.

Table Legs

Meanwhile – table legs are being built to support this massive conference table. Photo’s courtesy of Chronicle Mill Works.


Wielding


3 supports completed.


Access to data and electrical outlets.


Top view of conference table legs.

Side View of Table legs

Next – table legs are ready for powder coating.

At Walker Woodworking – we have completed the finishing for both tables and now it’s time to deliver to the job site. We don’t have the space to store such a massive piece of wood.

Brandon & Marty posing with slab for some perspective.

Next – a four minute video of the delivery at the job site and getting this table into the room.

Next up Final Assembly – Chronicle Mill Works delivers the table legs and we show up for extra manpower.

Putting together the table legs onsite! With Chronicle Millworks!

Putting together the table legs onsite! With Chronicle Millworks!

Putting together the table legs onsite! With Chronicle Millworks!

Putting together the table legs onsite! With Chronicle Millworks!

Putting together the table legs onsite! With Chronicle Millworks!


Travis is very proud of this completed project!

After all, taking on a 17 foot conference table was no easy task.

Wendi Gragg, Interior Designer is happy as well. This was her vision brought to life.

Table leg details by Chronicle Millworks

Table leg details by Chronicle Millworks, this center sections covers the outlet and data lines.

Table leg details by Chronicle Millworks

And this is the collaboration of three companies to complete this project! Wendi Starnes Gragg – Interior Design, Walker Woodworking, and Chronicle Millworks.

We will add more pictures after the project is completed. Walker Woodworking and Wendi Gragg did several more projects at this site including kitchen, bathrooms and more. We can’t wait to see the finished project throughout and to share it online. Stay tuned!