Sam & Kim Kitchen Remodel
Sam & Kim’s Kitchen Remodel
In 2015, Sam and Kim decided to move back to Sam’s former home and update their kitchen. Enlisting the help of Walker Woodworking and Tony Brooks of Beam Edwards & Brooks, this kitchen remodel became an amazing transformation from an enclosed kitchen to an open floor plan. Follow this link to see the complete before & after photo gallery.
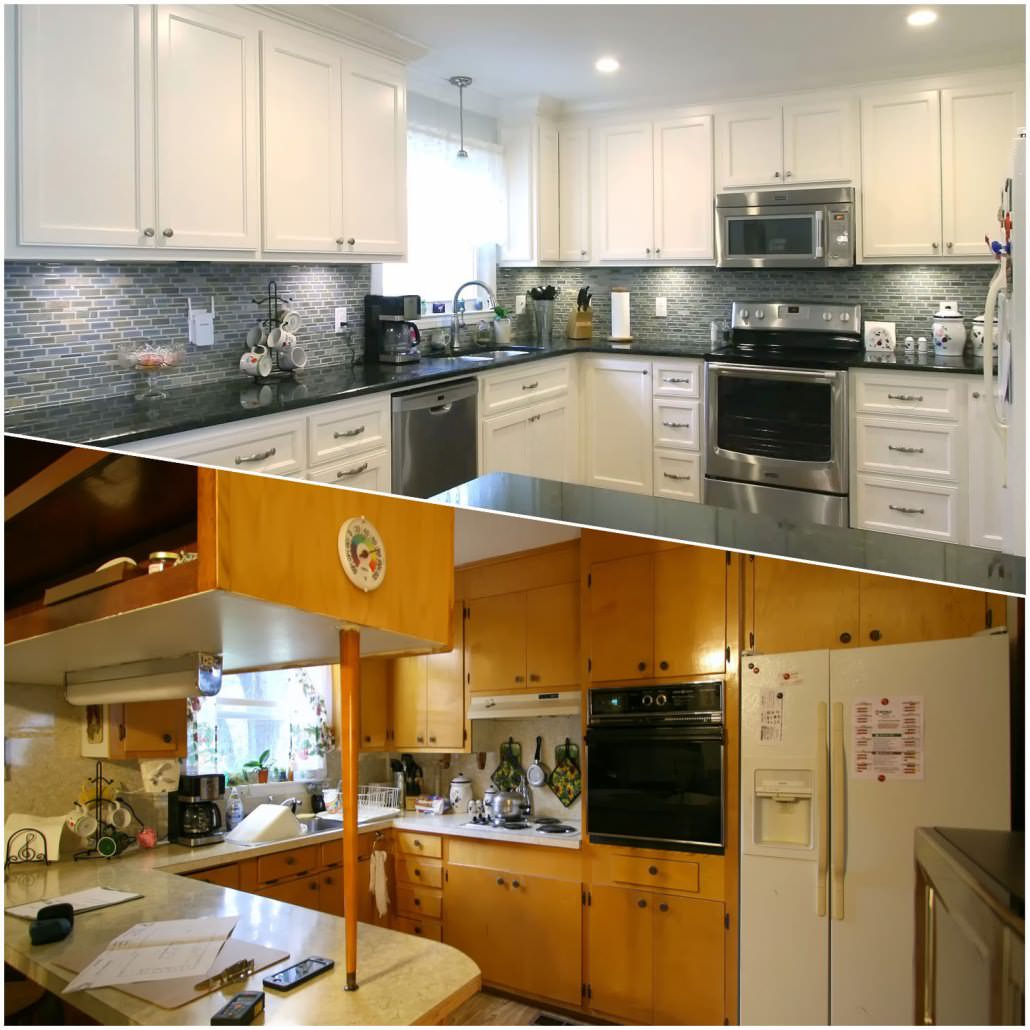
Walker Woodworking Before & After
Returning Home
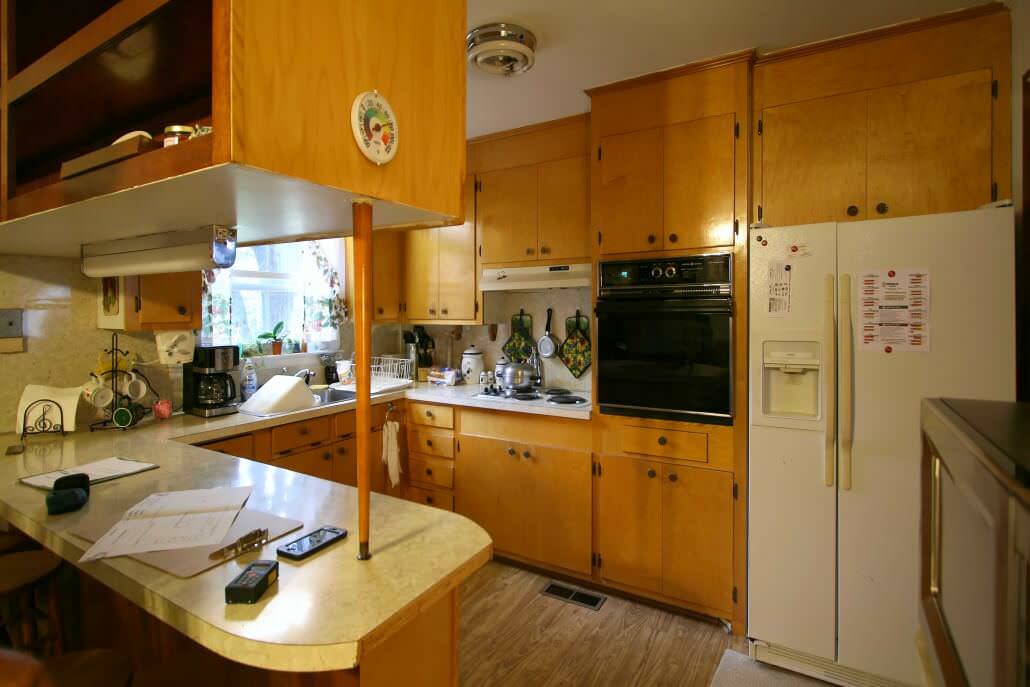
Sam’s family moved into this house in 1962 as its first owners. Over the years the home was remodeled several times. Multiple additions included adding a master bedroom, enclosing the carport to build a playroom, and adding a sunroom. Sam along with his brother Al and his sister Andrea grew up there. Many children through the years considered it their home while Sam’s mom ran a daycare until the mid 80’s.
Growing up in the home the formal living room was used only on special occasions or to take family photo. The 7 grandchildren considered this their second home and have fond memories of playing and being loved there.
After Sam’s mother’s death, his father continued to live in the house and host weekly Sunday Dinner for the family. After his dad’s death the house was vacant except for grandchildren sometimes living there.
Planning & Design:
In working with Tony Brooks, a plan was formed to open up the formal living room and convert to an open floor plan. The playroom was converted to a den for use during construction.
After a desire for the open floor plan was determined they met at Walker Woodworking with kitchen and bath designer, Brandon Fitzmorris, to complete the kitchen design. Brandon was able to plan out the space for optimized cooking and storage. Since this will be their forever home, they wanted to make the space as functional as possible. One of the design challenges was to achieve seating at the peninsula while still maintaining the feel of an open floor plan. We were able to accomplish this through team work with the general contractor by incorporating a pass through to the living room.
The process:
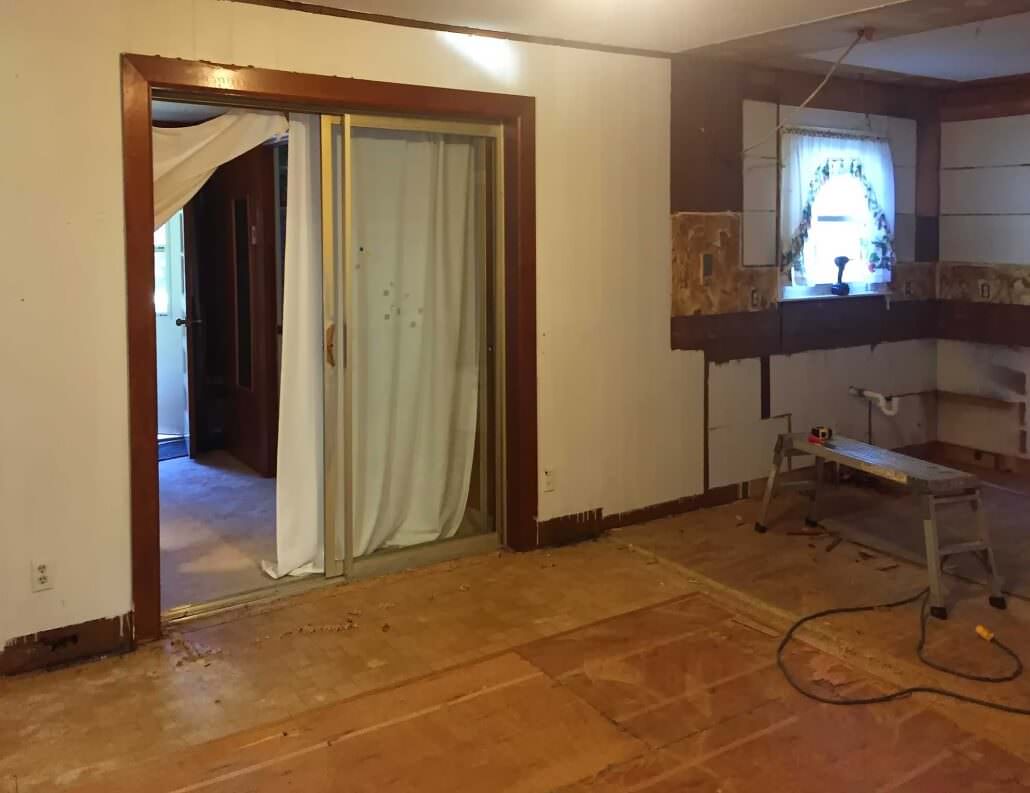
Demo – Demolition started and cabinets came out. Site prep was done by adding a protective floor covering to prevent damage and a dust barrier to the existing living space.
Before demo started
This double door was made into a single pocket door to add wall space for the kitchen area.
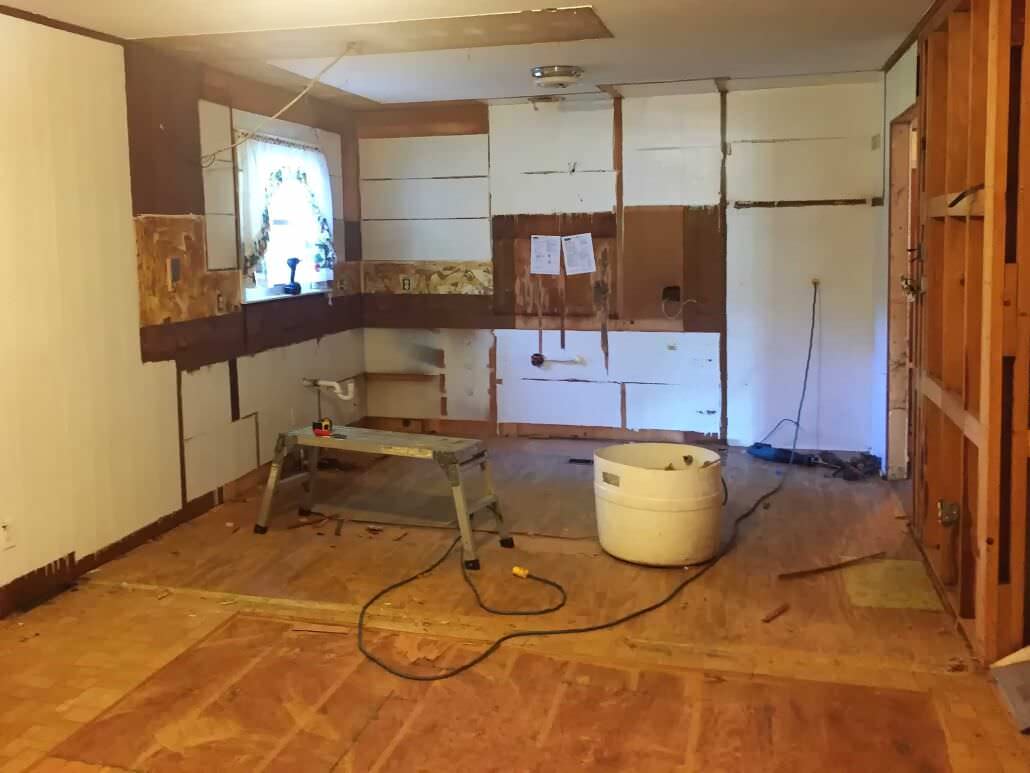
Walls that needed new sheet-rock & finish work after cabinets were removed.
Construction – A wall was removed and carpet from the living room came out. Hardwood was added to the kitchen and den and matched up to the existing hardwood in the living room, a treasure hidden beneath the carpet. The end result was seamless, there is nothing left of the previous wall separating the formal living room from the kitchen.

Kitchen wall and living room after the wall was removed and the header added.
Plumbing & Electrical – The next part of the process was to update plumbing & electrical. By using our preplanned CAD drawings, the subcontractors were able to quickly and efficiently make the necessary changes to the updated kitchen layout.
Sheetrock & Primary Painting – Sheetrock repair and primary painting is definitely an expectation with an extensive remodel like this one. The wall that needed to be removed was a load bearing wall. We had to build a header across the room and sheetrock that area.
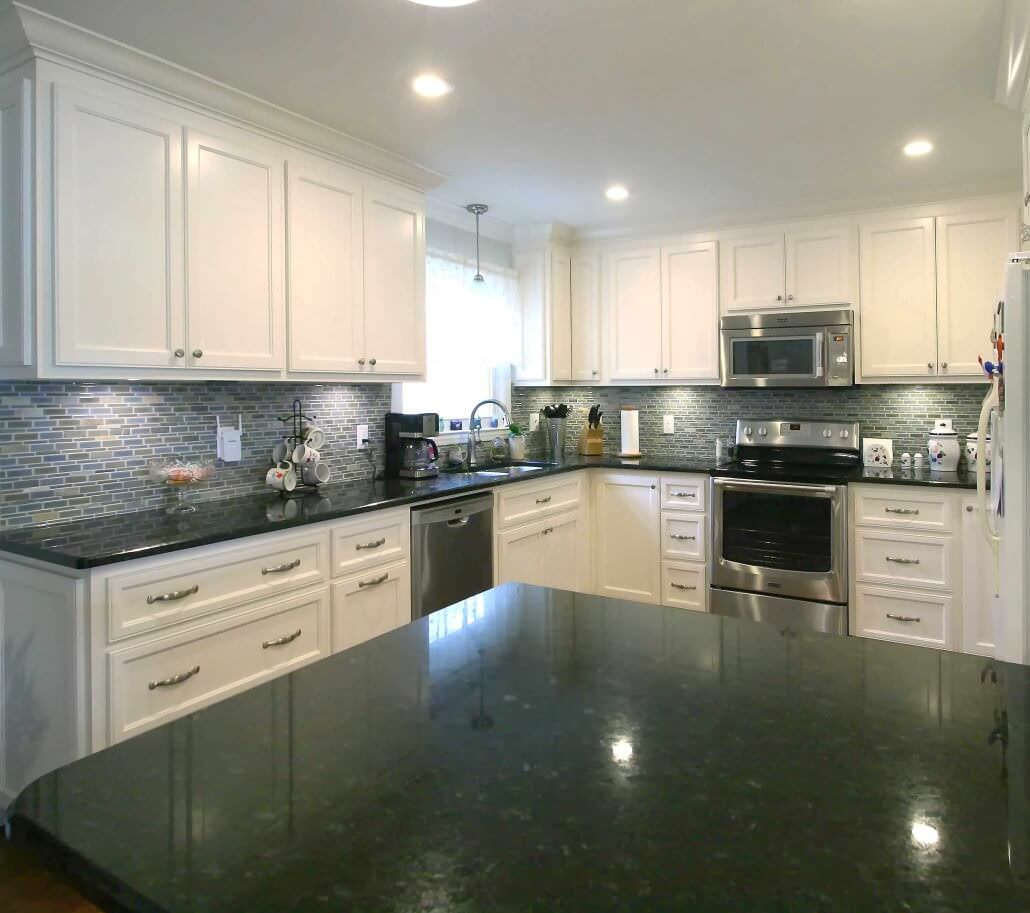
Cabinet Install – Usually a 2 day process for a kitchen similar to this one. Our trucks show up full of cabinets, already assembled including the decorative hardware. One of the things that we do differently than most companies is to apply the toe kicks after the floors are finished. In most cases this eliminates the need for shoe-moulding. This will give the cabinets more of a finished furniture style.

Walker Woodworking – Cabinetry Install
Counter-tops – Typically counter-tops are ready for the template after the cabinets are installed. Once the template has been done, it will typically take 1 to 2 weeks before the tops are ready to install. Each fabricator is different. Granite can be installed in a kitchen like this usually in half a day.
Appliances – In most situations appliances will go in after the counter-tops. Every project is unique and having professionals that realize the importance of when certain things should happen is important for a smooth remodel. This will also help to ensure that cabinets, flooring and counter-tops are not damaged during the process.
The Finishing Touches – The last few things that need to be done include the tile back splash, final coat of paint, and the final sanding & finishing of the floors.
Be sure you see all of the before & after photo’s in our Before & After Photo Gallery.
“Both Tony and the team at Walker Woodworking held our hand through the process, which at some times was emotional because of the changes being made to the family home. The end result was more than we could have ever dreamed possible.The remodel was completed in time for us to continue family traditions of Thanksgiving & Christmas in the home.” ~ Kim Davis

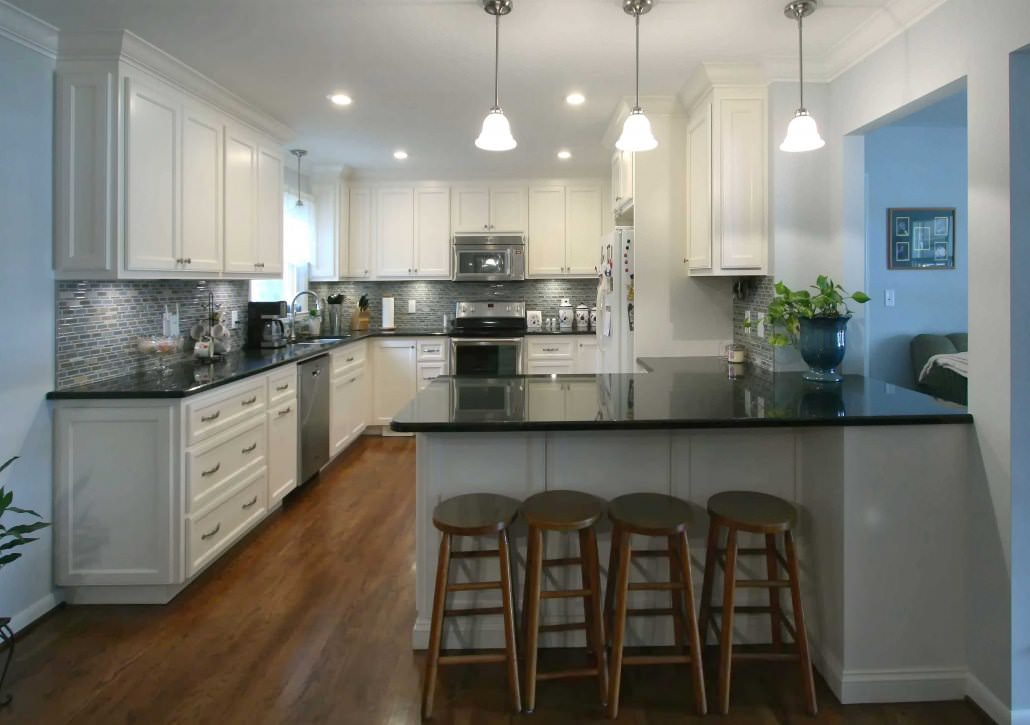
The open space was once a wall that extended the entire length of the room.
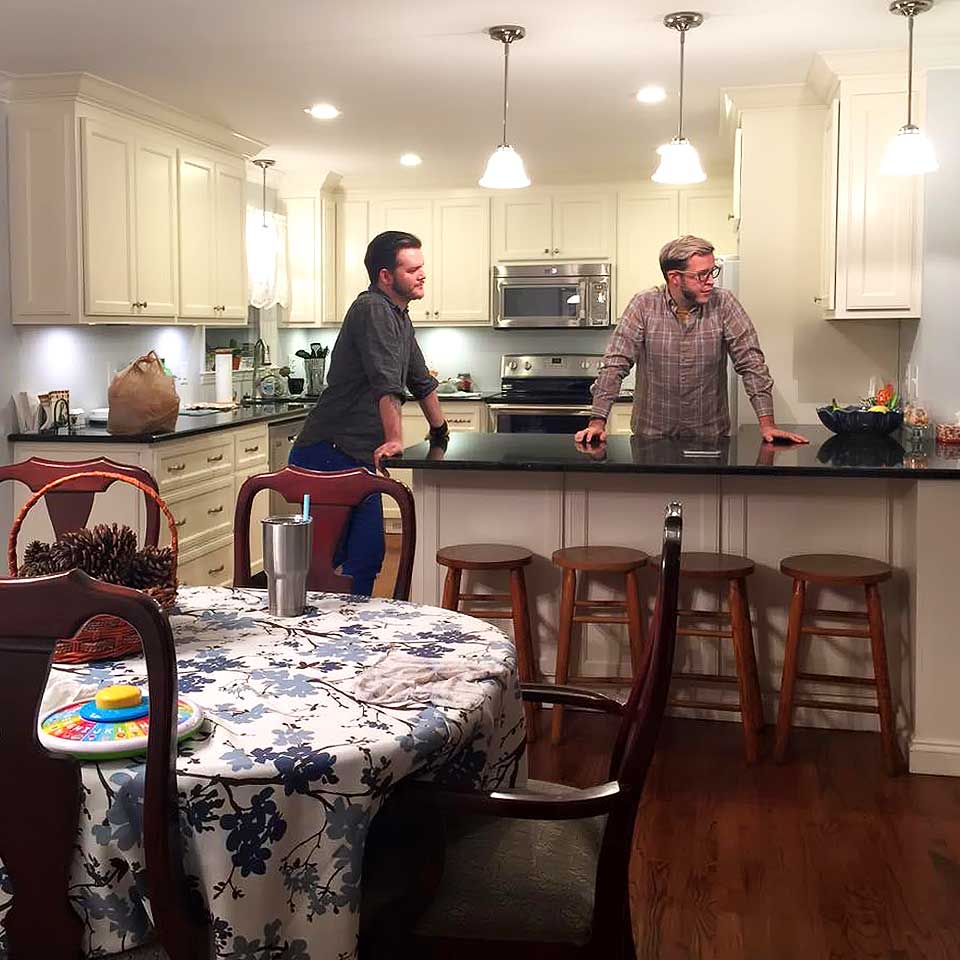
These guys can still see whats going on the living room.

This home will be enjoyed for many years & future generations to come.
We would like to thank Sam & Kim for allowing us to share their story. Follow this link to see the complete before & after photo gallery.


