Posts

Greenbrook Design Center

***Latest  Post Update 8/21/2018

CHECK OUT OUR NEW SHOWROOM!

***Latest  Post Update 10/30/2017

WE ARE MOVED-IN AT THE DESIGN CENTER!

WE ARE EXCITED TO SHARE WITH YOU OUR

DECISIONS, DETAILS, & DESIGN IDEAS!

OPENING FALL 2017 TO UPTOWN SHELBY!

GREENBROOK DESIGN, KITCHEN & BATH HOME DESIGN CENTER

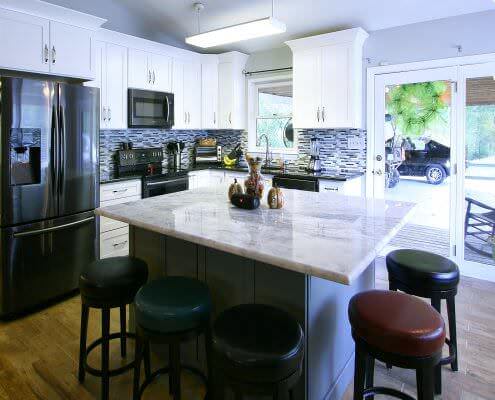
Inside the Design Center, you will find a unique one-of-a-kind showroom. The kitchen and bath home design center will be sure to appeal to homeowners, interior designers as well as contractors. Plan to be intrigued and watch us GROW in Uptown Shelby.

We are excited to be under construction! Stay up-to-date with what’s happening as we share more details on this page! 

OUR JOURNEY TO UPTOWN SHELBY

Location Address: 112-1 North Lafayette St. Shelby NC 28150

Construction has officially started! This is formally known as part of the Campbell building.

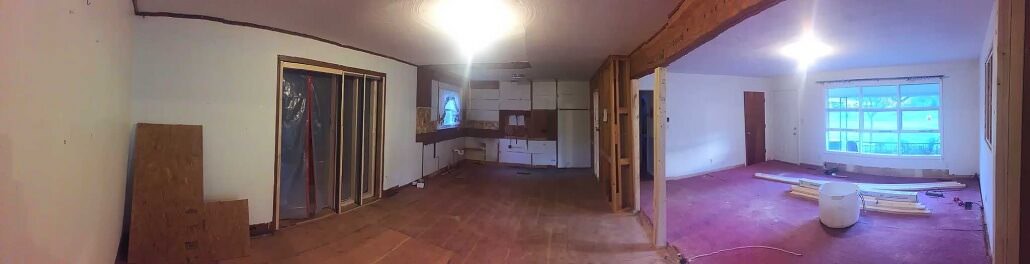
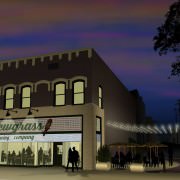
Here is a sidewalk view (before) of the Design Center. We have great plans in the works.

Storefront prior to construction.

Update 10/30/2017

AND WE MOVED IN!

It’s been a busy few weeks. Before during and after moving is a big job. For this update, I am adding just photo’s be sure to read the captions for details.

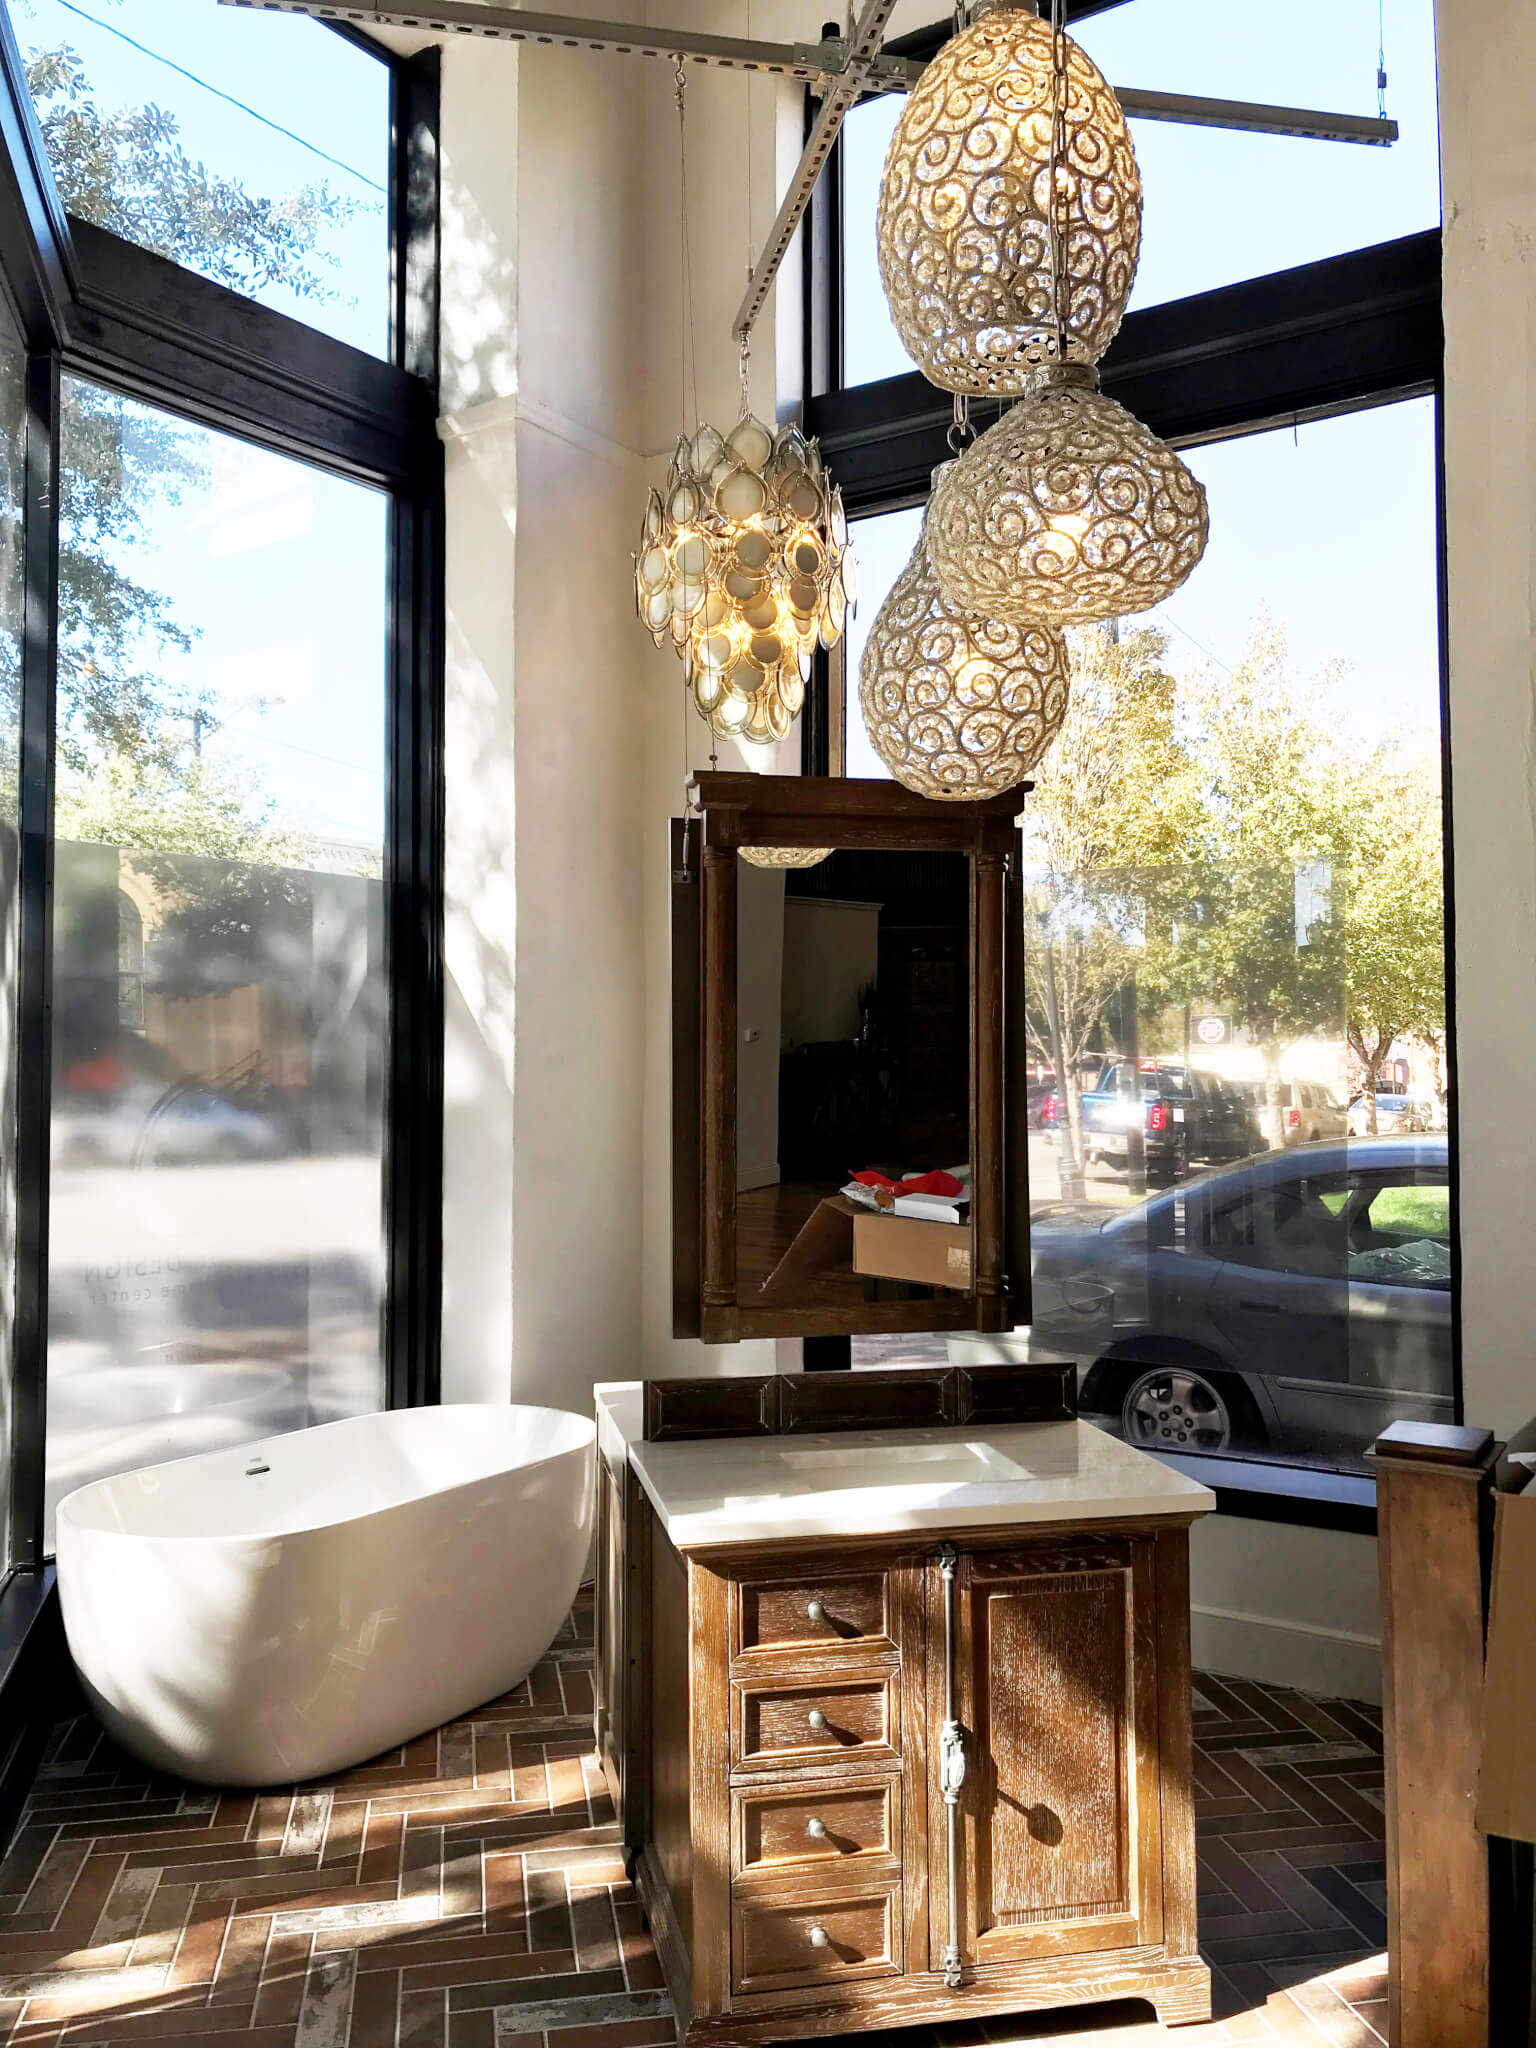
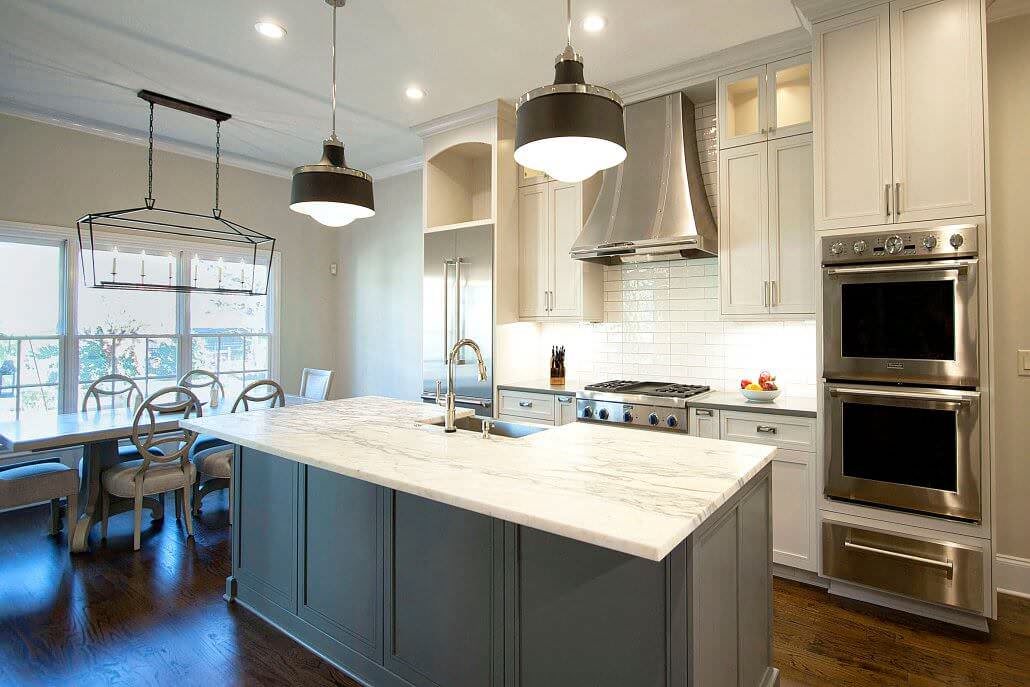
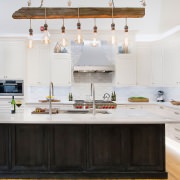
Featured lighting & James Martin Vanities!

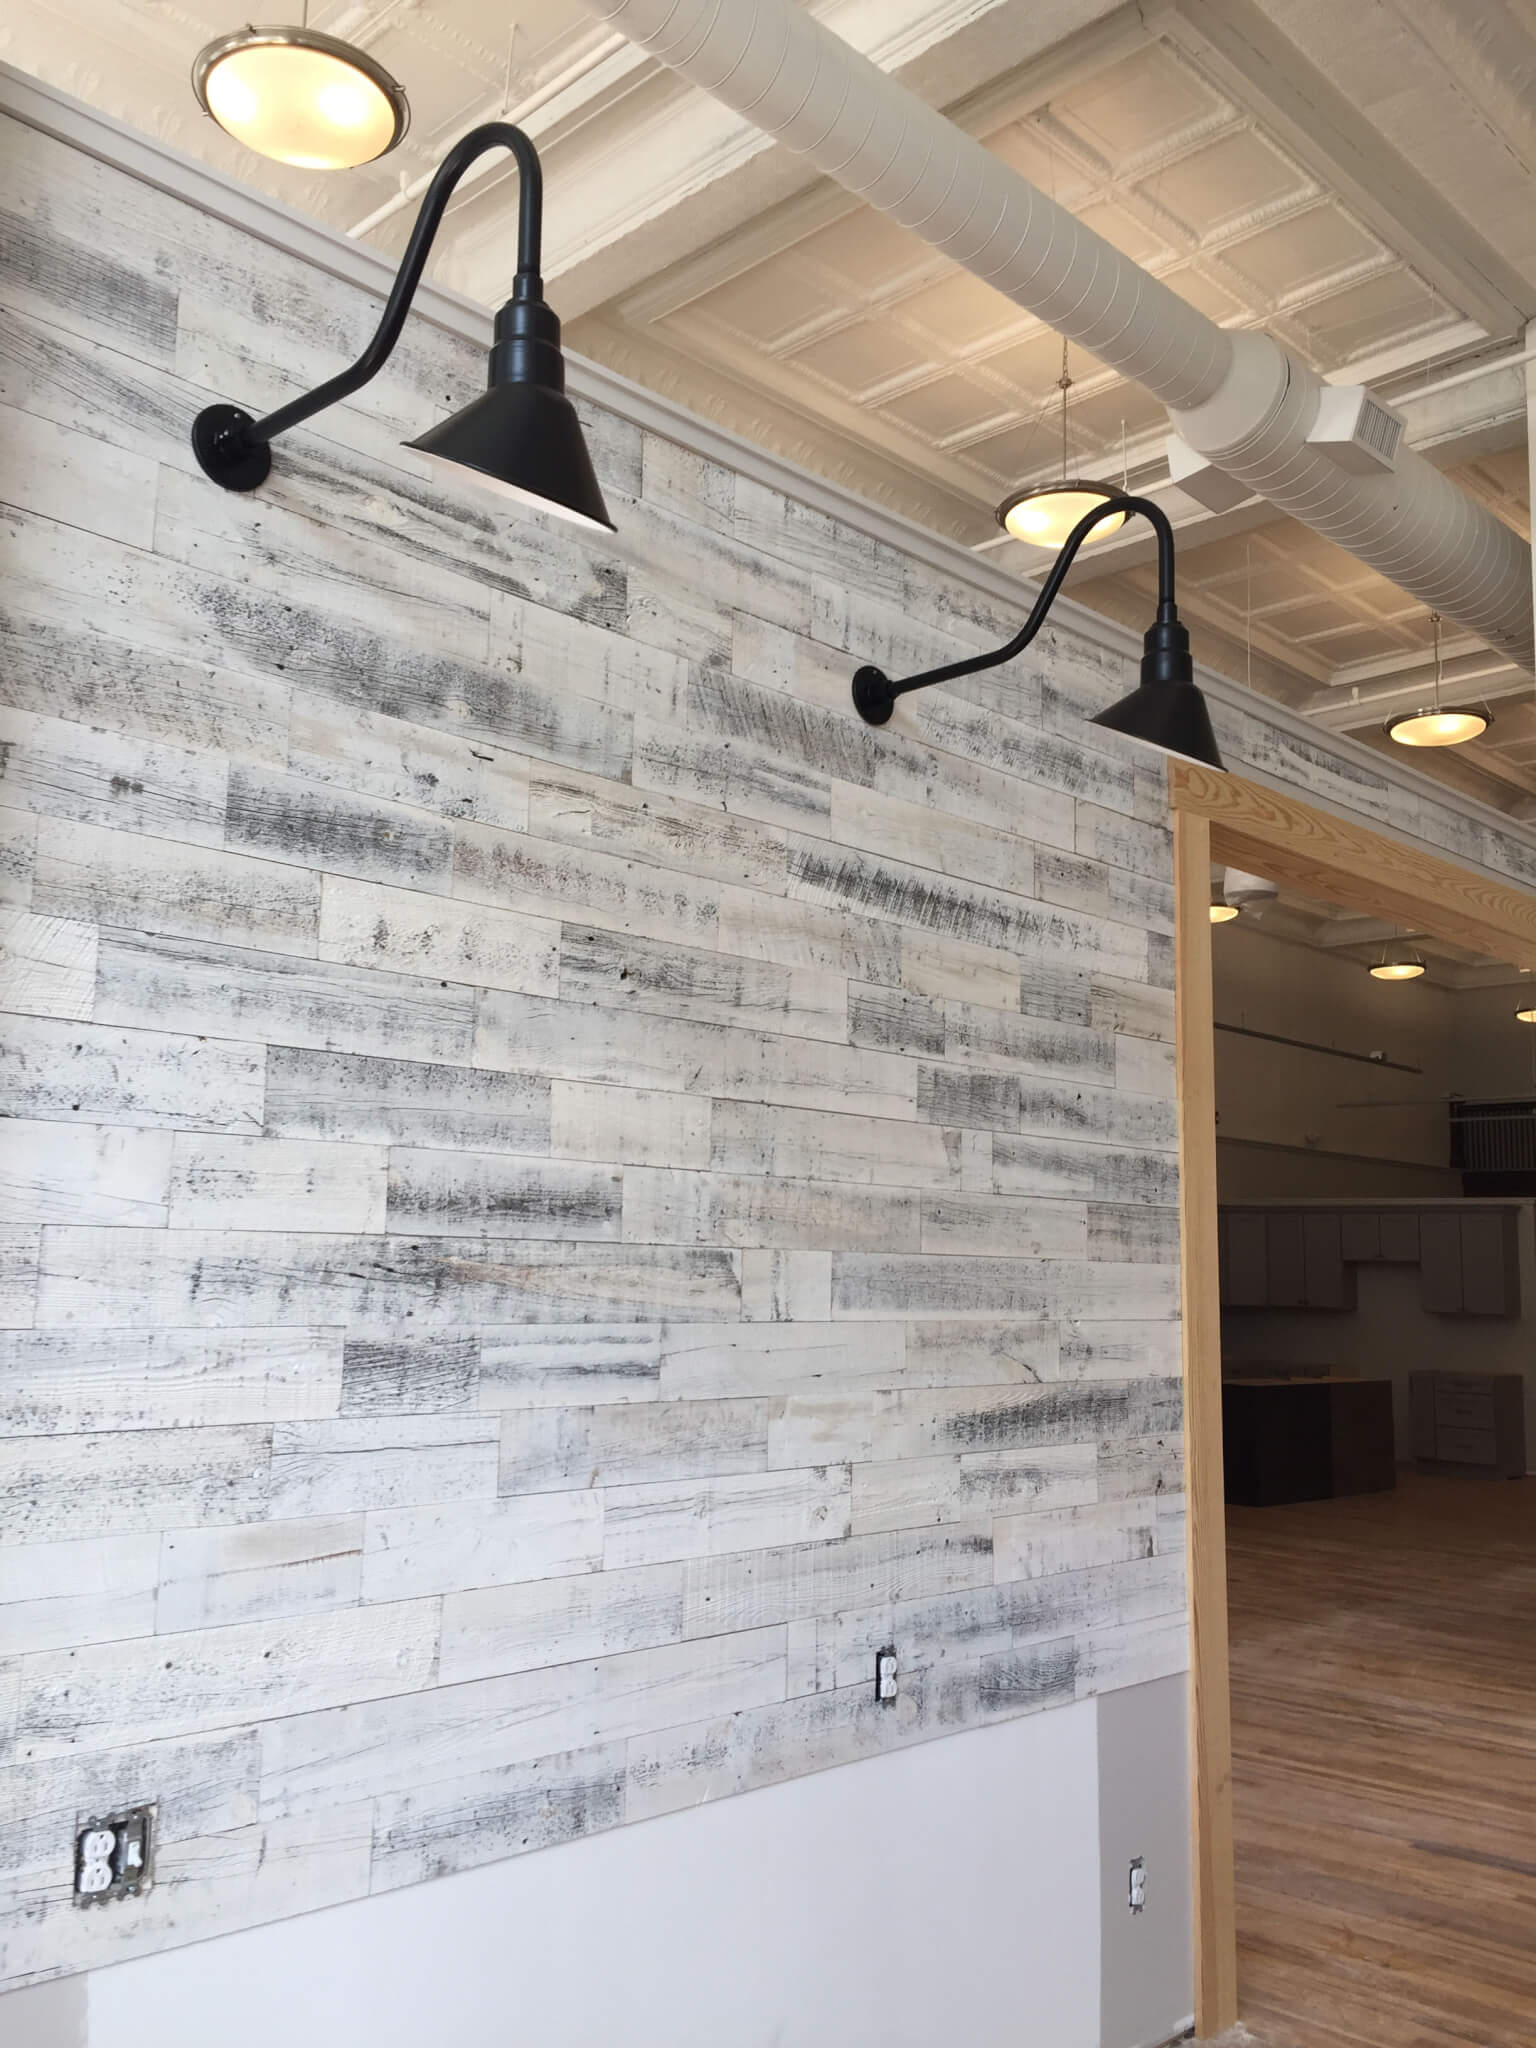
Stickwood installed!

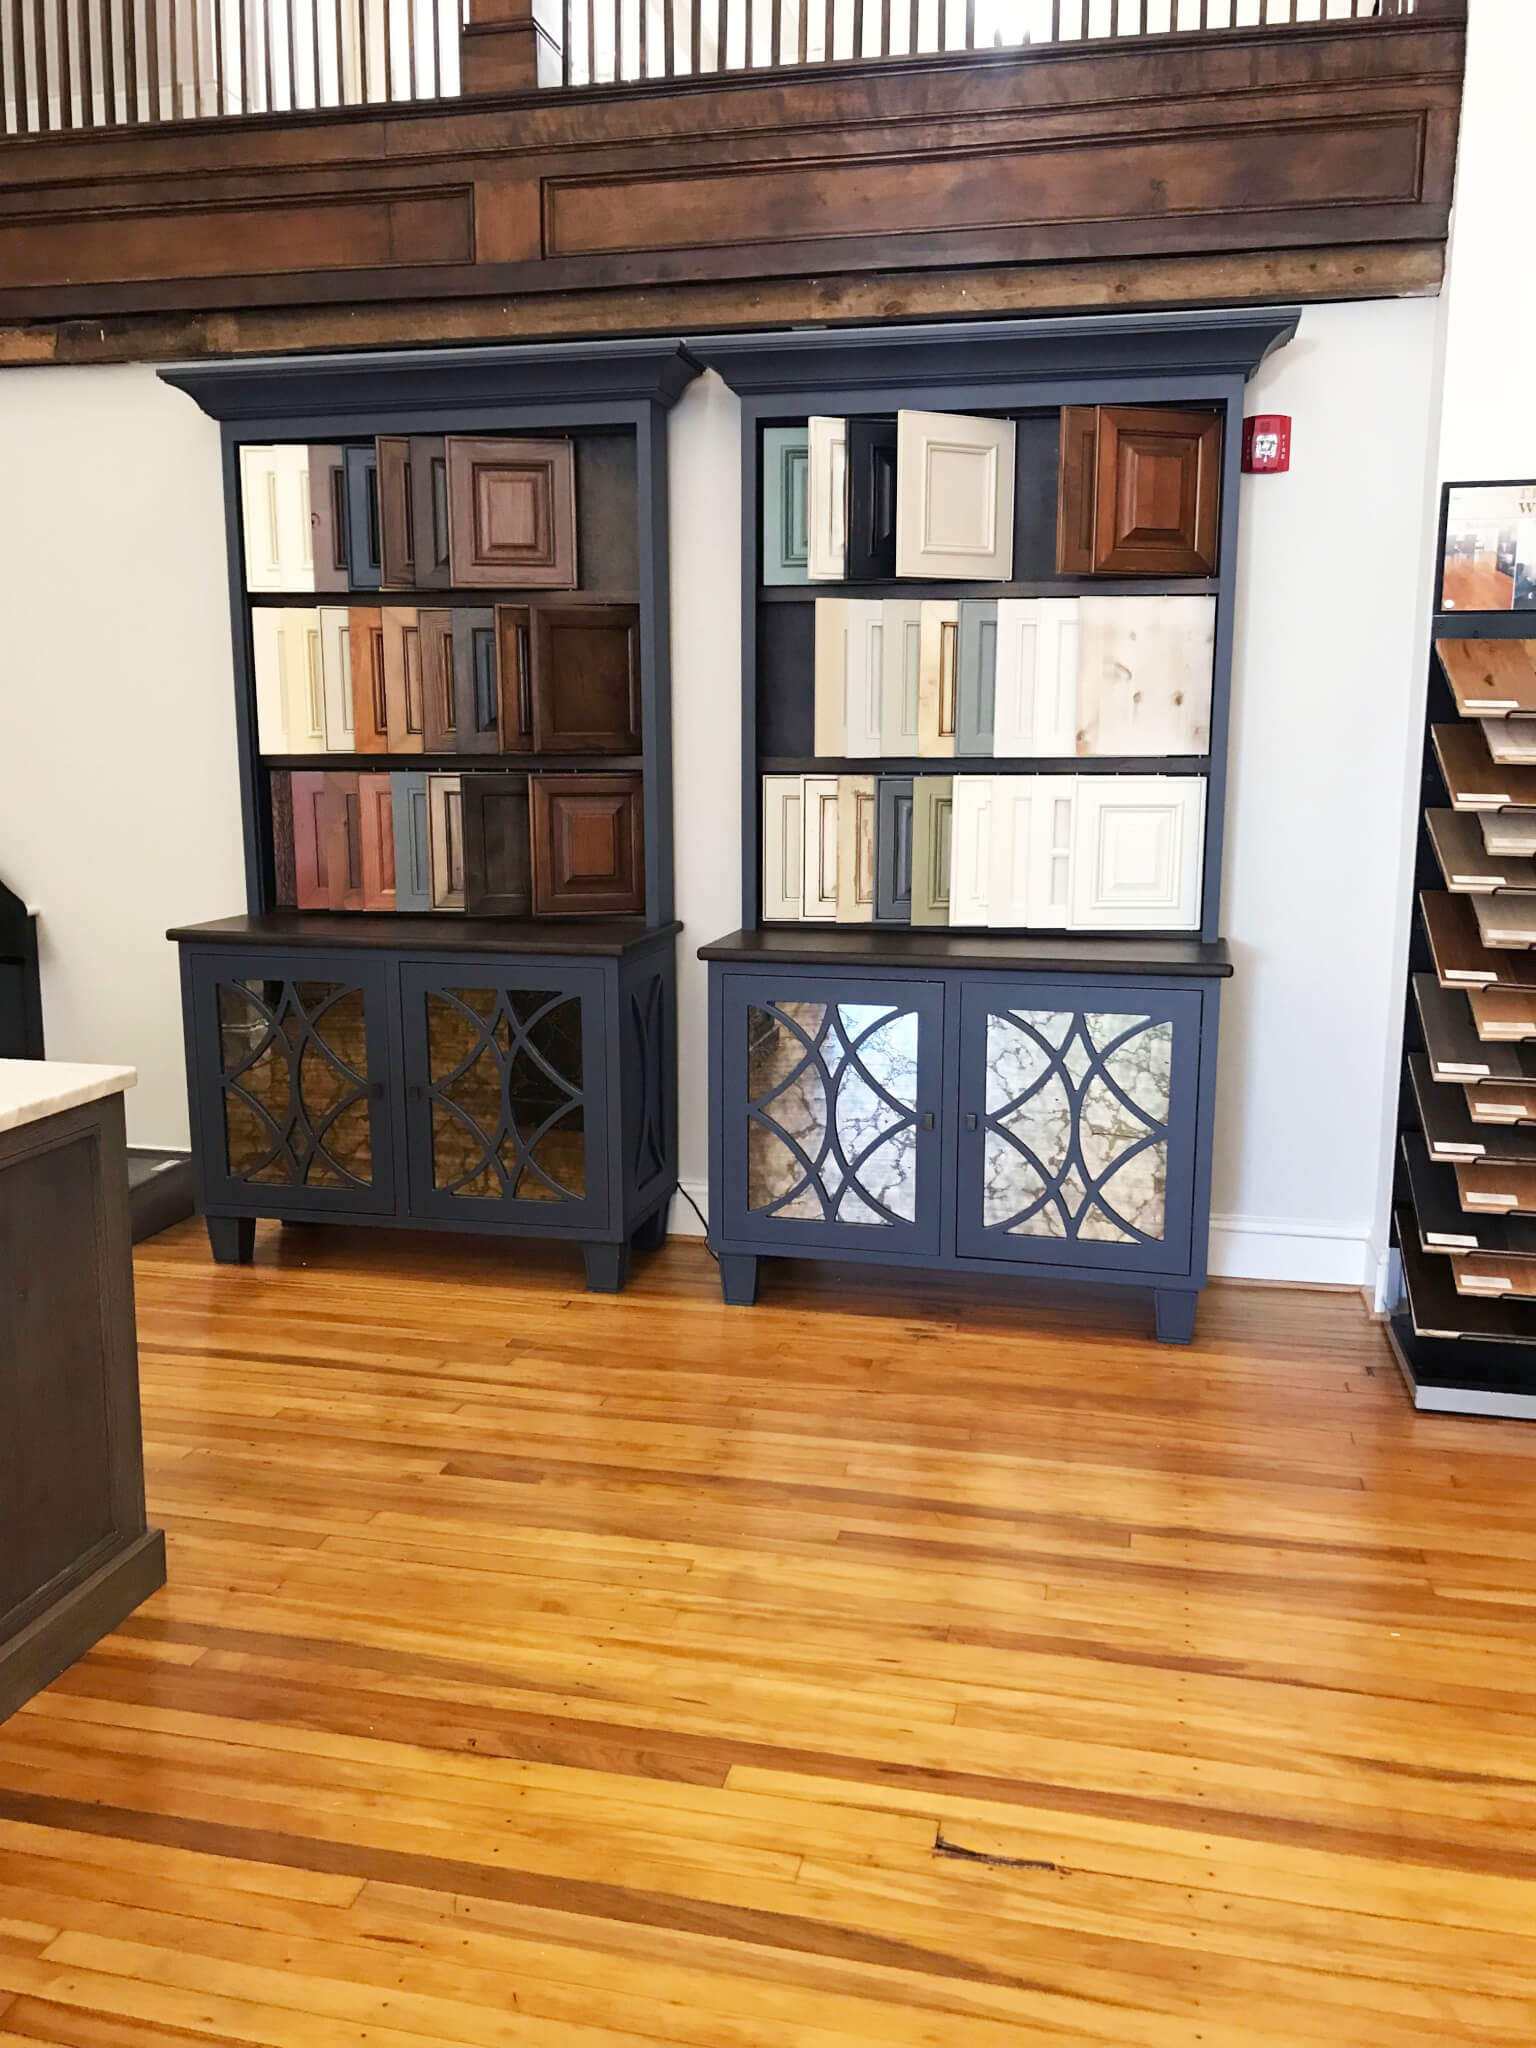
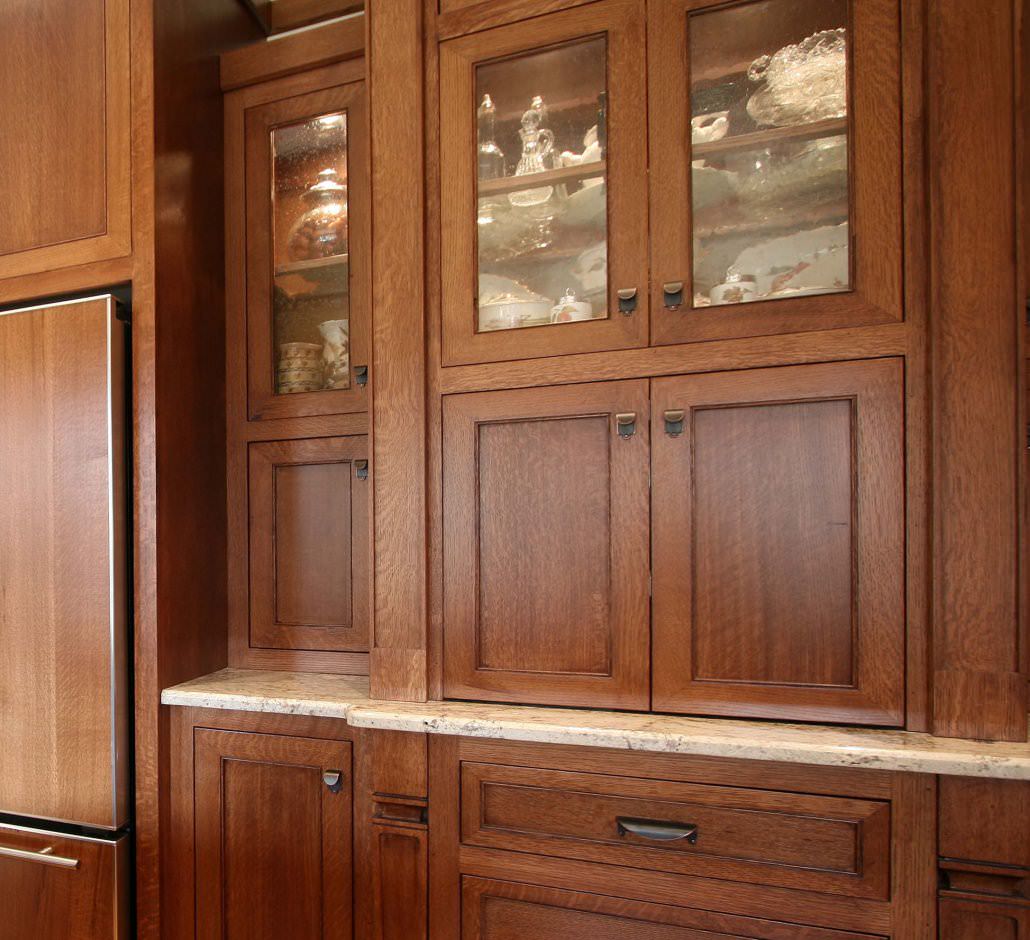
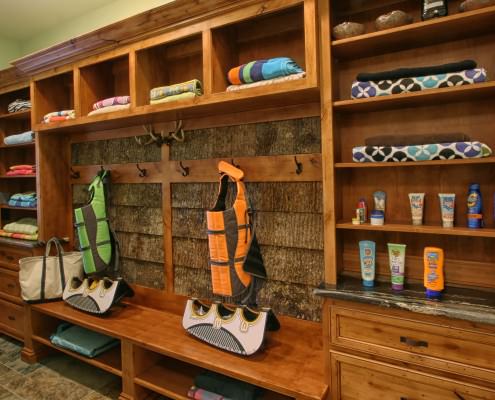
Walker Woodworking door display.

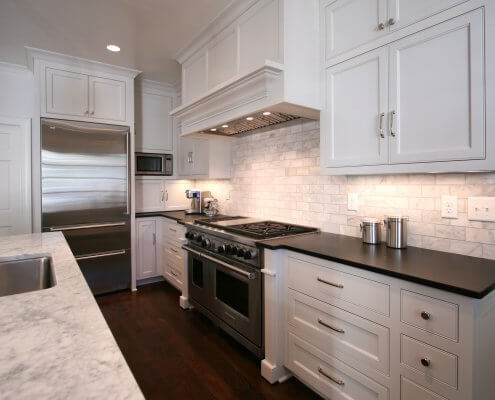
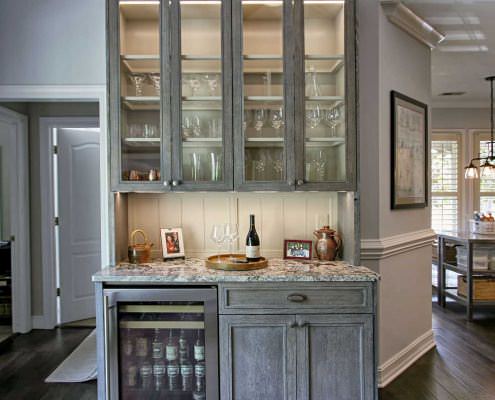
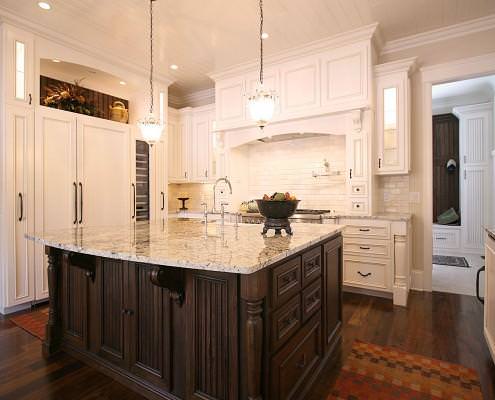
Wellborn display in progress, of course, we still need a backsplash, appliances & lighting!

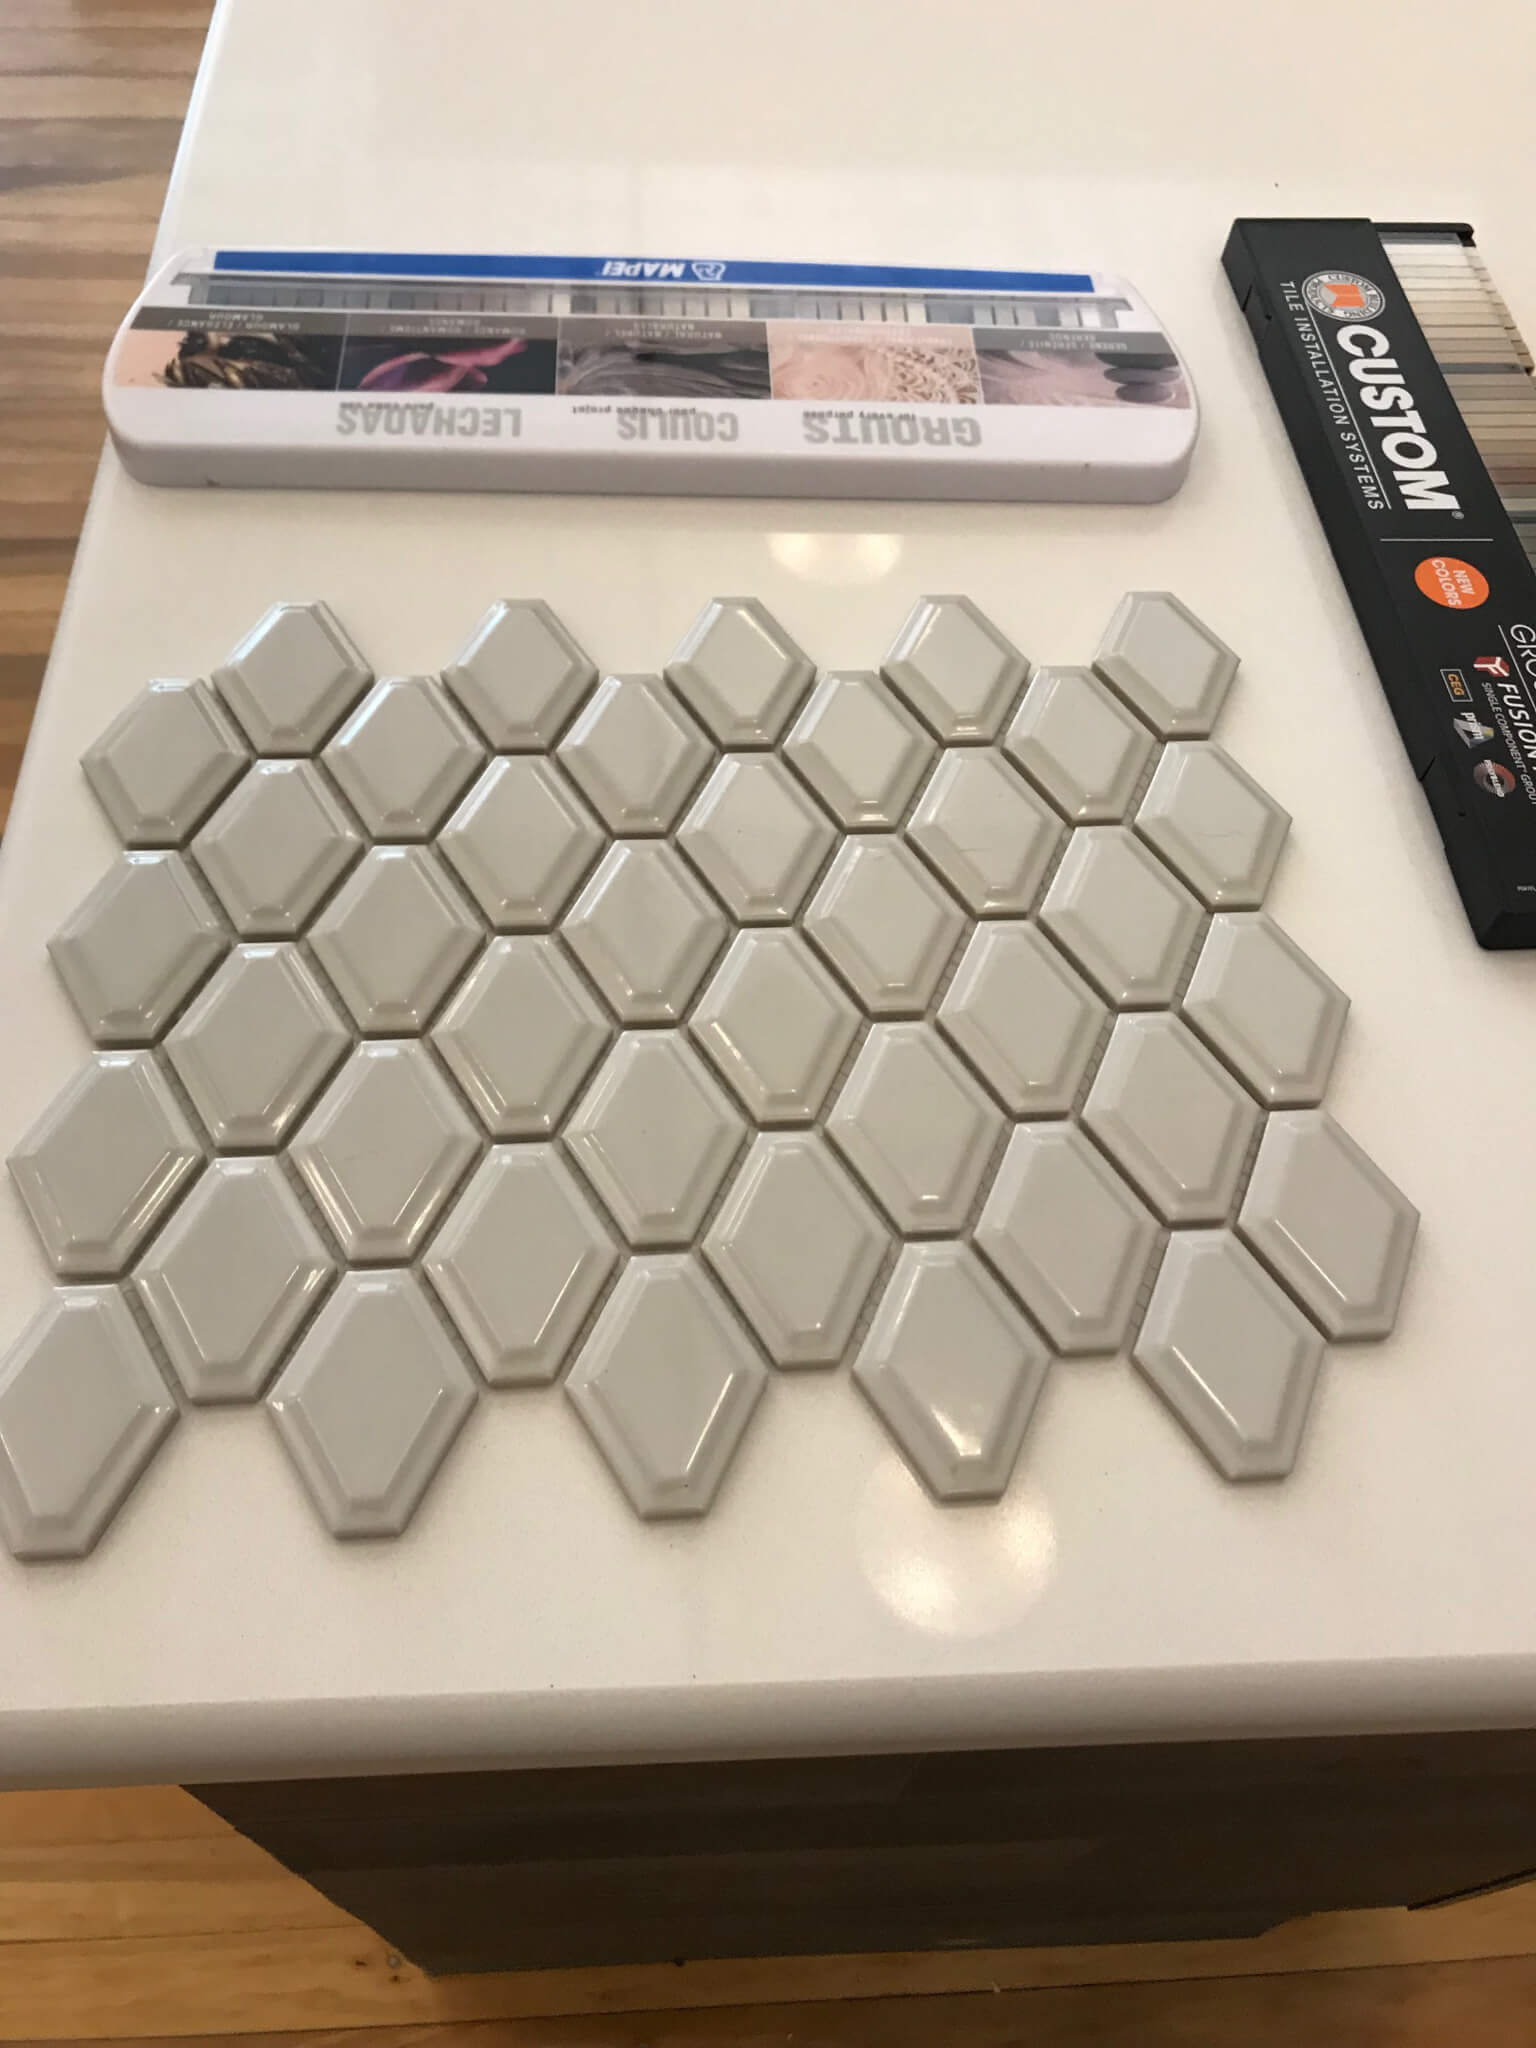
This backsplash is going somewhere…

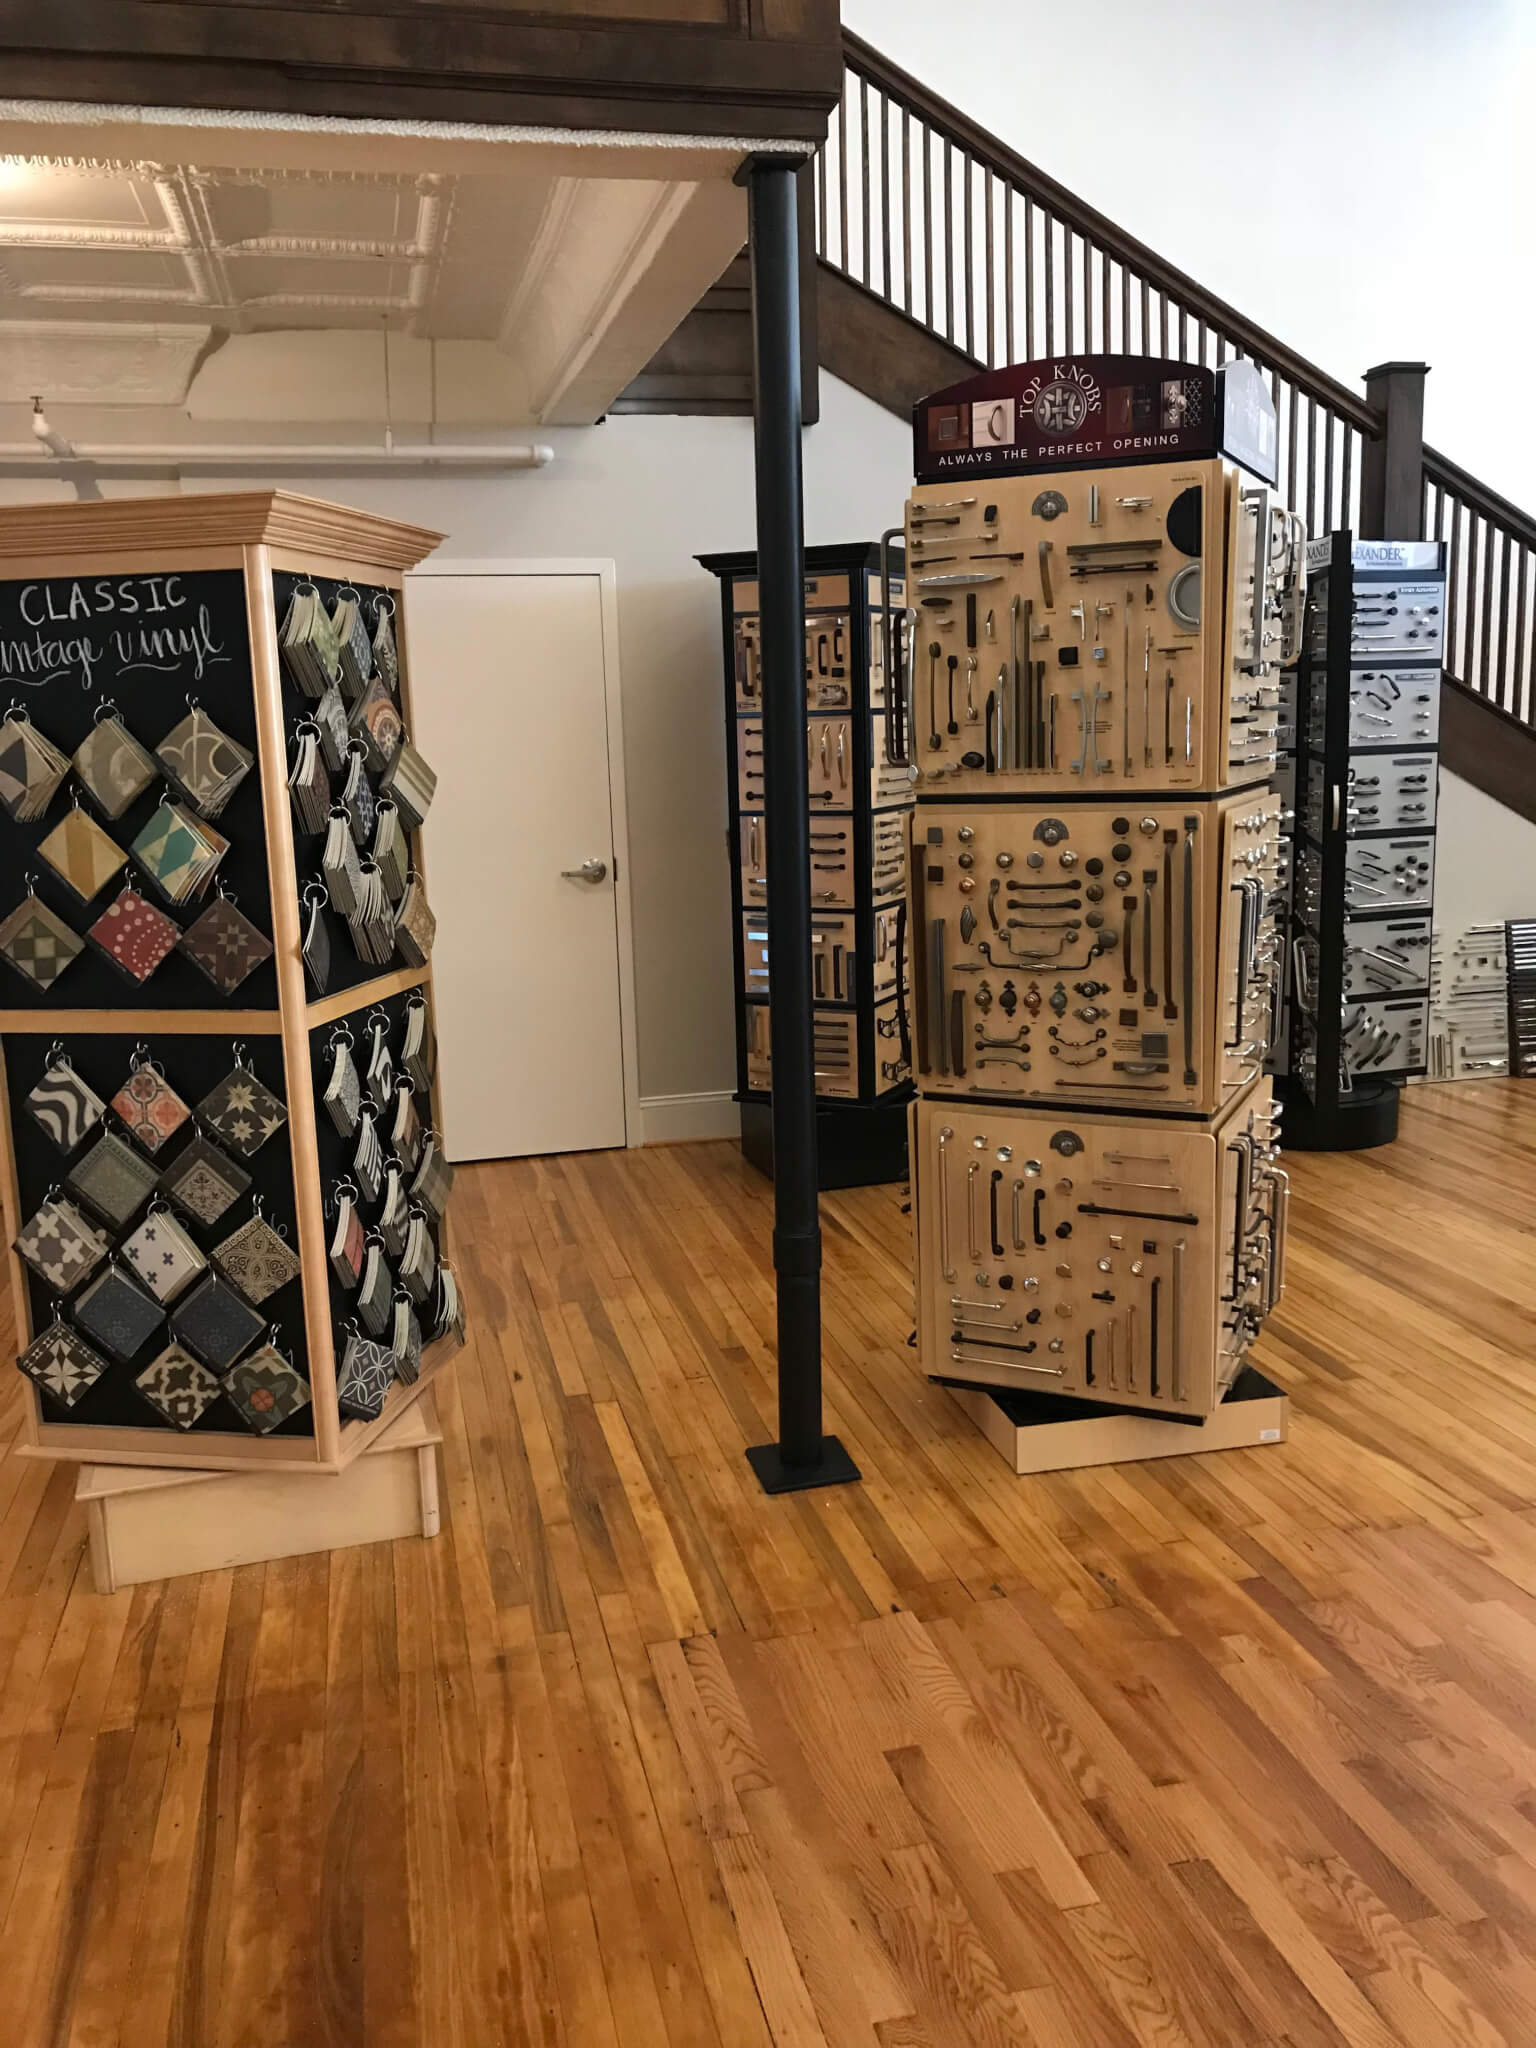
Hardware towers and more.

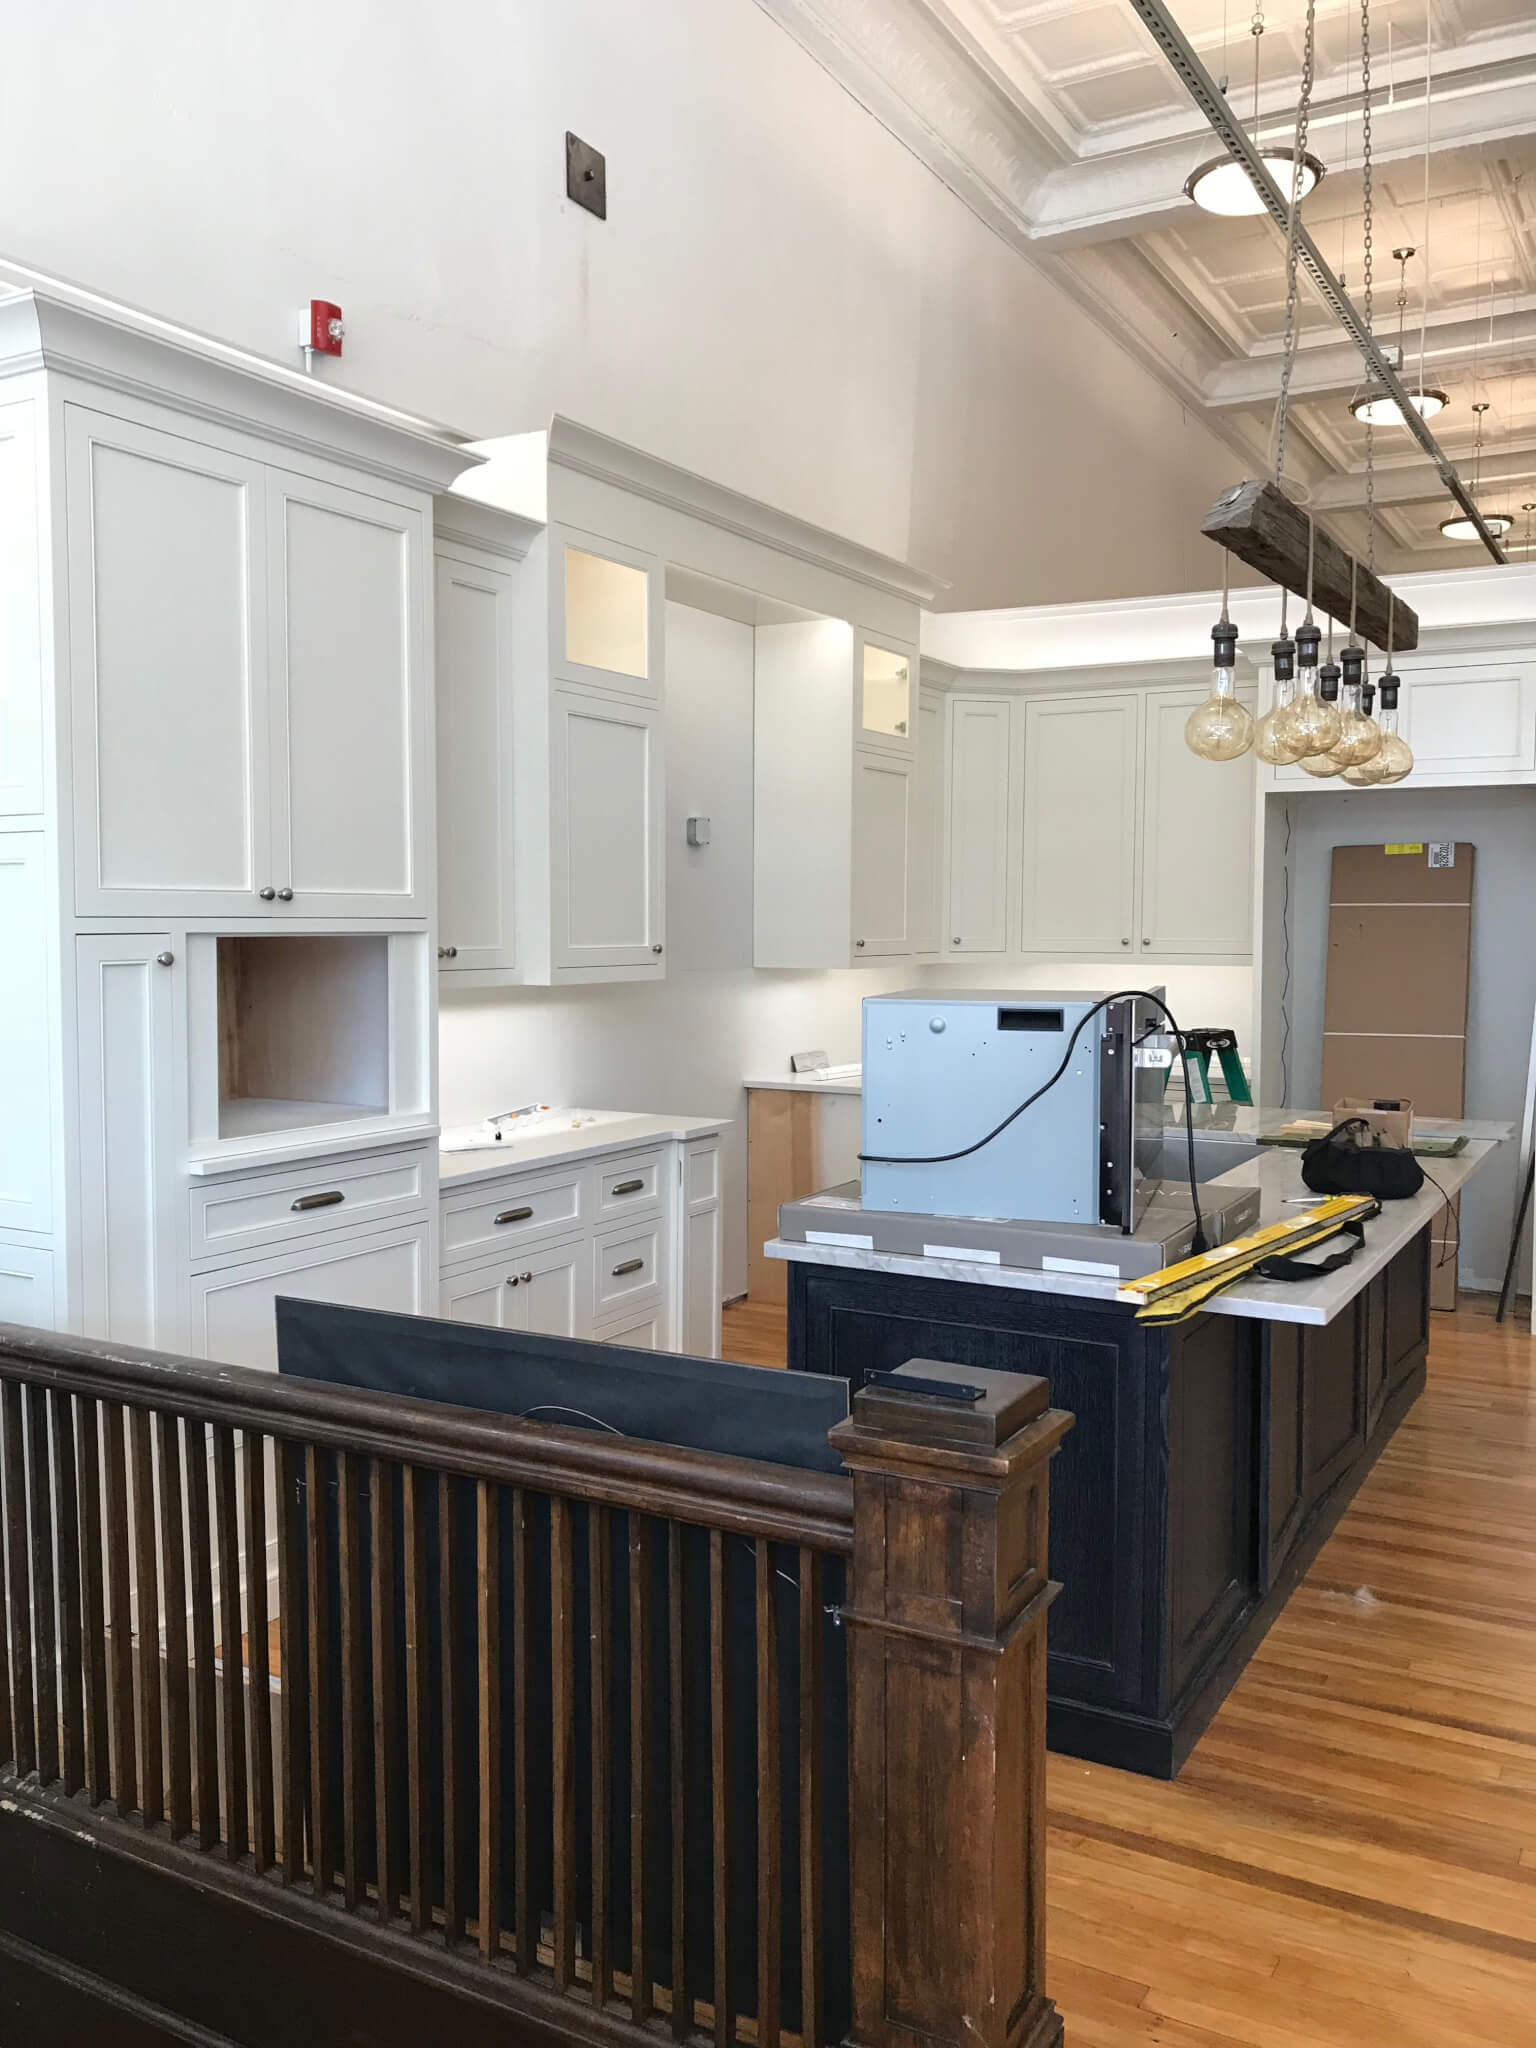
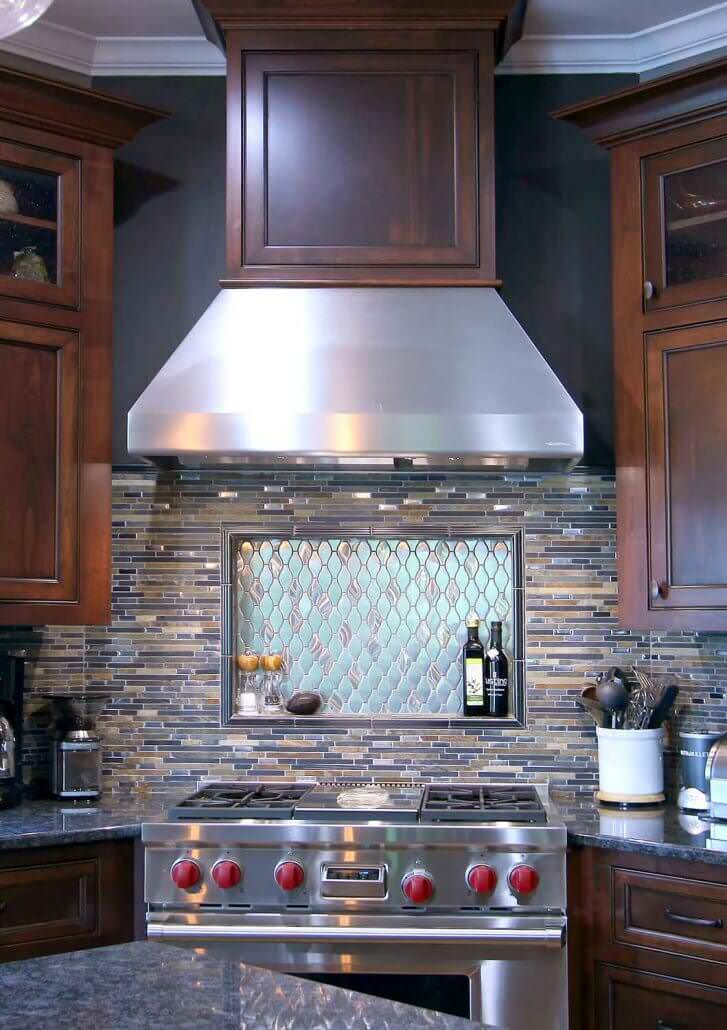
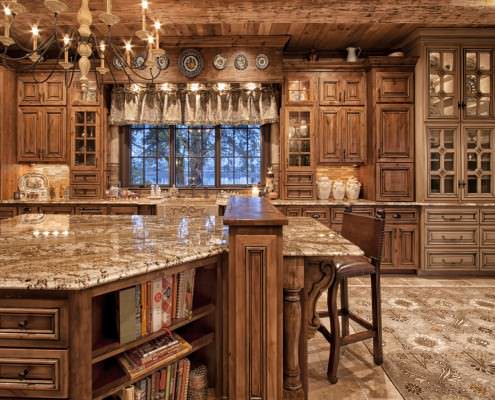
Our Walker Woodworking Display! In progress, appliance install underway!

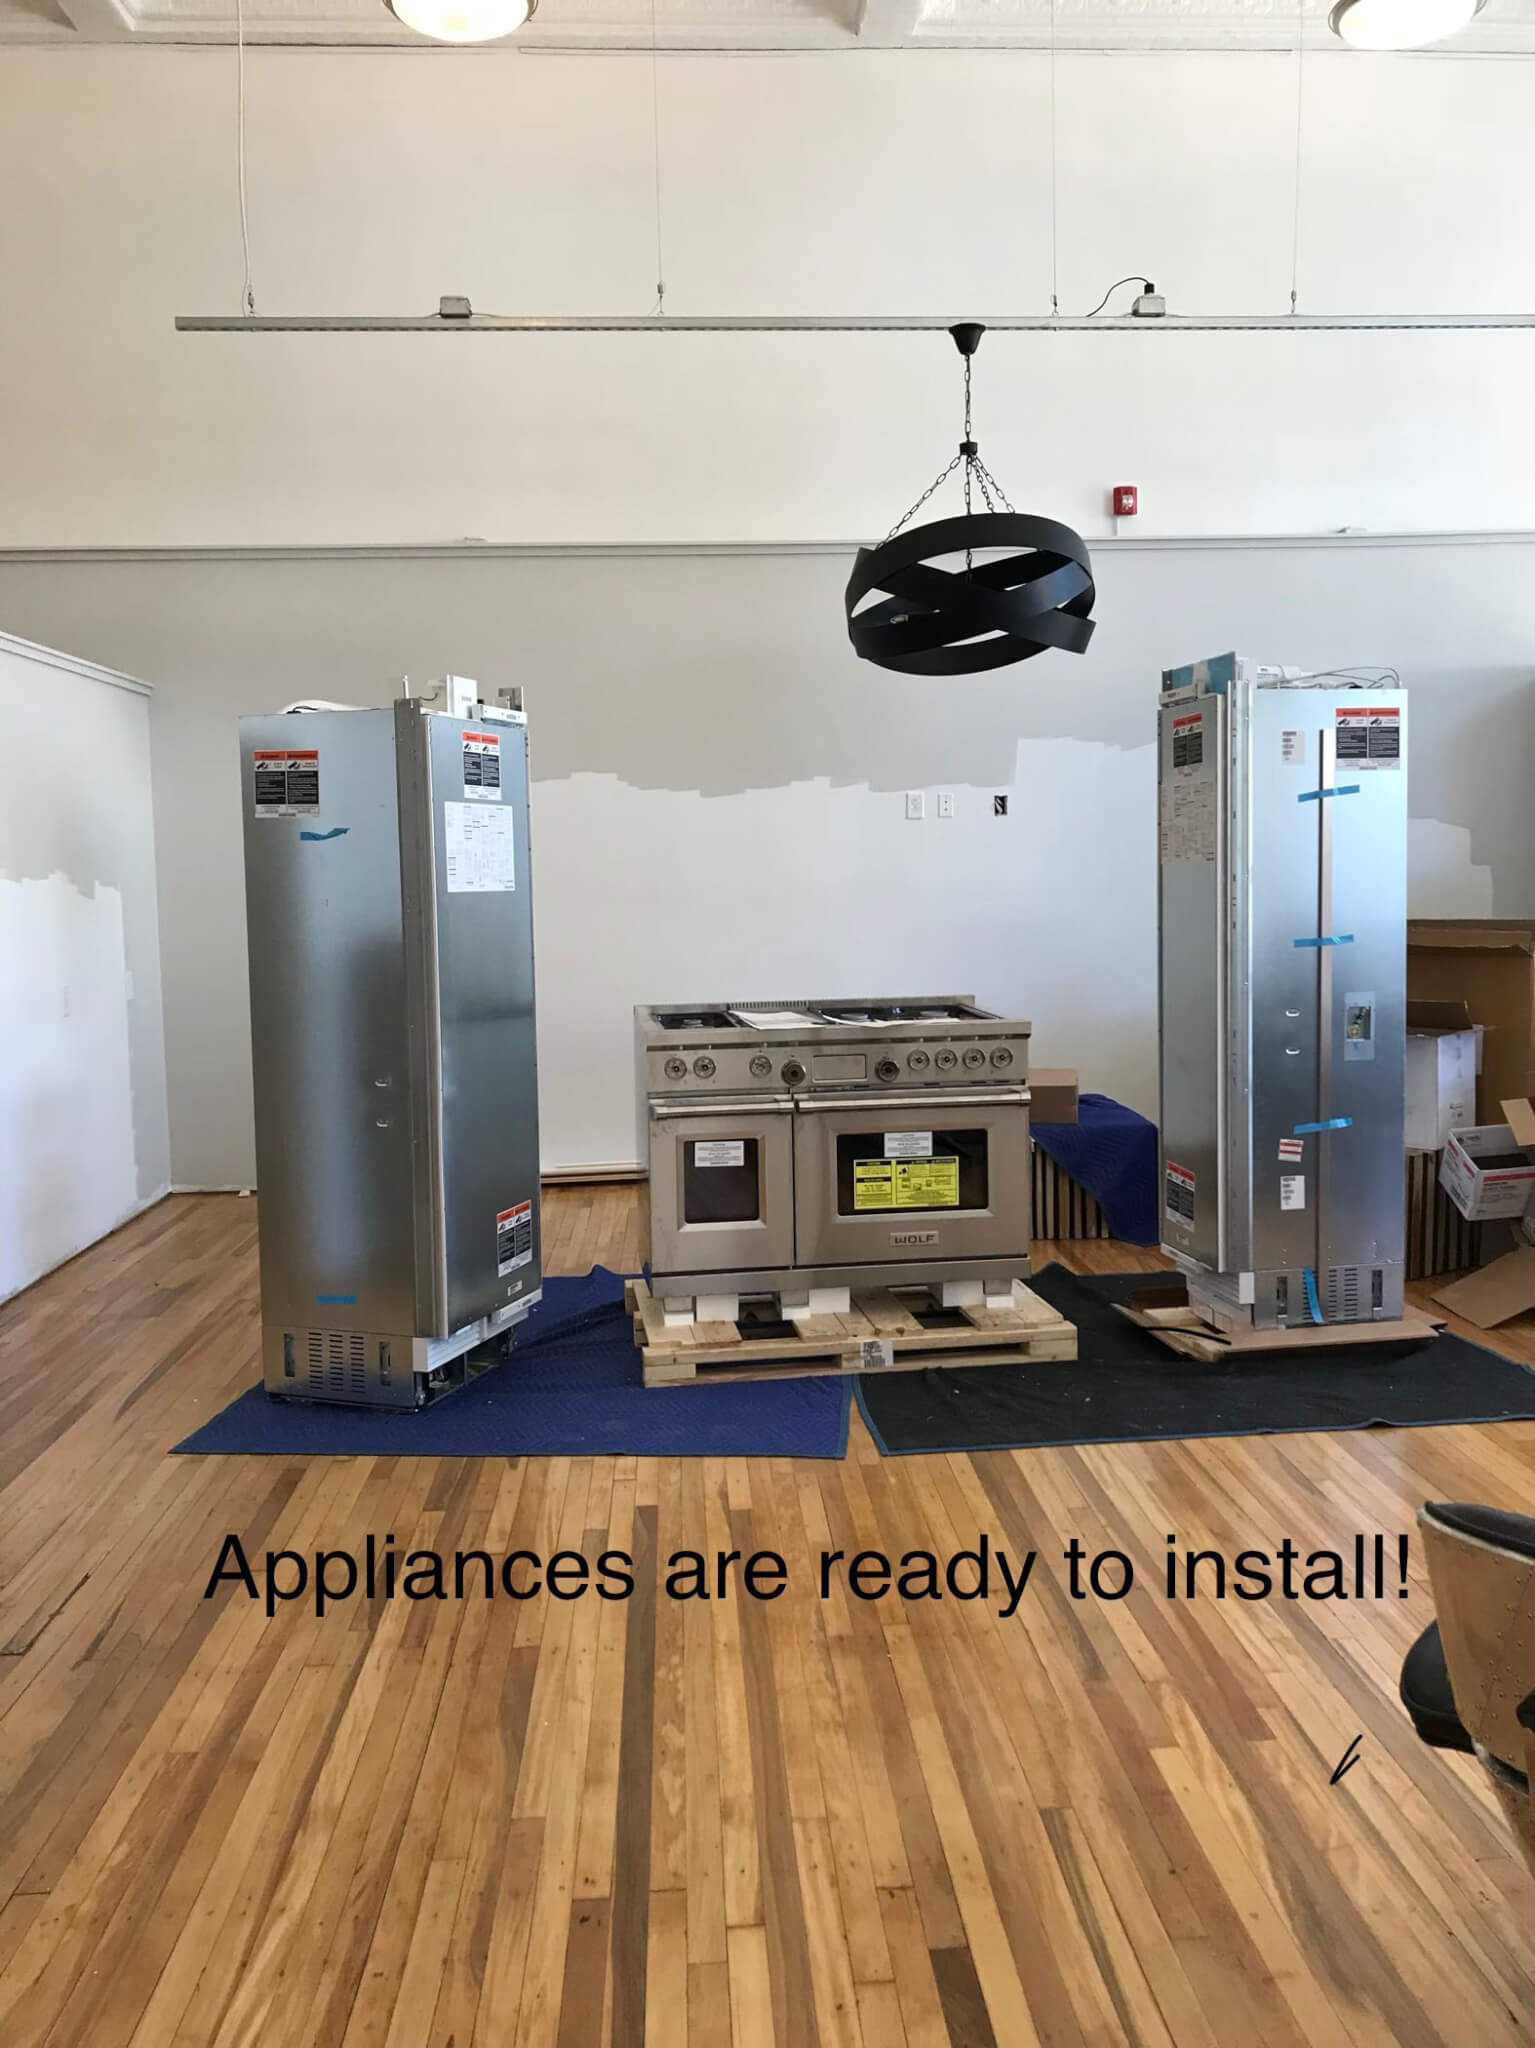
Subzero appliances on standby for install. This will be for our Walker Woodworking kitchen where we will be hosting live cooking demonstrations.

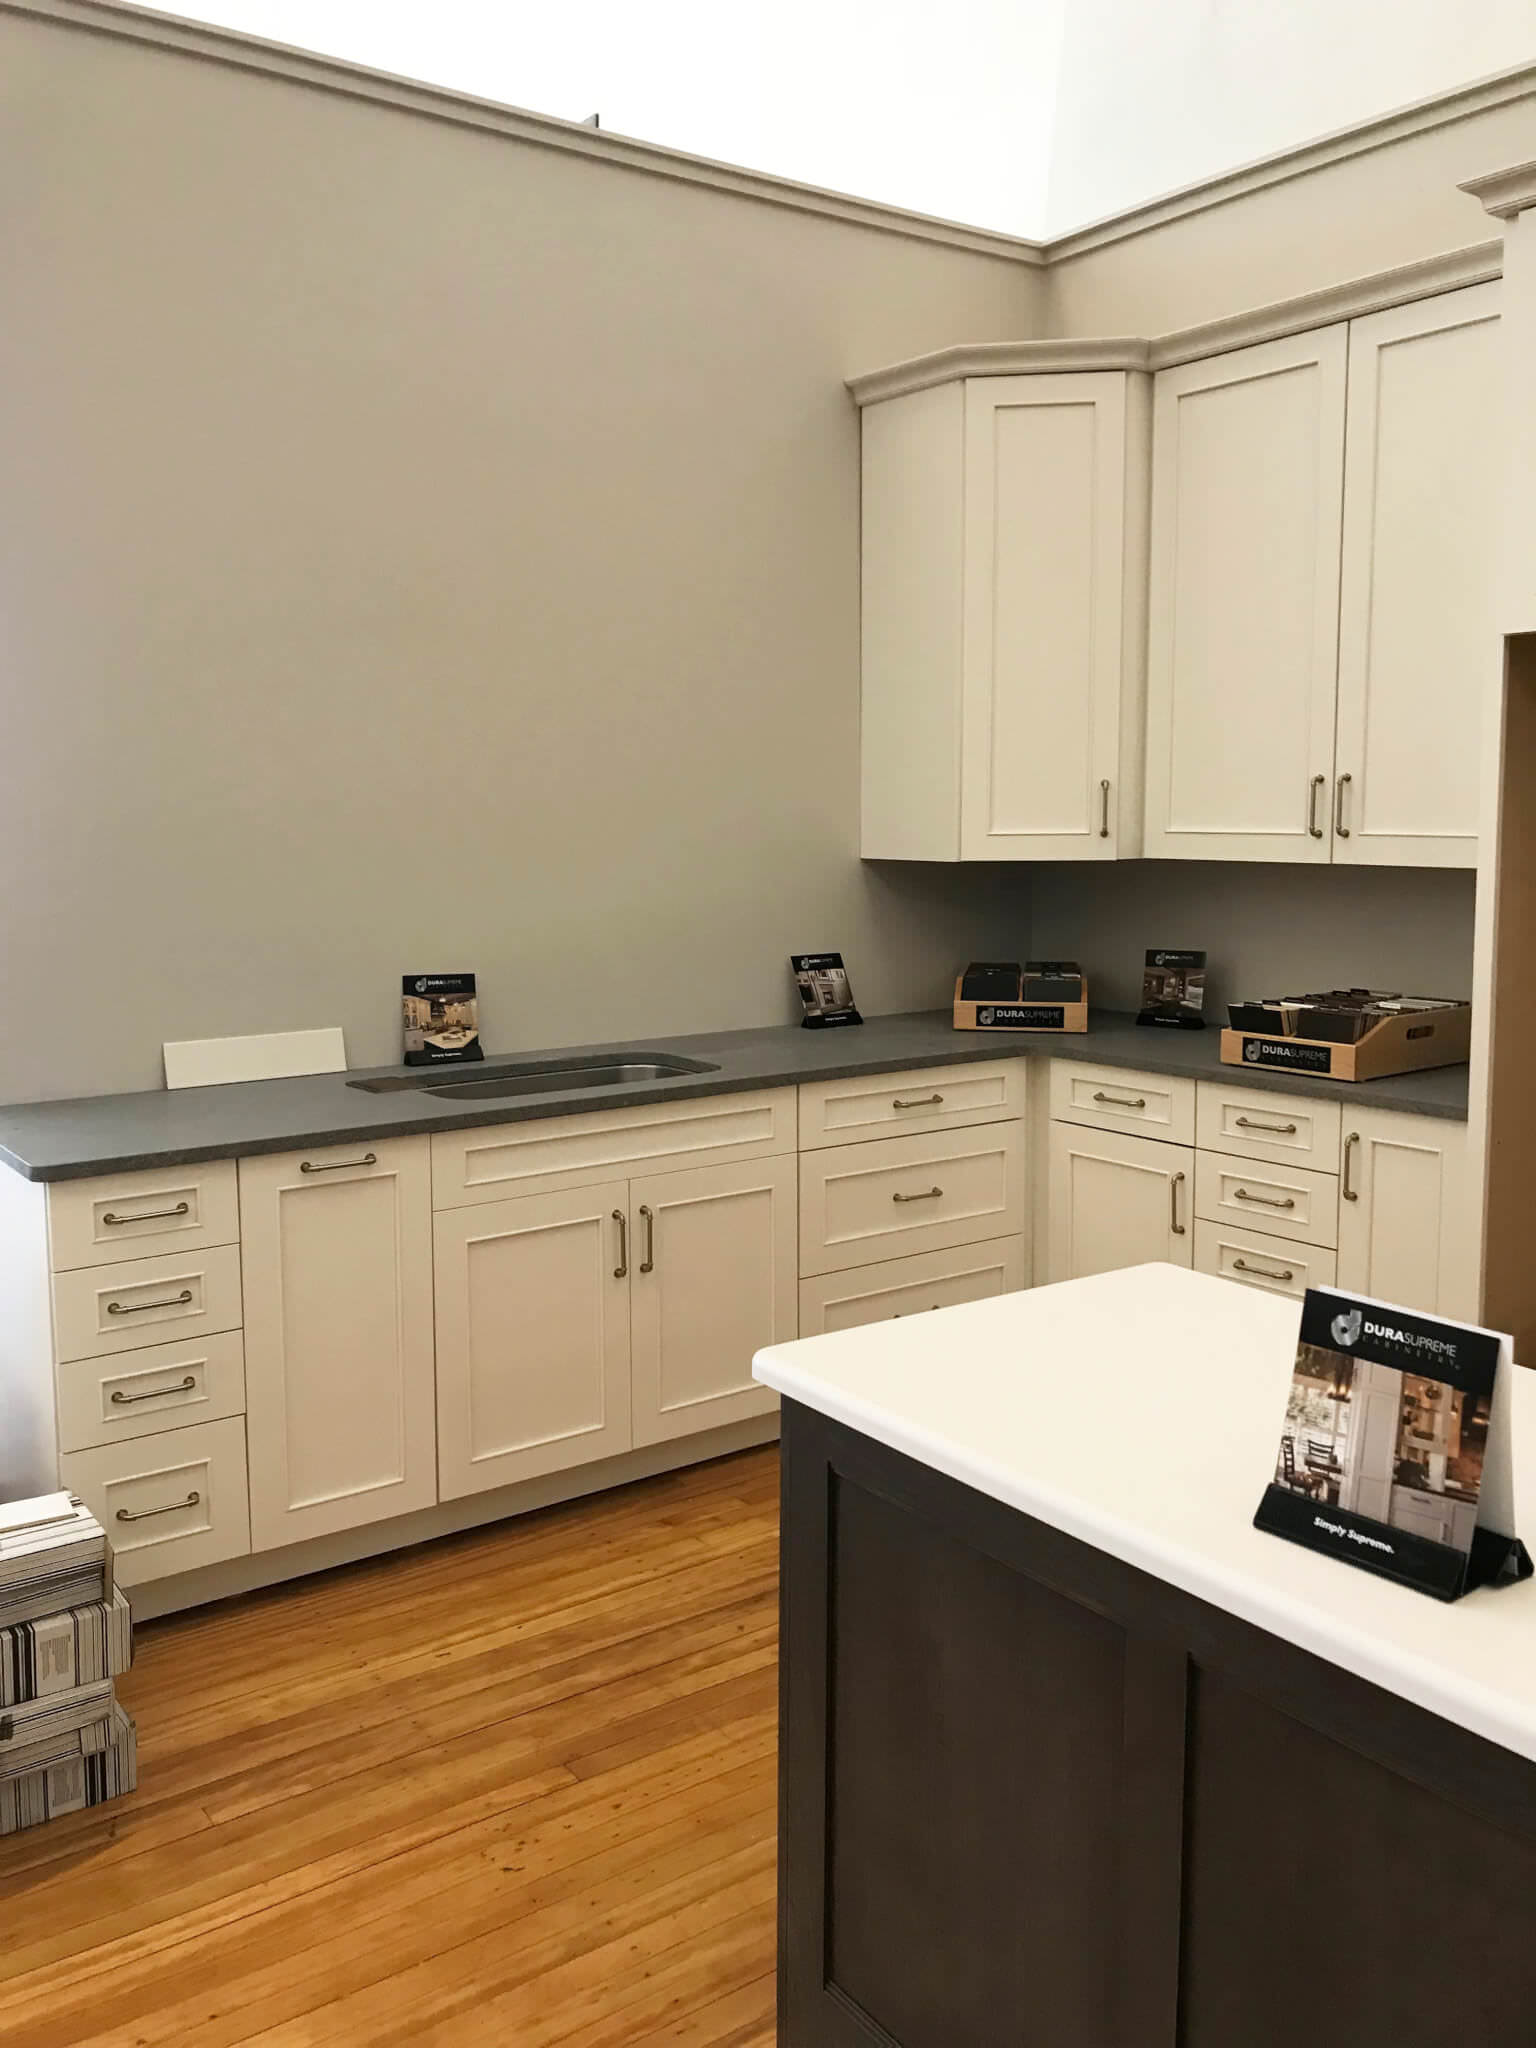
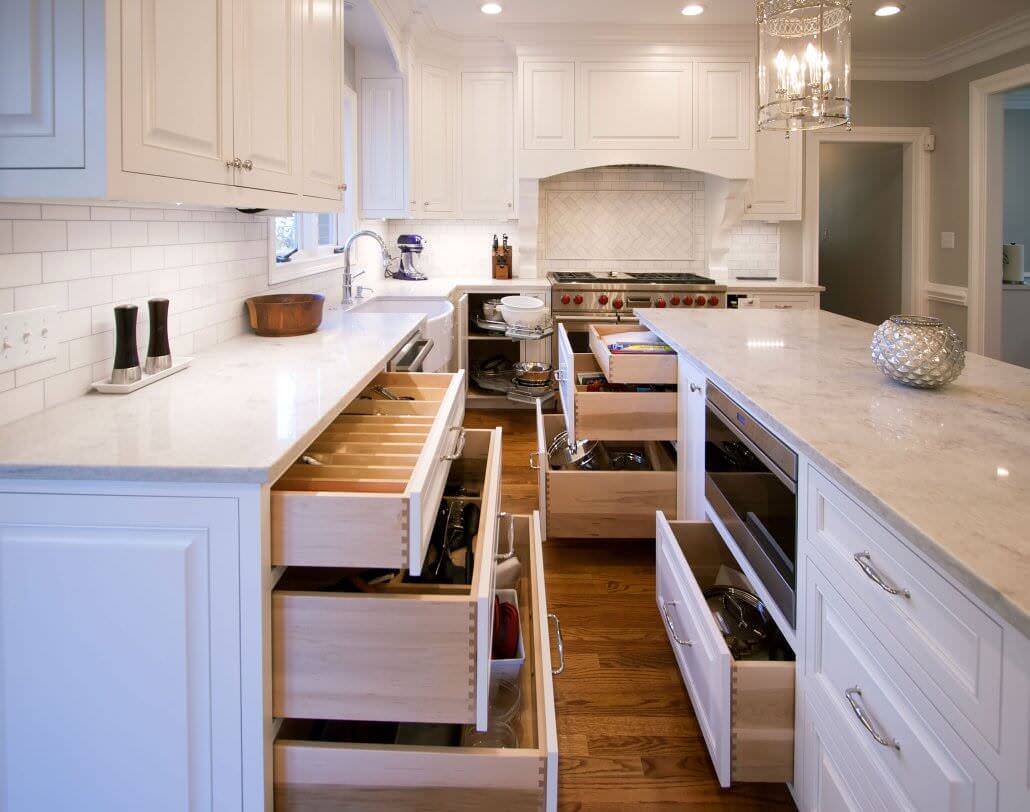
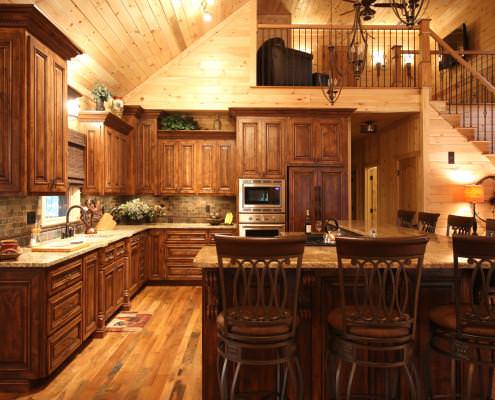
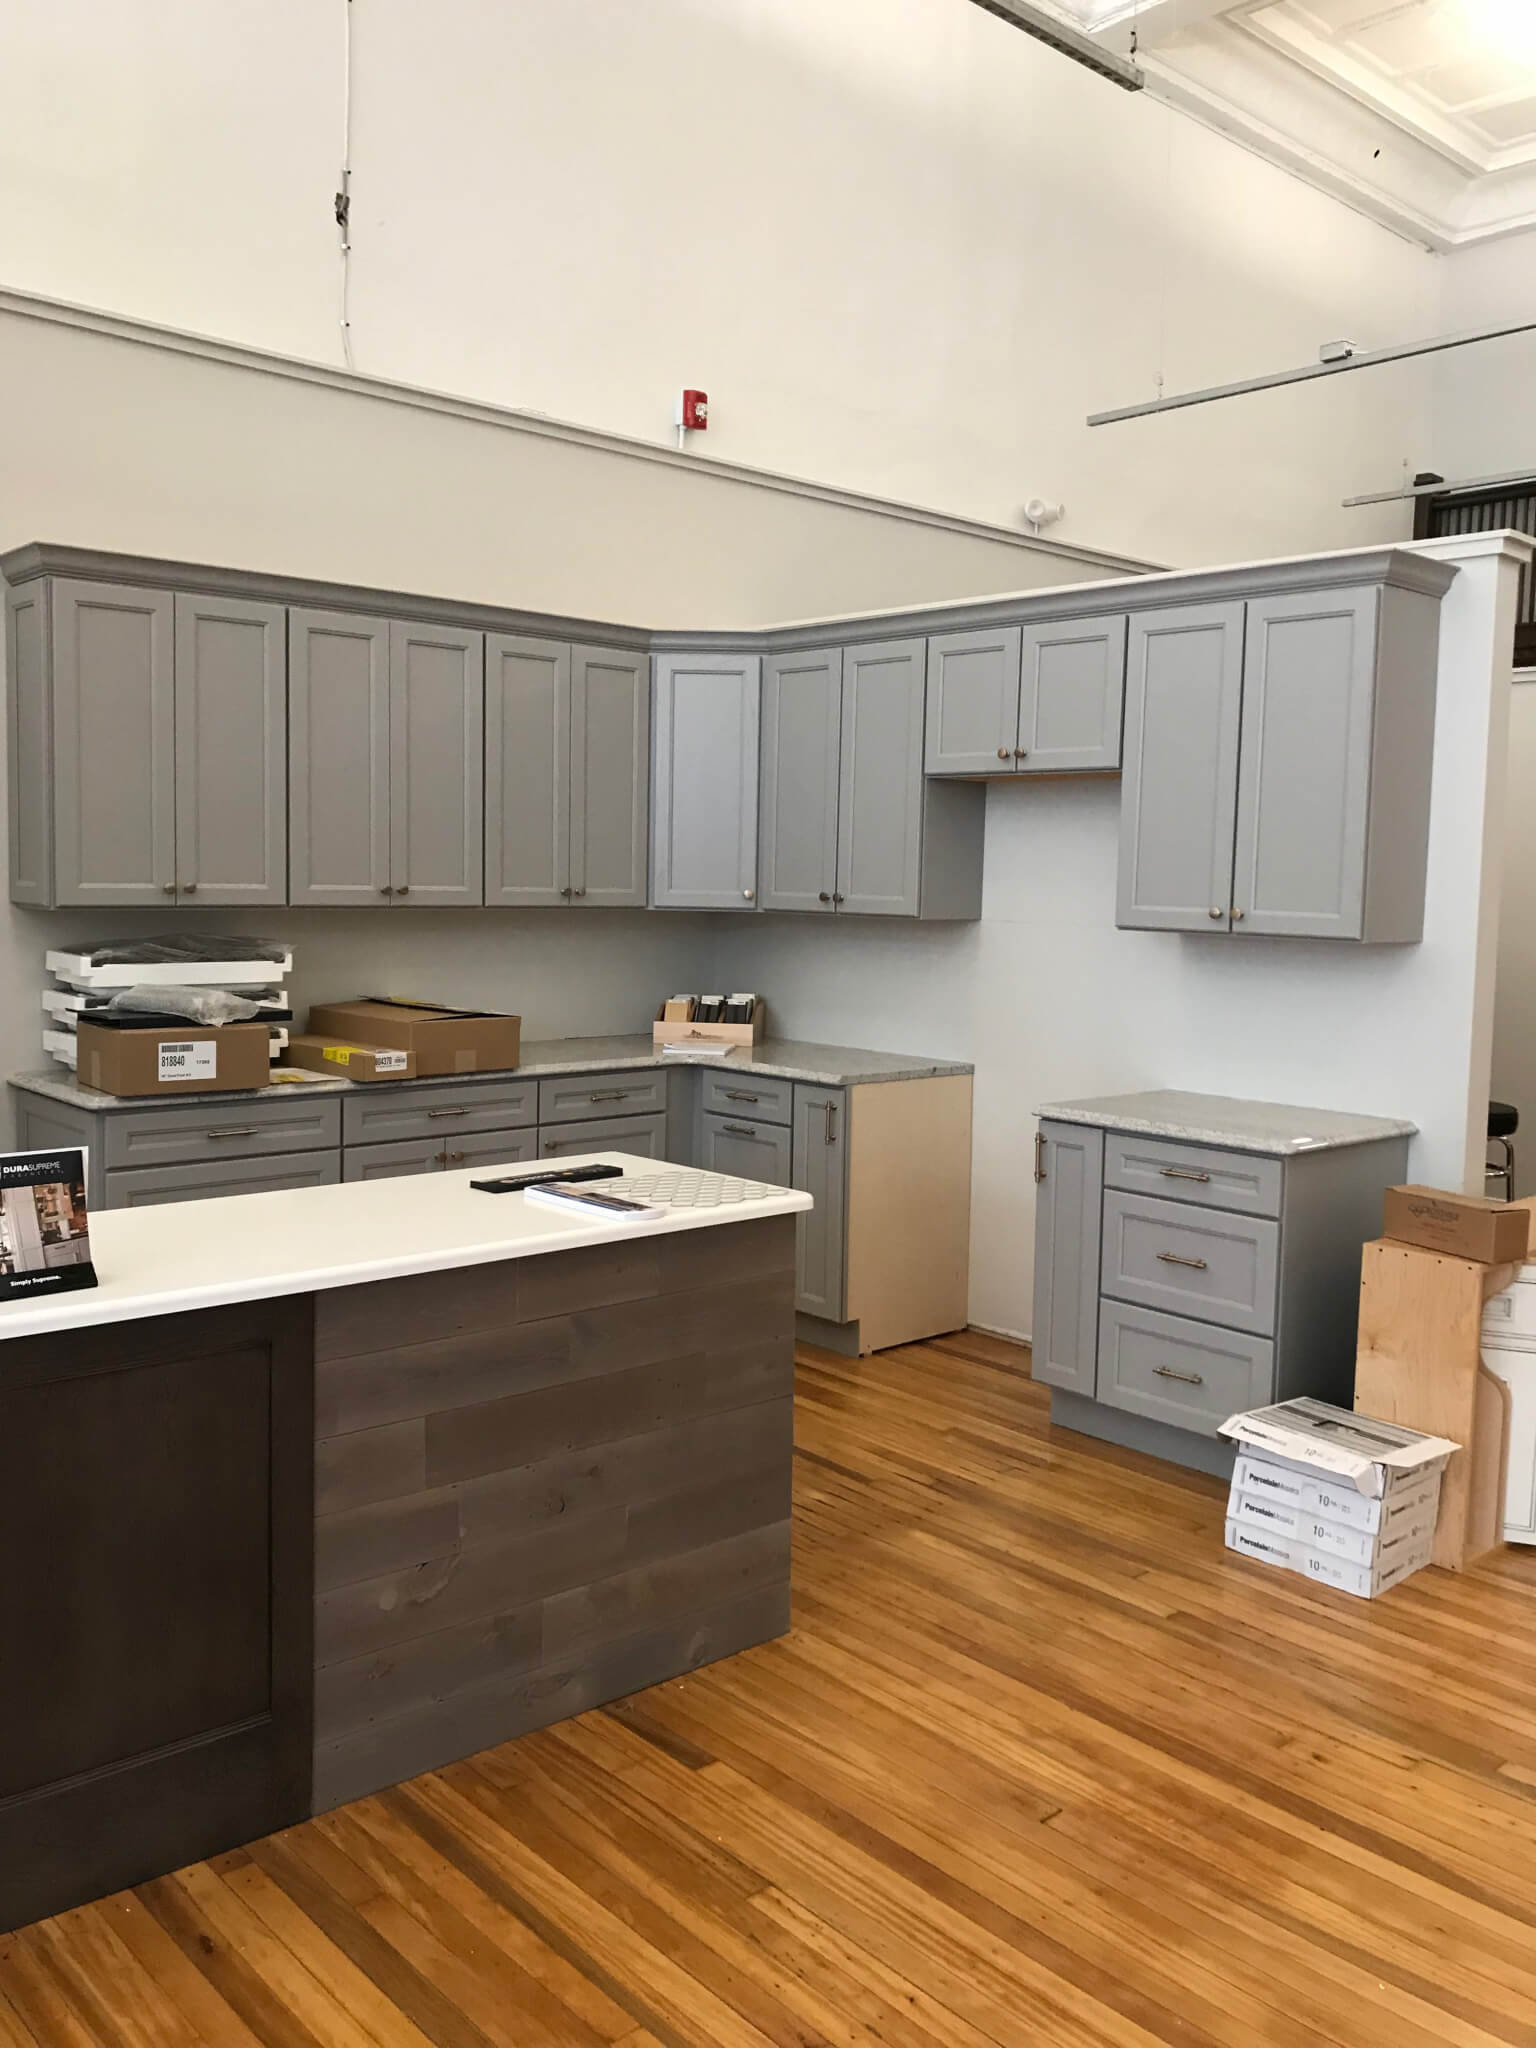
Dura Supreme display in progress, of course, we still need a backsplash, appliances & lighting!

It was exciting to reveal our tile floors that had been covered up for many weeks.

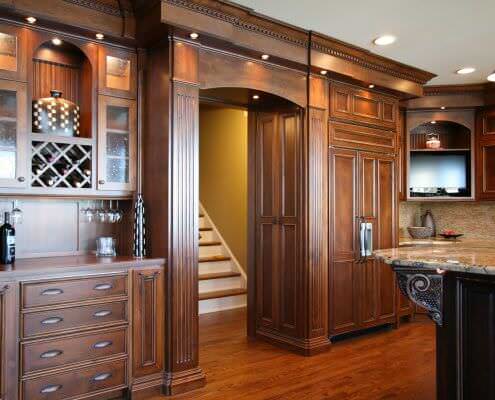
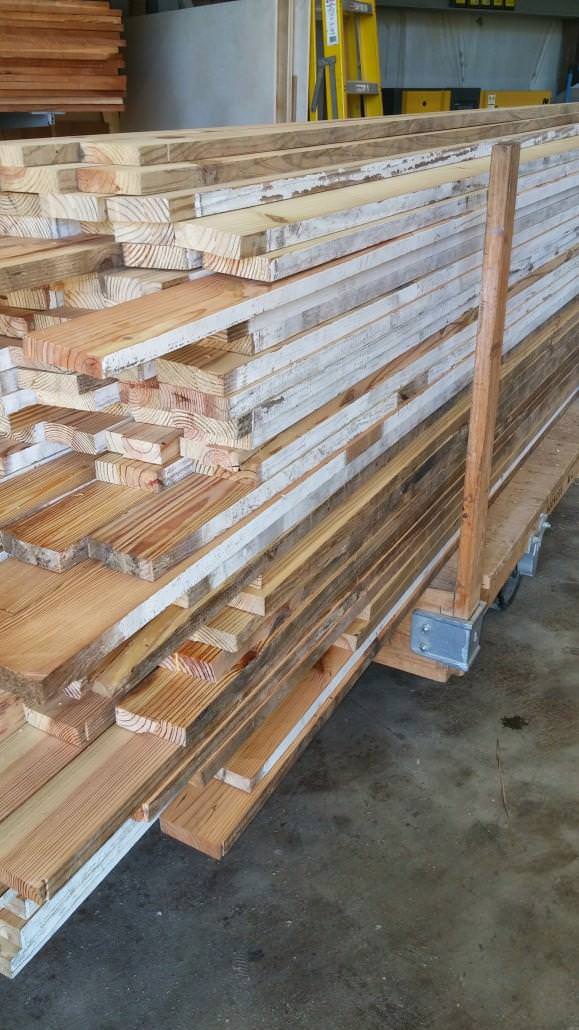
Mahogany doors being built in our shop and what they look like the day of installation. There were four doors total to make and the sizes 3′ wide by 8.5′ tall. Travis did the majority of the work on these with help from Chris Masters and Justin Webb (not pictured).

Update 9/16/2017

ANOTHER GREAT WEEK OF PROGRESS!

If you look back through this post – you notice that I keep the most recent updates at the top. A year ago on 9/17/2016, I made a post about how the work had stalled. Things are finally happening at the Design Center and we can’t wait to be able to move into our new space.

SATURDAY WORK & SATURDAY SURPRISES.

We have been working lots of Saturdays here at Walker Woodworking. Not only do we have a packed production schedule, but we also have design center items to make. One of my early visions for this building was the exterior. We were unable to make some of the changes I wanted because of the historic preservation rules. But I felt that the doors just looked so common and small compared to the massive size of the windows. My idea was to bring in taller wood-framed doors and I volunteered Travis to make them (he wasn’t thrilled about that idea at all). I talked to him into getting it done, knowing that in the end, it would be something he would be proud of that he personally had a hand in making. Travis delivered the doors yesterday (Friday) and today we went by so that our daughters could see the progress. We were pleasantly surprised to see the doors getting installed and another step toward getting this project completed.

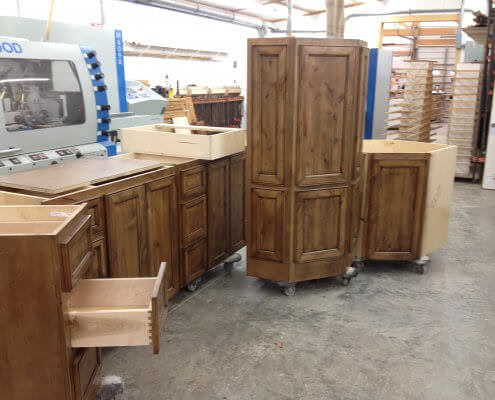
DISPLAY CABINETS GET INSTALLED.

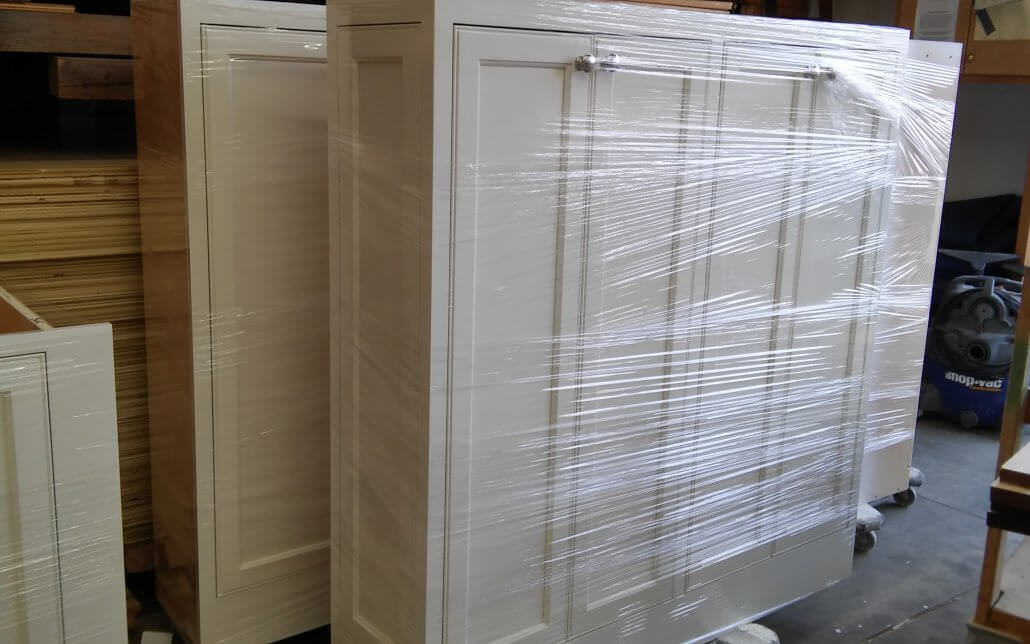
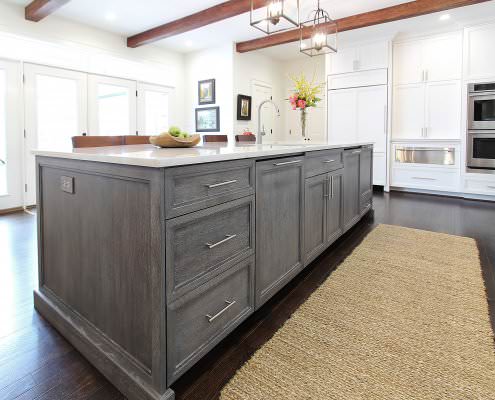
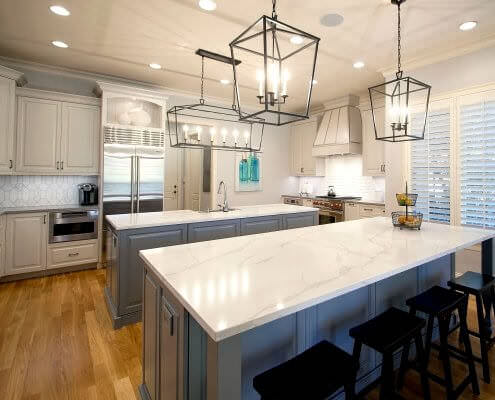
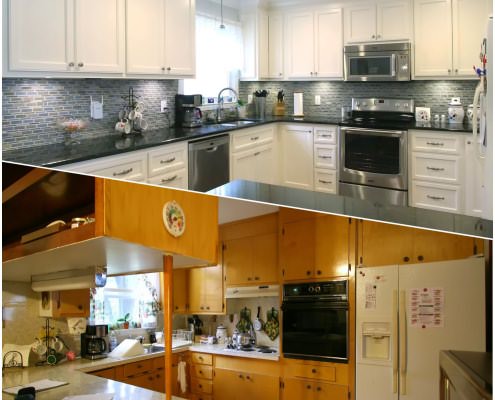
We have had a huge warehouse full of cabinets, lights, sinks, hardware displays and all sorts of things that we have collected over the last two years for this project. So when we started loading up the truck to take to the showroom to be installed – it was a really exciting moment for me. I won’t lie – I have been impatient and I am ready to get moved in. The gray cabinets are for our Wellborn display and the white cabinets are Dura Supreme.  These are the 2 semi-custom cabinet lines we will be offering.

Cabinet Install – Phase 1

Update 09/05/2017

FLOORS – A BIG DECISION!

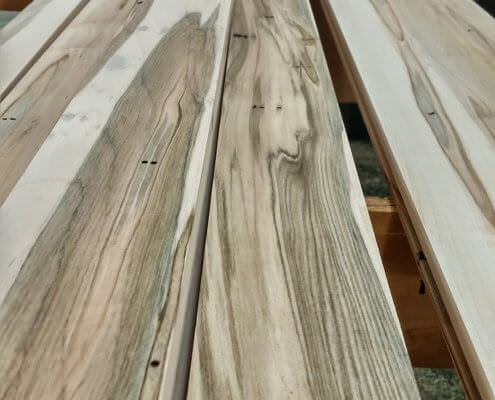
One of the things I have learned during this whole process is that I can’t always let my personal preferences lead my decisions. I really wanted a stain on these floors because I really love to see color in wood finishes.  I would have been happy with just about any stain color but the light gray was my favorite. I ultimately decided to go natural for two reasons, I felt that over time the lighter finish would be the most neutral and organic color to work our displays and decor around. The other reason I went with natural is that I felt it stayed true to the original elements of the building. I am so glad I went with the natural finish, these floors are truly beautiful and full of history.  I would love to hear your thoughts – comment below!

Floors before and during finishing.  The final decision of the stain choice was to go with Natural!

FLOORS AFTER.


You may notice in the showroom, there are actually three different types of wood used.  Maple, Pine, & Oak.   Over the years and due to multiple renovations, the flooring is what adds so much character to our space.

Update 8/20/2017

CEILINGS GET A MAKEOVER IN WHITE.

I had a few people tell me that I should keep the ceilings black but I just couldn’t do it. I am actually a big fan of black ceilings I have black ceilings in my basement, most showrooms have black ceilings but for me, changing the ceiling back to white was the easiest decision I have made so far. Without a doubt, these ceilings make this building. They are original to the building and something we needed to show off. It has been amazing at how much bigger and brighter the space is.

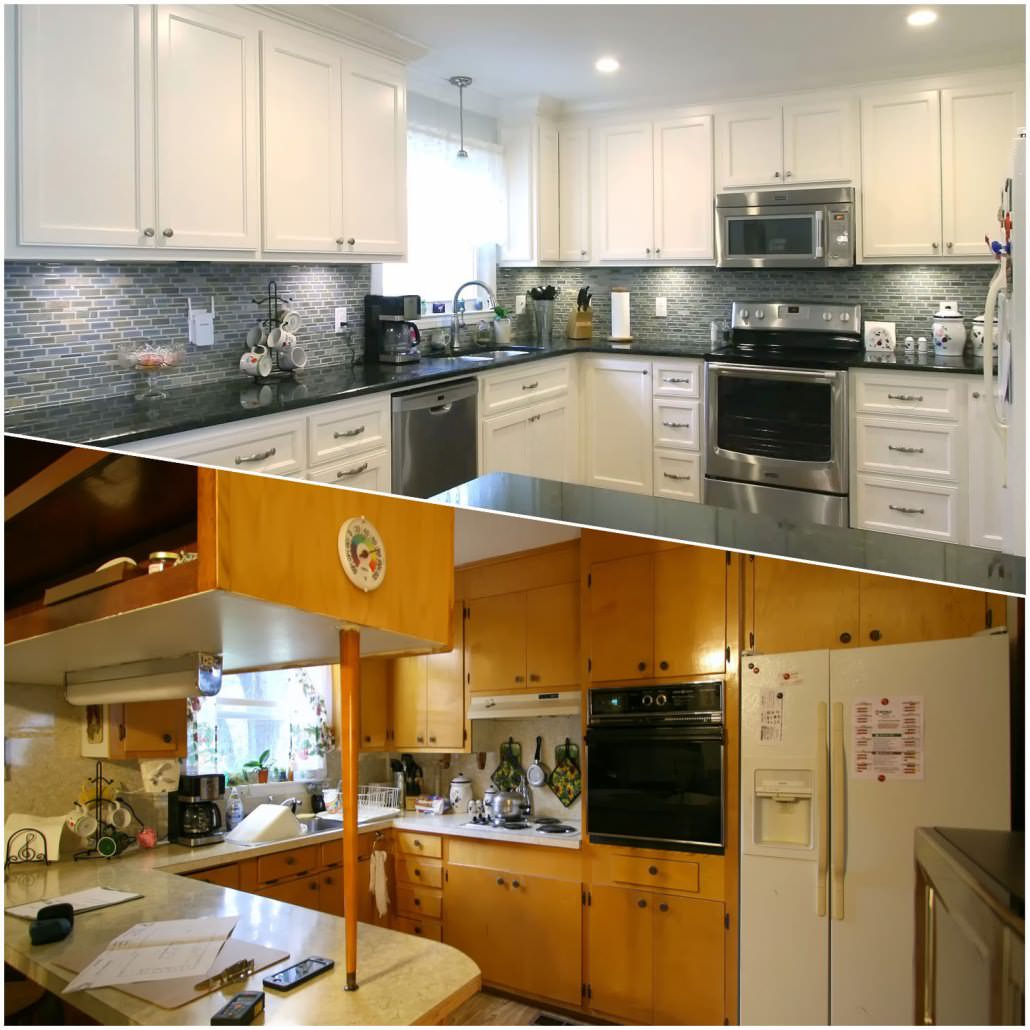
Here is a before and after of the ceilings before the lights were installed. The before and after photos were all with natural light from outside.

Update 07/17/2017

WE ARE FINALLY SEEING PROGRESS TO GET EXCITED ABOUT!

This has for sure been a test of patience for us over the last 2 years but I am happy to announce that things have been moving along again. Of course, if you have been following our social media sites you already noticed! Although things have been slow to move along, this week we will begin to see lots of progress.  Some of the major things to be done include installing windows and doors which mean there is some interior and exterior work to finish up.

In order to keep the historical preservation of the building, several of these interior and exterior items had to be special ordered. Although we don’t own the building, keeping true to these historical elements is important to us as well.  Once the doors and windows are installed, we hope to start seeing some paint on the walls and ceilings and trim work getting done. From there, things should move relatively quick. This also means that Walker Woodworking will be busy building some specialty items as well.

For the latest information, we suggest that you follow us on social media. With the new ‘stories’ on Instagram, we are able to introduce more behind the scene pictures with captions, which tell you more about the locations and pictures as you view them. We usually visit daily and post updates.

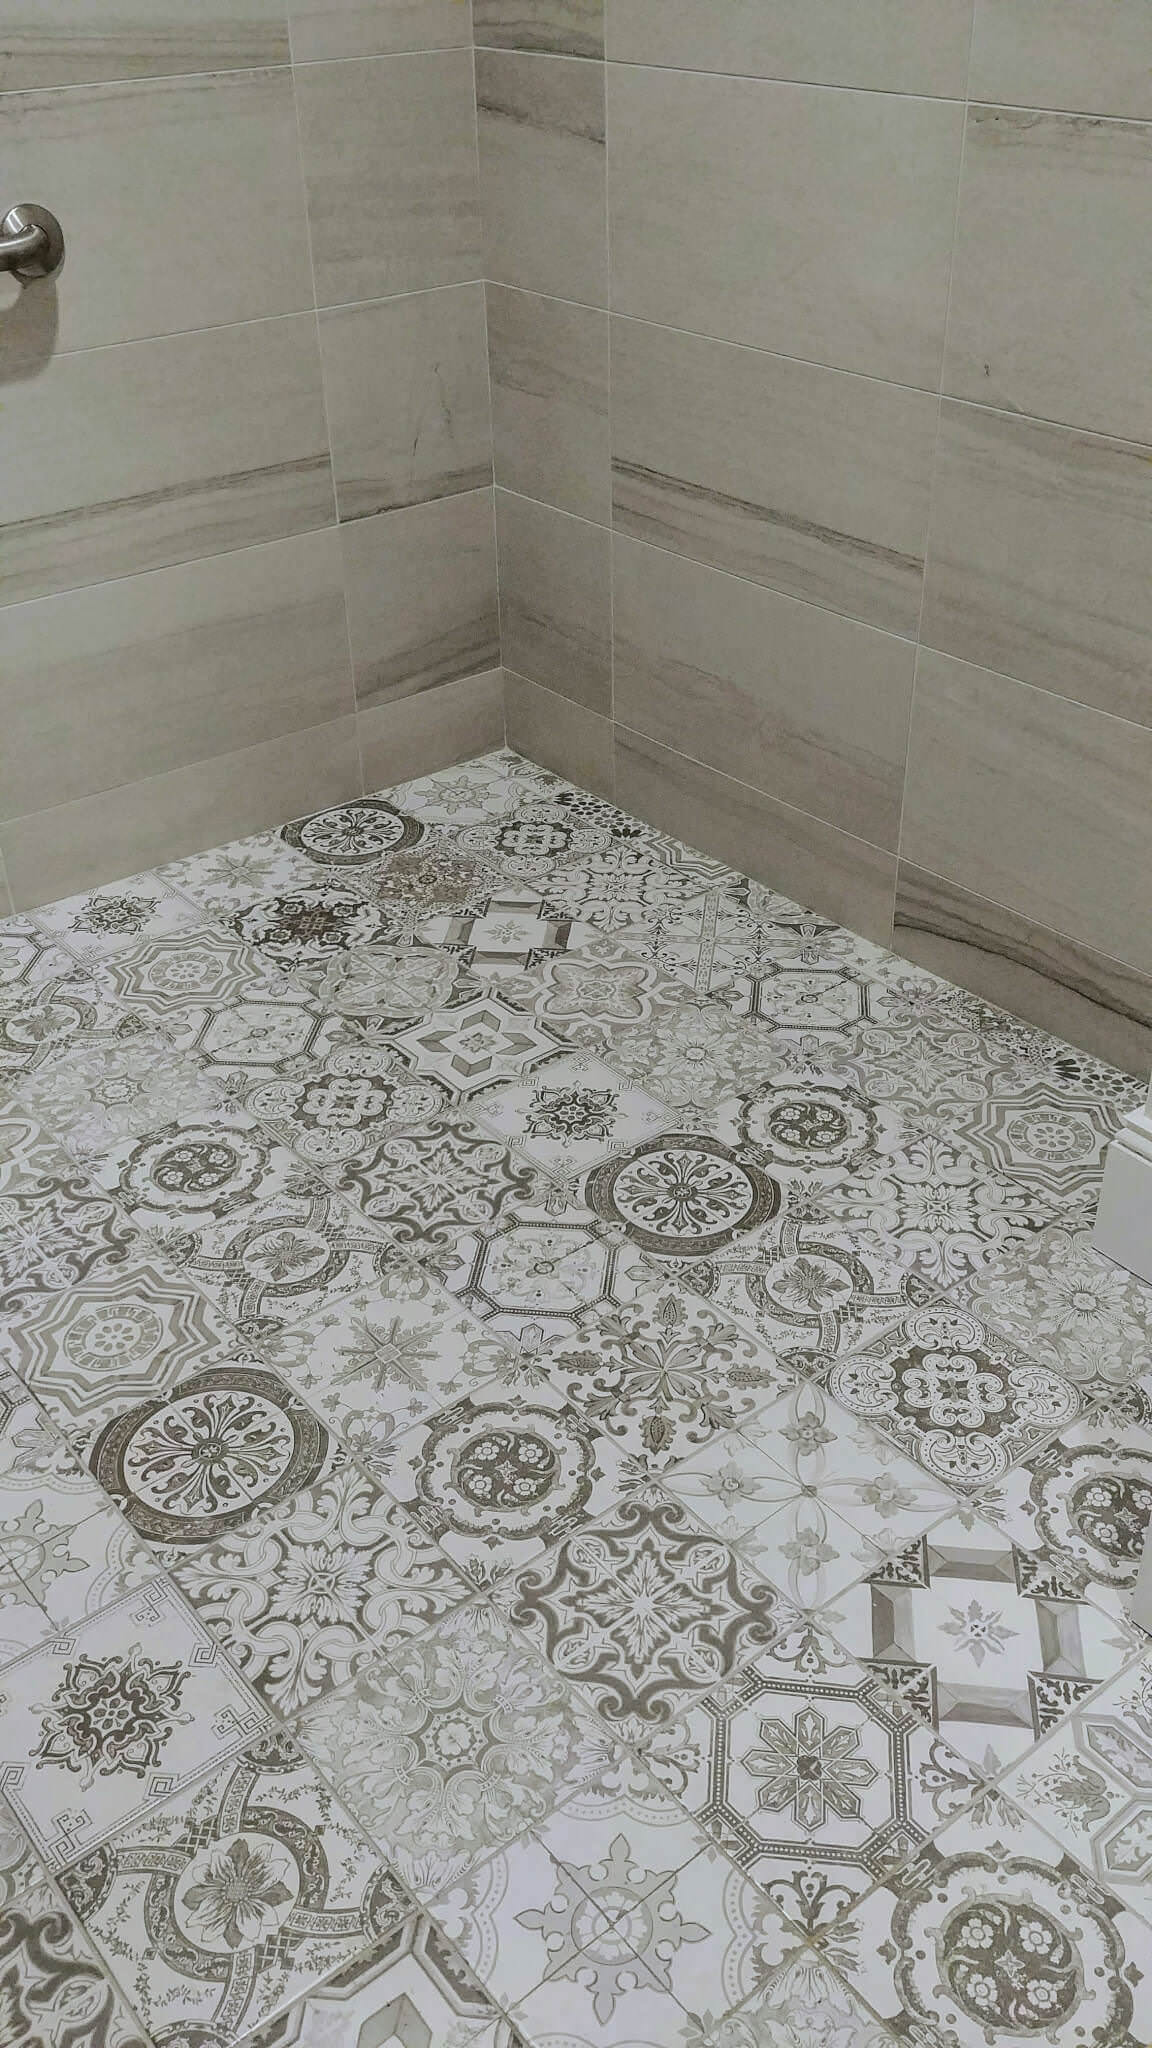
Interior tile work was completed last week.

Update 9/17/2016

AND THE WORK HAS STALLED…

Construction of our Design Center has been stopped temporarily due to a Federal Grant approval process. Stay tuned, construction is scheduled to resume November 3rd.

Meanwhile, our team is still making plans, making selections and getting excited about moving to Uptown Shelby.

MAKING SELECTIONS

The process of making selections as been underway for a while now but there is still lots to do. We thought it would be interesting to see how we take certain design elements and put them together for the final product. Often times HGTV makes the construction and remodel process look fast and easy in a 30 minute TV show, but the reality is a much longer and very complex process. A lot of time and thought from multiple sources of professionals goes into making a project of this proportion come to life.

TILE

This past week we went tile shopping; Wendi and I (Stacey) spent a day visiting several tile centers – 5 in all. We have several areas that we will need to select tile. The construction plans will be adding bathrooms and office space. Although we made some progress we still have a lot more to do and more to select. Here is a peek at some of the fun things we found.  Did you know Charlotte has so many great tile centers? Daltile, Emser, Florida Tile, The Tile Collection, & Crossville Tile.

Update 5/21/2016

AND THE WORK BEGINS…

Construction officially started in early March, and the bulk of that time has been spent in the basement. More updates coming soon.

View from the mezzanine to the main showroom floor.

 Original Post 5/13/2016

HOW WE GOT HERE…

When Travis and I purchased a CNC Router at the end of 2013, we never imagined how much things would change for us and our business with Walker Woodworking. We certainly had much to learn and we definitely had many challenges to overcome, but we will save that story for another day.  The CNC router enabled us to take our company to a new level with innovation and technology and while we have embraced these changes, we also had new needs that our current space could not provide.

Learning the CNC software and getting the process up and going was initiated by Brandon Fitzmorris. Brandon was our lead engineer and helped through the initial transition. As many people may remember, our designer at the time in 2013 & 2014 was Jeneane Beaver. Jeneane had just had her first child and with another on the way she decided that she wanted to stay home and be with her kids; a decision that we respected but it left us in a position to find a suitable replacement. Brandon was eager to accept the challenge and therefore we had yet another position to fill. By the end of 2014, we had Brandon in his position as Designer and a new engineer in place, with the need for an additional engineer.

Travis and I had been debating ideas to build a new shop or open a new showroom. While we were not necessarily making any immediate plans for one or the other, we were approached in the early summer of May 2015 by excited new owners of a building in Uptown Shelby. They had heard that we may be looking for space and we were very eager to see the space. Soon after we were signing a lease. Since that time we have been patiently waiting for the process of architects, engineers, and permits from the City of Shelby to run its course. Planning the space with the owners took some time, but we are thrilled with the end results.

Meanwhile, we have been making necessary staff changes in anticipation of this new showroom. Adding staff in space you don’t have has certainly put a strain on our working environment but we became creative and made temporary adjustments to make it work.  Over the last year we have added to our staff: Jan Blanton – Design Assistant, Tyler Triplett – Engineer, and most recently Ryanne Turner – Design Assistant. Marie Walker, a longtime administrative assistant,  is patiently awaiting the new showroom to have her own office. During this transition, she has moved to a home-based office with me (Stacey Walker) and continues with day-to-day duties.  We are all looking forward to the new Design Center.

A LITTLE HISTORY…


Campbell Building – full corner view

The Design center building itself is located right on the corner beside of First Baptist Church. Originally, construction started on the building in 1928 and was completed in 1929. The first use was a general store, then it became a pharmacy and had a little restaurant in the mezzanine area. It was later a furniture store and they sold toys in the basement area. Within the past 10 years, the last to use the building was a furniture store. As far as we know the 2 upper floors have never been used for much except storage.

Over the years the building was handed down to generations of the same family. The new owners are the first ones to actually purchase the building. Kay, the previous owner, is the great-granddaughter of the men who built the building. One was a steelmaker and another owned a brick factory and these two men had children that married each other. That couple had a child, and that child was the parent of Kay and Edgar.

At one point in time,  all the stairs and railings were painted bright orange! A few years back, Edgar took all that paint off himself and refinished each of the railings and banisters on site. (*Please feel free to comment in the feed if you have any other information about the historic building, we want to give as much accurate information as possible about the building)

The interior of this building has some great features that are original to the building that we want to preserve and maintain as much as we possibly can. From the original tin ceilings, the beautiful wooden staircases, and the pine floors. We worked diligently with the owners & architects to help make this happen, but in order to bring the building up to date with today’s codes, there will be a big transition in some areas inside and out that can’t be avoided. In the near future, the upper floors will be renovated as well. The 2nd floor will be Uptown Indigo – an event space and the 3rd floor will be the residence of the building owners.

Old Newspaper – Campbell Building

Old Ads From Furniture Store

Old Newspaper Ad

Follow us on Facebook & Instagram – #walkerwoodworking #greenbrookdesign #uptownshelby #shelbync for more photos and event updates!

Greenbrook Design Center

Remodeling 101 Part 4 Finishing Touches

Part 4: The Finishing Touches

Construction crews have left your home now and it is time to put your space back together with the last details.

Cleaning up

Now that everything is in its place and the dust has literally settled, it’s time to clean up.  As was mentioned in our article on Part 3; if you used a contractor some cleanup may be included in their estimate.  This is probably basic and may not include wiping down all of the surfaces.  Your new cabinets will be dusty inside and out.  First from being assembled in the shop, then from installation, and finally from the countertops and appliances being put in.  Hopefully, the dust barriers you put in place helped some, but you should still plan a large chunk of time to devote to the task of straightening up.

Tile backsplash  

Photo by Walker Woodworking Staff – All Rights Reserved

If you have a tendency to procrastinate, you’re in luck.  Your tile backsplash can be decided on and installed after you’ve lived in your kitchen for awhile.  In fact, mine wasn’t installed until after 6 weeks of using our kitchen.  We had narrowed our selections down to three options and my husband requested to wait on deciding until he could “see it all come together”.  Once it was all together we went with my original selection from months earlier…..happy wife, happy life, right?

Artwork

All of the photos and prints you took down to avoid being damaged can now be put back into space.  Since the walls have likely been freshly painted you can get creative with the way you rehang your photos.  Mixing frame sizes and finishes is gaining popularity.  Now that you’re living in the renovated space you will most likely want to buy some new artwork to bring the space together.  Don’t be afraid to play with scale and color when making art purchases.  If you live with something for awhile and don’t love it then you can always switch it out.  That is what makes decorating with artwork so fun.

Finding a place for everything

Great storage with drawers.

Restocking your new cabinets is an exciting time.  Think through where you want to put things based on how you utilize the space.  You probably planned this out with your kitchen designer in advance, but now you can put your plan to work. I’m talking about all the utensil dividers, spice pullouts, mixer lifts, custom corner storage, etc.  At Walker Woodworking they pride themselves on making use of every square inch available.  My favorite part of my new kitchen was using my silverware drawer.  We had not previously had one close to the sink in our old 80’s kitchen, so we’d been using a silverware tray set in an upper cabinet.  I now have a huge silverware drawer with a custom divider and knife block inside, courtesy of Walker Woodworking.

Grocery shopping

Now for the fun part.  If you’re like me you may be thinking “How on Earth will I fill all of these cabinets?”  Believe me, you will be able to. When I had gone shopping prior to our renovation I had to buy only necessities for the next meal; due to having very little extra pantry storage in our kitchen.  We now have a snack drawer, bread drawer, sippy cup drawer, a full tall pantry cabinet, places for stock pots, crock pots, storage for my broom/swiffer, and even a recycling nook.  I love being able to shop knowing that I have space for all the food to fit in my kitchen.

Cook and enjoy

You can now use all of your wonderful appliances and the gorgeous new deep sink you put in.  Once in your new kitchen, you can branch out and try some new exciting recipes.  Hopefully, you will be inspired to move beyond the microwave for cooking and learn some new techniques.  The only bad news is that using your kitchen means it will get dirty again.  Have fun in your new space……cook, clean, rinse, and repeat.

Article by guest blogger Jeneane Beaver, former Designer at Walker Woodworking.

“Having worked with Walker Woodworking for 7 years, I have the opportunity to share my experiences as a designer as well as a client, I remodeled my own kitchen in 2012.”  ~ Jeneane Beaver

Ready to start your next project? Call Walker Woodworking today and get the process started. 704-434-0823

If you have recently completed a renovation and you want to share your perspective, please comment below.

Check out the other parts of our remodeling series.

Intro to this remodeling series? Click this link to see it now.

Part 1 Budgeting and Planning Remodel Budget Analysis? Click here to see it now.

Part 2 Making your selections. Click link to view post.

Part 3 Under Construction. Click link to view post.

Remodeling 101 Part 3 Construction

Part 3: Living in a Construction Zone

under sonstruction

It’s here, it’s finally here!!! The day you’ve been dreaming of has arrived……construction begins! Then it hits you…..construction chaos has arrived! I now realize, I need more time!

It can be stressful to have your home torn apart and even more daunting to think of living in your home the entire time during the renovation.  But you can do it.  If you’ve read and followed our previous blog posts in our remodeling series, Part 1 and Part 2, then you should be well prepared for the demolition and construction phase.  The pre-planning done during those stages of your project should make this most arduous phase as brief as possible, getting you smoothly to Part 4 – Finishing Touches –  and ultimately to the reward of tasting the first delicious meal in your new kitchen.  

Before the construction crew arrives  

  • Clean out the cabinets and haul off old appliances.  This is a good time to purge.  You probably have more than you need in terms of kitchen gadgets, and cookbooks that have been replaced by e-versions.  Use this time to clear out the clutter.  Bonus: if you give them to charity you can keep the receipt for a tax write-off.  
  • Set up a makeshift “kitchenette” somewhere that is easily accessible.  During my own personal experience, my husband and I used a mini fridge, toaster oven, and microwave to survive our construction phase.  Coffee is essential for me as well, so I also set up a coffee station in our bathroom.  Keep your take out menus in a convenient spot; they will come in handy to help you survive life without a kitchen.
  • Find a place to store excess food until the job is completed.  We turned a spare closet into a temporary pantry while our home was being disassembled.
  • Setup dust barriers if possible, or have this quoted from your contractor.  This will depend on your layout and the scope of the project, but if possible you can hang sheets at the construction entrances to minimize dust and debris extending beyond the work zone.
  • Breathe – you’re prepared, enjoy the process as much as you can   🙂

Demolition Day  

The contracting crew will disassemble walls, cabinets, floors, etc.  Whatever is required to create a “clean slate” for your new design to become reality.  It will be exciting to see the old cabinets leave the space.  Seeing the new open area can help you envision how the new plan will come together.  Once our space was emptied I used my plans to draw out the footprint of the kitchen.  I really became excited, to see the reality of my vision finally appearing before my eyes.

The work continues

Depending on the scope of your project the work may take a few weeks to complete.  However, things will generally happen in this order:

  • Plumbing and electrical rough in changes will be made.  New pathways will be made for outlets to be accessed and for a new sink placement if needed.  
  • Framing and drywall will be completed.  This is where the dust barriers will come in handy.  The process is messy.  I’d recommend painting the new walls once they are ready; that way the walls will be completed prior to new floors going in.
  • Floors are installed.  Whether wood or tile, the flooring installation can last a few days. They will be beautiful in the new open space.
  • Cabinets will be installed next.  I believe this is the most exciting part of the construction process, because these custom components are the backbone of the new work-space.  The day they arrive will be better than Christmas.  The beautiful finishes, hardware, spacious drawers, and custom pullouts are finally arriving in your home! Yay! The installation will last a few days, then a counter-top template can be finalized.  
  • Counter-tops are next to go in.  The gorgeous tops you’ve selected will be the icing on the cake.  If you need any of these to be cut on site, the dust barriers will need to be in place for this as well.  You are almost to the finish line!
  • Last electrical and plumbing can now be completed.  Appliances can be installed, and you can now have a working sink, as well as a better place for your coffee machine (no longer in the bathroom).

Cabinets Arrive! Work Continues.

Prepare for hiccups:  I know what you’re thinking. “That doesn’t sound too bad,” and you’re right. The idea of living in a construction zone doesn’t sound too bad here.  If only a project could be finished in the time it takes to read this article, but alas, it cannot.  Any home project takes time, and a major remodel is definitely a lengthy process.  Be flexible and expect at least one delay to come up; they are inevitable.  Be courteous to the people working in your home, if you are respectful to them, they will be more inclined to treat you and your home with respect. Be sure to report anyone that comes into your home that is not courteous. Small business owners appreciate knowing of any problems as soon as they arise.

Working Toward a Completed Project

Take some before, during, and after pictures to share with friends and family. It is exciting to see the progression.

Last tip: Don’t bother trying to clean up until the job is truly complete, because you’ll be dissatisfied and will be doing it more than once. If a General Contractor is looking after your project, he may have clean-up included as part of your estimate.

Once construction is done it will be time to put your kitchen back together and get ready for Part 4 –  The Finishing Touches (coming soon to complete our renovation series).

Article by guest blogger: Jeneane Beaver, Former Designer at Walker Woodworking

“Having worked with Walker Woodworking for 7 years, I have the opportunity to share my experiences as a designer as well as a client, I remodeled my own kitchen in 2012.”  ~ Jeneane Beaver

If you are only in the dreaming stage of beginning your project, we’d love to talk to you and work with you to fine tune your very own remodel plan.  If you’re ready to be further from dreaming and closer to construction, call Walker Woodworking today 704.434.0823.

Please feel free to add a comment about your own personal experience with remodeling.

Did you miss the intro to this remodeling series? Click this link to see it now.

Did you miss Part 1 Budgeting and Planning Remodel Budget Analysis? Click here to see it now. 

In case you missed it – Part 2 Making your selections. Click link to view post.

How Cabinets Are Made

How are kitchen and bath cabinets made? Until you started shopping around for cabinets you probably didn’t realize that there are different ways that cabinets can be built and several options for materials. Most people come to us with a picture and say “this is what I like”. While this is perfectly fine, we still like to offer some education about the different ways that cabinets are made as well as the materials that we use.

As a consumer, it’s always a good idea to know how cabinets are made. Research the construction techniques and know the quality of well designed cabinetry before you purchase.

There are distinct choices you need to make. Here, we take them on one by one to help you pick the right cabinets for your home.

Learn a few basic terms about cabinetry, a few important things to know include;

  • Materials used
  • Construction techniques
  • Build methods

These are the 3 main factors that will ultimately determine the look and the quality of your cabinets.

Even if you’re not the type of person who’s inclined to ponder- how things are put together – it’s still helpful to understand the basic parts and how cabinetry is constructed. This will help you have a better feel for the different levels of cabinet quality and what you do or don’t get for the various levels of cost you’ll encounter.

Materials – What are your cabinets made of?

wormy-maple

Material – Solid Wood – Wormy Maple

There are several material options when cabinets are specified. You should know the difference between solid wood, MDF, Plywood and particleboard.  Let’s start by having a basic understanding of these materials.

Solid wood – As the term implies, it’s solid homogeneous wood, all the way through. The only variation might be boards or panels that are several pieces of solid wood joined together.

Plywood – is an engineered wood product, but one that’s probably most familiar to people. It’s made up of thin wood “plies” or layers of wood that are glued together in a sandwich form. Usually the plies are oriented with their grain direction at varying angles with respect to each other to give the board or panel more rigidity and stability.

Medium density fiberboard (MDF) – another engineered wood product that’s made up of wood fibers. The fibers are combined with an adhesive under pressure and formed into boards and panels. MDF has a finer texture than particle board and is denser and heavier than particle board.

Particleboard – Is an engineered wood product that’s made from wood chips and particles that are combined with an adhesive and fused together into boards and panels.

Melamine – Is a plastic-based, sheet material similar to laminate that is applied to the exterior of cabinets. The substrate or material underneath the melamine is usually medium density fiberboard, particle board or plywood.

Another important point to remember about wood, is where it originates. If it’s important to you that your products are made in the USA, you should ask your designer if your products are domestic or imported. Other countries don’t have the same regulations as the US in how they engineer their wood products.  

Construction Techniques – How are cabinets made?

Clamps

Construction Techniques

There are different ways that cabinet boxes, frames and drawers are made when joined together. While there is no wrong way to build cabinets, there are different ways in which they are constructed. The process that is used, will determine the integrity of the product and the time and labor involved. Here are the most popular methods used today.

Mortise and tenon – another form of joinery, this method uses a square “post” protruding from one end of a piece of wood that fits into a square hole or cutout in the mating piece. This type of joinery might be used to fasten the pieces of a cabinet’s face frame together.

Doweled joint – this joinery technique uses round wood dowels (pegs) that are pressed and/or glued half way into holes drilled into one piece of wood. The protruding part of the dowel is then fit into holes drilled into the mating piece of wood. This method is another way to join the sides of drawers or cabinet boxes together

Dado – this is a groove that’s cut into a board or panel that the edge of another board/panel can fit into. A good example is the sides and back of a cabinet drawer that are dadoed to accept the edges of the drawer bottom. It’s a stronger way to ‘capture’ the drawer bottom than just gluing or nailing the drawer bottom edges to the side panels.

Putting together the Materials and Construction

Cabinets Assembled

Cabinets Assembled – ready to package for delivery

The materials and construction details that your cabinets are made from are not always as visible as the doors and drawers, but they contribute greatly to their durability and cost. The overall quality of kitchen cabinets is closely linked to their construction, meaning how they’re put together and the materials they’re made from. Let’s put the two together when considering the different components of the cabinets.

Cabinet boxes can be made from high quality material, such as ¾” maple plywood to a low quality material such as particle board and many options in between. This is one of the main factors that will affect the overall price of your cabinetry.  

Cabinet Frames, the very front of what you see are usually made with solid wood.

Drawer boxes-   The quality of material used as well as the way the boxes are joined together will affect the sturdiness of the drawer. For example, a dovetailed drawer will be stronger than a drawer using butt joints and screws. You will also have choices of different slides, from standard, to full extension, and full extension with soft close features.

Build Methods – What determines the overall look and style of your cabinets?

The construction style of your cabinetry determines how your doors and drawers fit and the overall look of the cabinet face. Regardless of the style you choose, you can rest assure that you will get the same superior quality of construction that we provide time after time. Cabinetry is divided into three major categories when considering methods.

  • Inset
  • Overlay
  • Frameless

Inset – The Inset Difference

inset-cabinets

Example of Inset Cabinets

The inset door gets its name because it is set inside of the cabinet frame. The door is designed and constructed with extremely precise measurements so that it nests inside the frame and opens and closes properly.

Overlay –  The Most Common

overlay-cabinets

Example of Overlay – Full Overlay Cabinets

The standard overlay cabinet is typically the most popular. The face frame of a standard cabinet door overlays from 1/2″ up to 1 ½” with varying gaps between doors and drawers.

Frameless –  The advantage of Frameless Cabinets

frameless cabinets

Example of Frameless Cabinets

A frameless cabinet is a style of cabinet that has been popular in Europe for decades, but that wasn’t introduced here in the states until rather recently.  Doors typically cover the entire cavity and box, which is called full-overlay.  Because they don’t require a frame, frameless cabinets feature full access, allowing maximum use of space.  Cabinets and drawers are slightly larger than those constructed with face frames.  Frameless cabinets have a more modern look.  If you are purchasing new cabinetry for your home, you owe it to yourself to look into the benefits of frameless cabinetry.

Other things to consider

There are several style options to consider for kitchen cabinets. The door style and finishes are going to define the style more than anything. So which style of cabinets is right for your home? It depends greatly on the overall architectural style of your house and your tastes.

Other decisions that will need to be considered include:

Look for these topics to be covered in future blogs. For more information about how Walker Woodworking builds our custom cabinets – visit our Product Education page.

Was this information helpful? Tell us what you think.

Cerused Oak Remodel

Cerused Oak Remodel Project.

We were so excited when our client, Mrs. Young, wanted to use a new finish technique that we were in the process of making to showcase at the 2016 Southern Spring Home & Garden Show.  After making a few samples, we decided that we would use the color combination of Revere Pewter for the perimeter cabinets with cerused oak on the island. We were just in love with this color combination but before we could get the cabinets made for the show, it caught Mrs. Young’s attention.  Dr. & Mrs. Young had just purchased a home and wanted to remodel the kitchen before they moved in.

Photo by Walker Woodworking Staff – All Rights Reserved.

Kitchen – Before Photo

What are your needs?

First, we had to determine what the homeowner needed and what their style preference was. Travis Walker, company owner met with Mrs. Young in her home and started the process of gathering measurements and information. Travis will usually take pictures like the one above to share with Brandon as part of the planning for the first design meeting. We also ask our clients what they like and don’t like about the design of the kitchen they currently have. Getting as much information as possible prior to the design meeting helps Brandon, our designer plan the layout of the kitchen before meeting with the clients.

“My husband and I both love to cook and spend time together in the kitchen, so a good flow with plenty of prep space was critical. We also really believe in function over form, so we were leaning toward more of a commercial style kitchen… Of course we think we got both function and form with this remodel!” ~ Mrs. Young

Photo by Walker Woodworking Staff – All Rights Reserved.

After Photo. When looking at the before picture notice that the refrigerator and ovens are still in the same location.

What are your style and color preferences?

We also asked Mrs. Young to share her thoughts about this as well as her idea books from Houzz so that Brandon could see which style and color preferences she was leaning toward. Idea-books from Houzz are one of our favorite tools to use when planning a new customer design meeting.

“As to color choices and cabinet style… I have to credit Brandon with quickly figuring out our design style preferences (I.e., clean, simple, elegant) and showing us the new cerused oak cabinet he’d been working on. I loved it from the moment I laid eyes on it. While gorgeous, it isn’t formal or stuffy. It perfectly fit the environment of our kitchen, the floors, the stone fireplace, the flagstone patio, and generally, the natural views through the picture window. Once I had the sample doors, I was able to select a complementing paint color and flooring… The granite was the final touch that pulled all the colors together.” ~ Mrs. Young

The cerused oak for the island and bar area are custom painted with a color we named  ‘hunting lodge gray’ with a white glaze. Revere Pewter from the Benjamin Moore Historical collection is the perimeter color of the kitchen.  

Photo by Walker Woodworking Staff – All Rights Reserved.

The cerused oak for the island and bar area are custom painted with a color we named ‘hunting lodge gray’ with a white glaze. Revere Pewter from the Benjamin Moore Historical collection is the perimeter color of the kitchen.

“People are highly complementary when they see the kitchen… Thanks to you all!” ~ Mrs. Young


See all of the photos from this project. Click this link to see our photo gallery of this project. 

Find our more about our Kitchen & Bath Services

Making a quiet comeback

For about 2 years now we have been seeing cerused oak in furniture pieces, and now it is being incorporated into kitchens.  Cerused oak can have many different colors due to a technique that is used to bring out the grain.

Photo by Walker Woodworking Staff – All Rights Reserved.

Photo by Walker Woodworking Staff – All Rights Reserved.

What is Cerusing?

Cerusing is a time-honored French finish technique in which the open grain of oak is filled with a contrasting white pigment. The stain and colors of the white pigments can be mixed and matched to create unique color combinations.  What I love the most is the texture that you can see and touch. This technique is mostly used on quarter sawn white oak.

cerused oak example

Notice the white glaze in the wood grain.

Why Oak?

Specifically we use Quarter Sawn White Oak. This wood has an amazing straight grain pattern that lends itself to design. Quarter sawn lumber is defined as wood where the annular growth rings intersect the face of the board at a 60 to 90 degree angle. When cutting this lumber at the sawmill, each log is sawed at a radial angle into four quarters, hence the name. Dramatic flecking is also present in red oak and white oak. When quarter sawn oak is cerused, we are able to add a white glaze and use a special brush to make sure the glaze seeps into the grain without affecting the color of the stain, thus giving texture to the surface of the wood.

Quater sawn Oak example

Quarter Sawn White-Oak stain only

Find our more about our Kitchen & Bath Services

Want to see how we can incorporate cerused oak into your home? Give us a call today to schedule a design consultation 704-434-0823.

Sam & Kim Kitchen Remodel

Sam & Kim’s Kitchen Remodel

In 2015, Sam and Kim decided to move back to Sam’s former home and update their kitchen. Enlisting the help of Walker Woodworking and Tony Brooks of Beam Edwards & Brooks, this kitchen remodel became an amazing transformation from an enclosed kitchen to an open floor plan. Follow this link to see the complete before & after photo gallery.

before-after-side-by-side

Walker Woodworking Before & After

Returning Home

Sam’s family moved into this house in 1962 as its first owners. Over the years the home was remodeled several times. Multiple additions included adding a master bedroom, enclosing the carport to build a playroom, and adding a sunroom. Sam along with his brother Al and his sister Andrea grew up there. Many children through the years considered it their home while Sam’s mom ran a daycare until the mid 80’s.

Growing up in the home the formal living room was used only on special occasions or to take family photo. The 7 grandchildren considered this their second home and have fond memories of playing and being loved there.

After Sam’s mother’s death, his father continued to live in the house and host weekly Sunday Dinner for the family. After his dad’s death the house was vacant except for grandchildren sometimes living there.

Planning & Design:

In working with Tony Brooks, a plan was formed to open up the formal living room and convert to an open floor plan. The playroom was converted to a den for use during construction.

After a desire for the open floor plan was determined they met at Walker Woodworking with kitchen and bath designer, Brandon Fitzmorris, to complete the kitchen design. Brandon was able to plan out the space for optimized cooking and storage. Since this will be their forever home, they wanted to make the space as functional as possible. One of the design challenges was to achieve seating at the peninsula while still maintaining the feel of an open floor plan. We were able to accomplish this through team work with the general contractor by incorporating a pass through to the living room.

The process:

Demo – Demolition started and cabinets came out. Site prep was done by adding a protective floor covering to prevent damage and a dust barrier to the existing living space.

Kitchen-remodel-before-tearout

Before demo started

Kitchen-remodel-before-picture

This double door was made into a single pocket door to add wall space for the kitchen area.

Kitchen-tear-out

Walls that needed new sheet-rock & finish work after cabinets were removed.

Construction – A wall was removed and carpet from the living room came out. Hardwood was added to the kitchen and den and matched up to the existing hardwood in the living room, a treasure hidden beneath the carpet. The end result was seamless, there is nothing left of the previous wall separating the formal living room from the kitchen.

Kitchen-remodel-during-renovation

Kitchen wall and living room after the wall was removed and the header added.

Plumbing & Electrical – The next part of the process was to update plumbing & electrical. By using our preplanned CAD drawings, the subcontractors were able to quickly and efficiently make the necessary changes to the updated kitchen layout.

Sheetrock & Primary Painting – Sheetrock repair and primary painting is definitely an expectation with an extensive remodel like this one.  The wall that needed to be removed was a load bearing wall. We had to build a header across the room and sheetrock that area.

Cabinet Install – Usually a 2 day process for a kitchen similar to this one. Our trucks show up full of cabinets, already assembled including the decorative hardware. One of the things that we do differently than most companies is to apply the toe kicks after the floors are finished. In most cases this eliminates the need for shoe-moulding.  This will give the cabinets more of a finished furniture style.

cabinet-install

Walker Woodworking – Cabinetry Install

Counter-tops – Typically counter-tops are ready for the template after the cabinets are installed. Once the template has been done, it will typically take 1 to 2 weeks before the tops are ready to install. Each fabricator is different. Granite can be installed in a kitchen like this usually in half a day.

Appliances – In most situations appliances will go in after the counter-tops.  Every project is unique and having professionals that realize the importance of when certain things should happen is important for a smooth remodel. This will also help to ensure that cabinets, flooring and counter-tops are not damaged  during the process.

The Finishing Touches – The last few things that need to be done include the tile back splash, final coat of paint, and the final sanding & finishing of the floors.

Kitchen-remodel-white-cabinets

Be sure you see all of the before & after photo’s in our Before & After Photo Gallery.

“Both Tony and the team at Walker Woodworking  held our hand through the process, which at some times was emotional because of the changes being made to the family home. The end result was more than we could have ever dreamed possible.The remodel was completed in time for us to continue family traditions of Thanksgiving & Christmas in the home.” ~ Kim Davis

Kitchen-&-Home-renovation-with-family

The open space was once a wall that extended the entire length of the room.

Kitchen-remodel-after-with-family-in-kitchen

These guys can still see whats going on the living room.

Family-by-christmas-tree

This home will be enjoyed for many years & future generations to come.

We would like to thank Sam & Kim for allowing us to share their story. Follow this link to see the complete before & after photo gallery.

photo of camera on a tripod at photo shoot

On a Photo Shoot

On a Photo Shoot

Last week I went out to do a photo shoot at a beautiful home in Walnut Cove near Asheville, NC. with my side kick @Marie Walker. We got so carried away with snapping pictures in the kitchen that I forgot to get a few with my iPhone- which I really like to do. I just can’t explain how much fun taking pictures can be when the lighting is just right. It saves us so much time during the processing phase because we are – after all – just amateurs.


desk, crackled finish

Custom crackled finish, by Walker Woodworking

Here is a close up of the desk we did at Walker Woodworking. Yes, this finish is very detailed and required precise attention to get it just right, but overall it really adds character to the desk.

antique distressed mirror gold

Antique distressed mirror with gold, rocks out this custom wet bar.

This area was small and difficult to photograph, I was able to get a close up with my iPhone – this antiqued glass is awesome. It has gold and burnt orange coloring that looks great with the black cabinets.

white cabinets, inset, cup pulls, photo shoot

See the photo gallery for more pictures.

Here’s a sneak peek of the kitchen – we will have these photos added to our website very soon.  You will be able to view the entire project and all the unique details our custom cabinetry has to offer.

It’s always a treat for us to get out of the office and see the final product of our cabinets in the setting of a beautifully furnished home.  We get a chance to actually enjoy time with the homeowner in their atmosphere, rather than in our office always working and discussing details.

Check out our online photo gallery to see more great finished projects.  www.walkerwoodworking.com

Stacey Walker


Goodbye Summer ~ Welcome Fall 2015 Walker Woodworking

Goodbye Summer ~ Welcome Fall 2015 News & Event update for Walker Woodworking

Wow, I can’t believe the summer is almost over. August was such a busy month for us here at Walker Woodworking but as usual, never a dull moment.

At the beginning of August we wrapped up Homearama at Cheval. It was a great turnout and very exciting to see so many people walking through the beautiful homes.I it’s such a great opportunity to get design ideas and see what’s trending. We appreciate everyone that came out to support us. New Old Luxury Custom Homes did a great job with the entire house and as always we took lots of pictures. We were not able to get in with our professional camera for many photos but my iPhone was able to capture some of the neat features of the home. Be sure to check them out.

Walker Woodworking Homearoma Pictures & Information 

Walker Woodworking & New Old Homearoma at Cheval

By mid-August we were celebrating the American Legion World Series, a big event going on right here in Shelby. Walker Woodworking was proud to be able to sponsor and support such a great sport. Players came in from as far away as Hawaii, and South Carolina took home the championship trophy. This was an event that took a huge effort from our community to pull-off. Shelby is a small town, so this was a BIG deal for us.

American Legion World Series 2015

Remember our post about Newgrass? They also opened in August and I have updated the post and added a few pictures. Be sure check out the post to see how things turned out, or better yet come see it in person. The beer is awesome and the food is delicious..

New Grass Post

New Grass

And last but not least school started back and for us that can only mean one thing, it’s time for the Southern Ideal Home and Garden Show. If you are thinking about doing any type of home renovation project, then this is a great show for you to visit. There are all types of home professionals there, you can see the various products and ask lots of questions. It’s 3 days only and as a change to their schedule it’s after Labor Day this year.

September 11th – 13th.

Walker Woodworking & Southern Shows Booth 218

Visit southern shows for more information. 

The Walker’s are ready for Football Season and all of the things that come with fall, thanks for taking the time to check in. ~ Stacey Walker

By the way, we may just have something NEW for this years show, Follow our Facebook Page, Follow us on Instagram or Pinterest to keep updated. Our display won’t be ready until it’s SHOWTIME! 

Newgrass Brewery & Walker Woodworking

Newgrass Brewing Company opened their doors in August of 2015. We were very proud to be apart of the project. Here is a timeline of our part of the project. We have updated this post with pictures from recent visits. We hope you will enjoy reading.

Spring of 2015 ~ The History.

We are so excited to be involved in this complete renovation in historic uptown Shelby, NC.  The renovation of the historic 1909 structure will preserve Shelby’s heritage for years to come.  The interior of the building will showcase heart pine reclaimed from Dover Textiles Mill.

Dover Wood 4

Photo by Walker Woodworking Staff – All Rights Reserved.

Dover Mill was the workplace of many people in Shelby, NC including the grandmother, and father of Travis Walker. There is a piece of history in every board from the mill, as there will be new history made at the Newrgass Brewing Co. The reclaimed wood from the floors of Dover Mill have been milled into the NEW floors and walls at the Newgrass Brewing Co. in Shelby, NC.

Dover Wood 3

Photo by Walker Woodworking Staff – All Rights Reserved.

(The original piece of wood was 3 1/2 in thick and 8 1/2 in wide. Each Dover piece now makes 5 pieces for the floors/walls at Newgrass.)

The ground floor will house the brewing area, highlighted behind glass walls.  The brewery will feature a stage area where local and regional artists will be able to perform. The stage floor and walls are made from reclaimed wood. In addition to the main floor the brewery will have a mezzanine level for additional seating, and the third level will host private parties and events. The building has an elevator (original to the Hudson’s store) which is also flanked by the reclaimed wood.

While machining the reclaimed lumber from Dover Mill, our metal detector found a 36 caliber musket ball from around the early 1800’s. It’s before they started putting tin in with the lead.  This created excitement around here at Walker Woodworking, and at Newgrass so much so that talk of naming a brew after the musket ball may seen on the future tap list.

Musket Ball

Photo by Walker Woodworking Staff – All Rights Reserved.

It has certainly been rewarding and exciting here at Walker Woodworking, to see all of this come together and help in the preserving process of this building.  The historic character of the Newgrass brewery as well as the transplanted history of the Dover Mill reclaimed wood will definitely be worth a visit in uptown Shelby, NC.

Newgrass is expecting to OPEN for business in August 2015,  just in time for the American Legion World Series Events including the 7th Inning Stretch.

Follow both Newgrass Brewery and Walker Woodworking on Facebook to stay updated with news and events.

Visit the Newgrass Brewery website to see what they are serving.

The Opening ~ August 2015

The final 3 things Newgrass needed before opening up was Flight Paddles and some Chalk Boards. As things were winding down for construction crews, employees at Newgrass were getting ready for an unannounced opening day, the last week was spent for them moving-in and for us – getting the flight paddles finished up and making and hanging the chalk boards. Since this is not something we do everyday, it was certainly a change of pace, and we enjoyed the excitement of seeing this local business open their doors with much success!

0804150949a~2

Flight Paddles we made and branded. These are used to serve four 4oz samples of beer.

OPening dat

Opening Day! What a great turnout for an opening that was not even announced.

IMG_4194

Chalk board – shaped like a guitar pick. What a neat idea, this is for the stage area.

IMG_4320

Darin Aldridge & Friends ~ Blue Grass Music

IMG_4321

We also made the huge Chalk Board on the back wall. This pictures was made 2 weeks after the opening.

We wish the best to Newgrass Brewing Co. for much success for many years to come in Uptown Shelby, thank you for allowing Walker Woodworking to be apart of your project!

Portfolio Items